WEATHER GUARD Model 254 EZ-GLIDE® Clamp Kit, Universal, Driver Side User Manual
Page 5
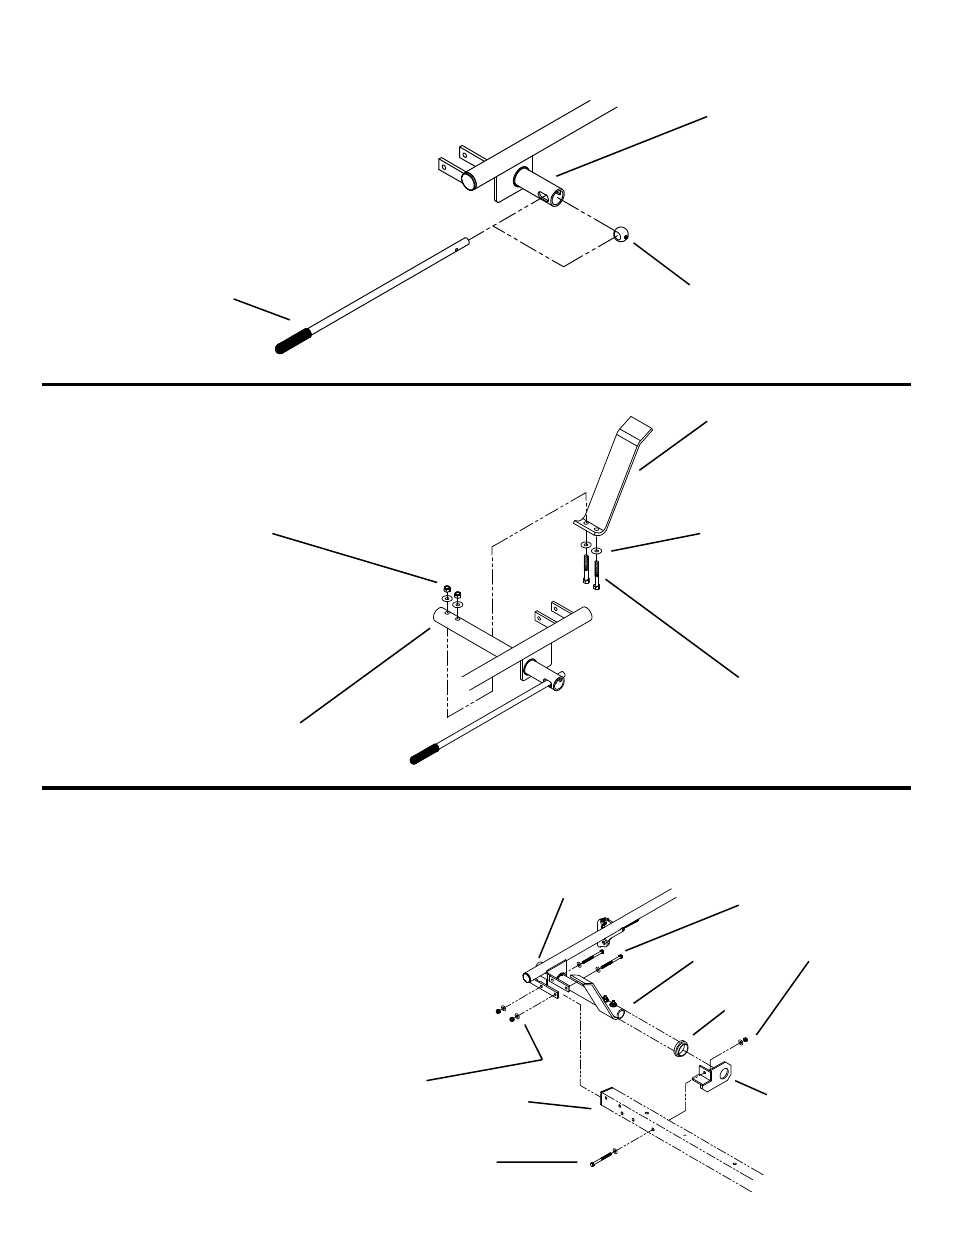
STEP 3
Insert the Handle (A) into the Handle Pivot Tube (B) through the Handle Pivot Ball W/Allen Screw (C). Turn the allen screw
into the ball, making sure it extends into the clearance hole in the handle.
(C)
(B)
(A)
STEP 4
Attach Rear Ladder Clamp (A) to the Handle
Pivot Tube (B) as shown with 5/16-18 x 2"
Fasteners
(A)
(B)
(4) 5/16 Flat
Washer
(2) 5/16-18 Nylon
Lock Nut
(2) 5/16-18 x 2"
Hex Hd. Bolt
STEP 5
Remove "Drivers Side End Stop" from the cross-members
previously installed when the Passenger Side ladder rack
(251, 252, 253) was mounted to the vehicle. If you have
installed an accessory cross-member, one "Drivers Side End
Stop" will remain on one of the cross-members depending on
your application of the Model 254.
Next insert a Plastic Bushing (A) into the Pivot Tube Bracket
(B) and slide it onto the end of the Handle Pivot Tube (C).
Attach Rear Rail (D) to the Rear Cross-Member (E) with
5/16-18 x 2-3/4" Fasteners and the bracket to the
cross-member with a 5/16-18 x 2-1/2" Fastener.
(A)
(B)
(C)
(E)
(D)
(2) 5/16-18 x 2-3/4"
Hex Hd. Bolt
5/16-18 x 2-1/2"
Hex Hd. Bolt
(6) 5/16 Flat
Washer
(3) 5/16-18 Nylon
Lock Nut
NOTE: The vehicle mounting is not
shown for clarity.
5