Installing the unit from inside the cellar – Vintage Cellars Ceiling Mount User Manual
Page 25
www.whisperkool.com | Page 23
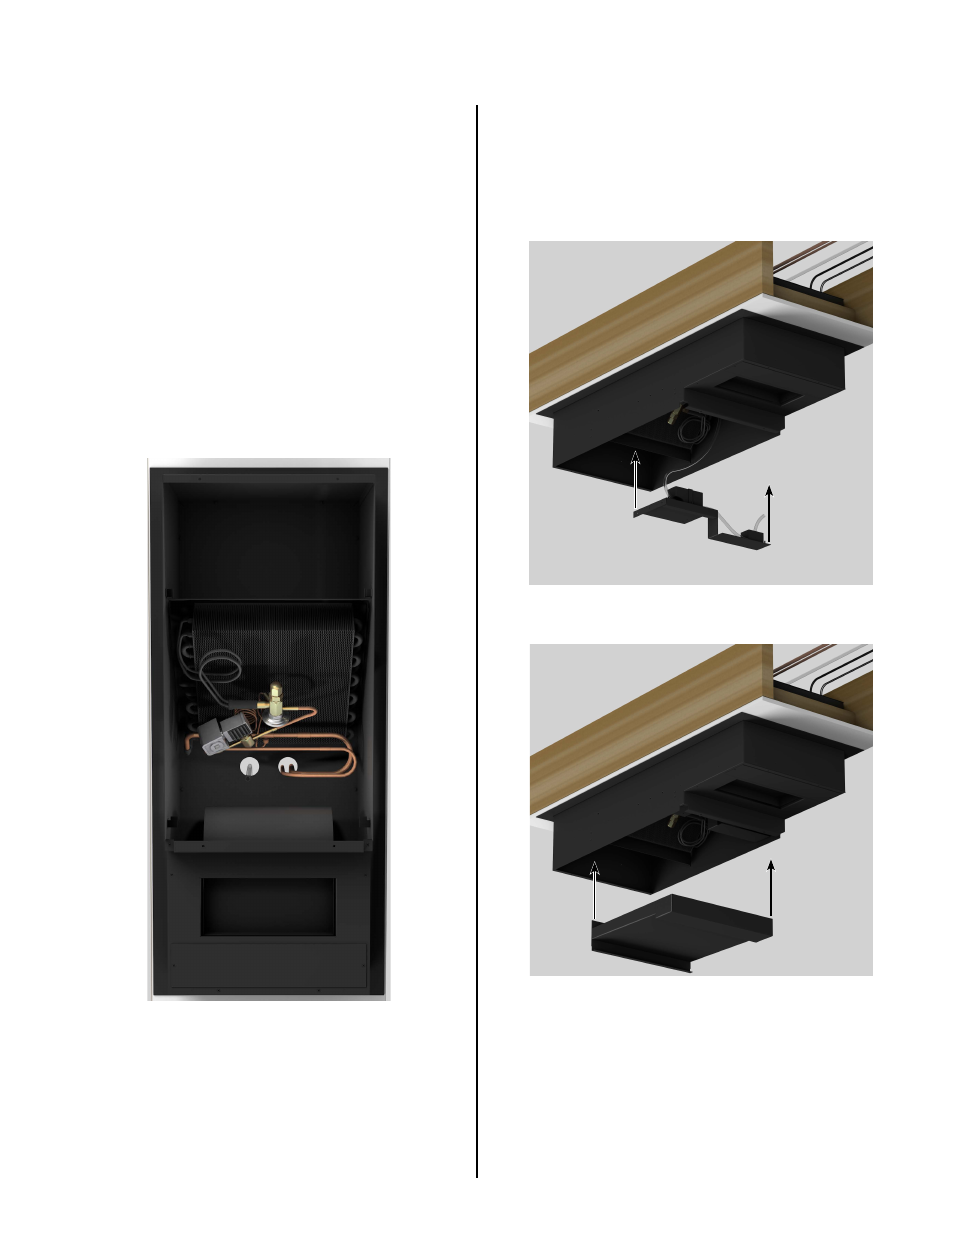
INSTALLING THE UNIT FROM INSIDE THE CELLAR
12.
Connect the line set to the liquid and suction lines on
the evaporator. Note: ½” copper tubing will slip over
the 3/8” suction line on the evaporator for an easy
connection.
13.
Place a wet rag around the suction and liquid lines
approximately 4” from the braze joints. This will
prevent excess heat from damaging components.
14.
Purge nitrogen though the system to prevent oxig
15.
Braze the copper tubing to the connections on the
evaporator unit.
16.
Insulate the suction line using Armaflex or similar
insulation.
17.
Connect the drain line to the pump discharge line
using the supplied ¼” barbed coupling. Follow the
directions on page 24 for proper drain line routing.
18.
If you have purchased the Active Humidity Option,
connect the water line to the evaporator unit by
pushing it into the ¼” coupling supplied on the unit.
19.
Reinstall the pump bracket and drip tray.
20.
Follow steps 4-11 on page 18 to complete the wiring
on the unit.
21.
If desired, paint the exterior of the evaporator
housing to match the color of the ceiling.
Note: The unit comes black. The mounting bracket and front
grille are paintable, enabling you to match your desired color.