Installing the evaporator unit with attic access – Vintage Cellars Ceiling Mount User Manual
Page 20
Page 18 | 1-800-343-9463
WCM
033114
1.
Insert the following items into the unit through the
removed knockouts: power cable wiring, keypad cable,
bottle probe cable and humidistat cable (optional).
INSTALLING THE EVAPORATOR UNIT WITH ATTIC ACCESS
CONNECTING THE EVAPORATOR UNIT
Note: The diagram on page 16 labels the knockouts to route
theses items into.
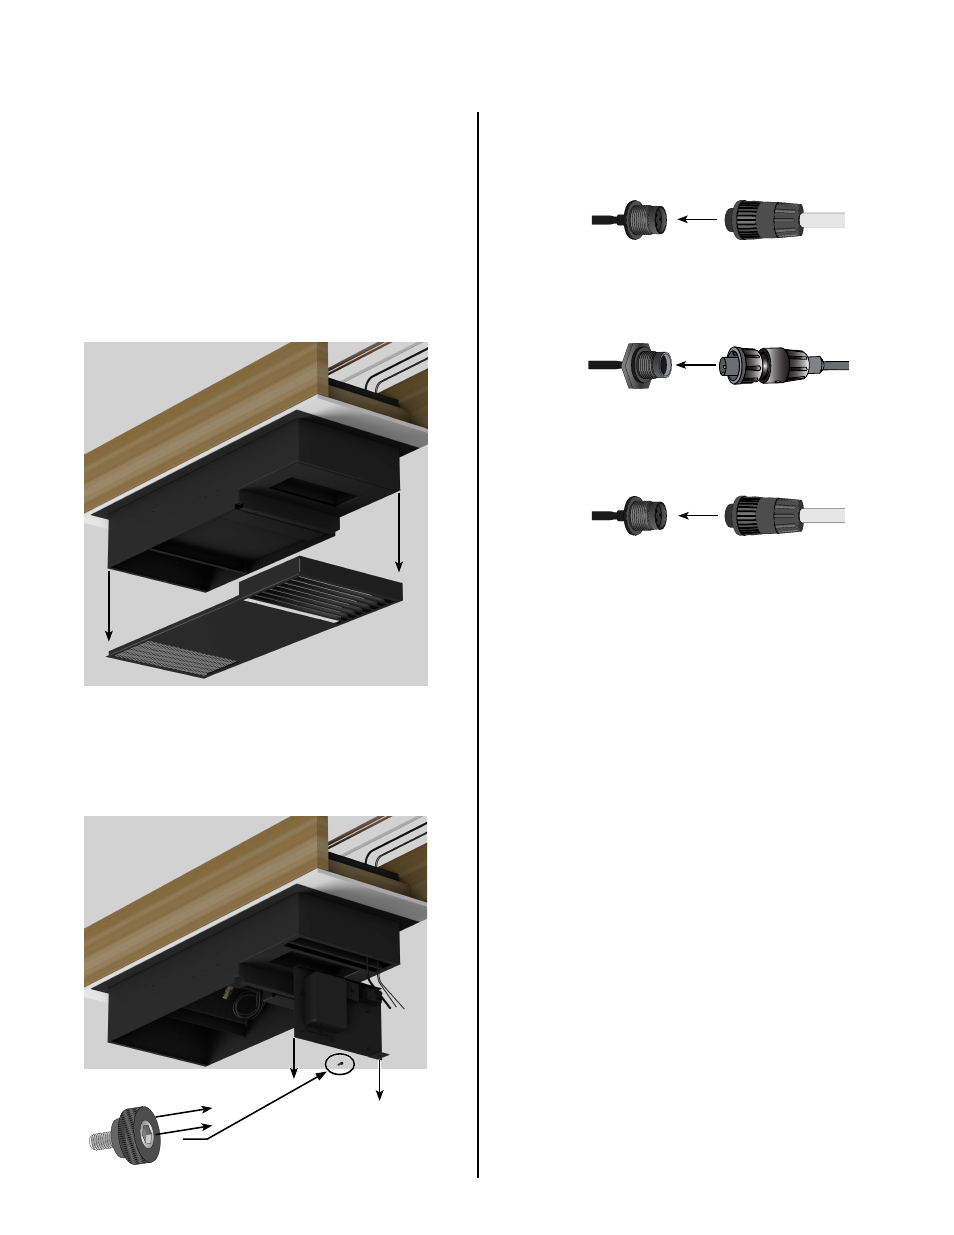
2.
Remove the eight screws securing the supply and
return air grille.
3.
Grasp the grille and pull straight down. This will release
the grille from the ball studs.
4.
Remove the two screws securing the Control Access
Panel in place and remove the panel.
5.
Remove the thumbscrew holding the electrical panel
and slide the panel.
6.
Connect the power cable to the evaporator.
7.
Connect the keypad cable to the evaporator (see page
26 for more keypad information).
8.
Connect the bottle probe cable to the evaporator (see
page 25 for more bottle probe information).
9.
If you have purchased the Active Humidity Option,
connect the Humidistat cable to the evaporator (see
page 28 for more humidistat information).
(Optional)
10.
Slide the electrical panel back into the evaporator unit
and secure with the thumbscrew.
11.
Re-install the control access panel.