Installing the evaporator unit with attic access – Vintage Cellars Ceiling Mount User Manual
Page 17
www.whisperkool.com | Page 15
INSTALLING THE EVAPORATOR UNIT WITH ATTIC ACCESS
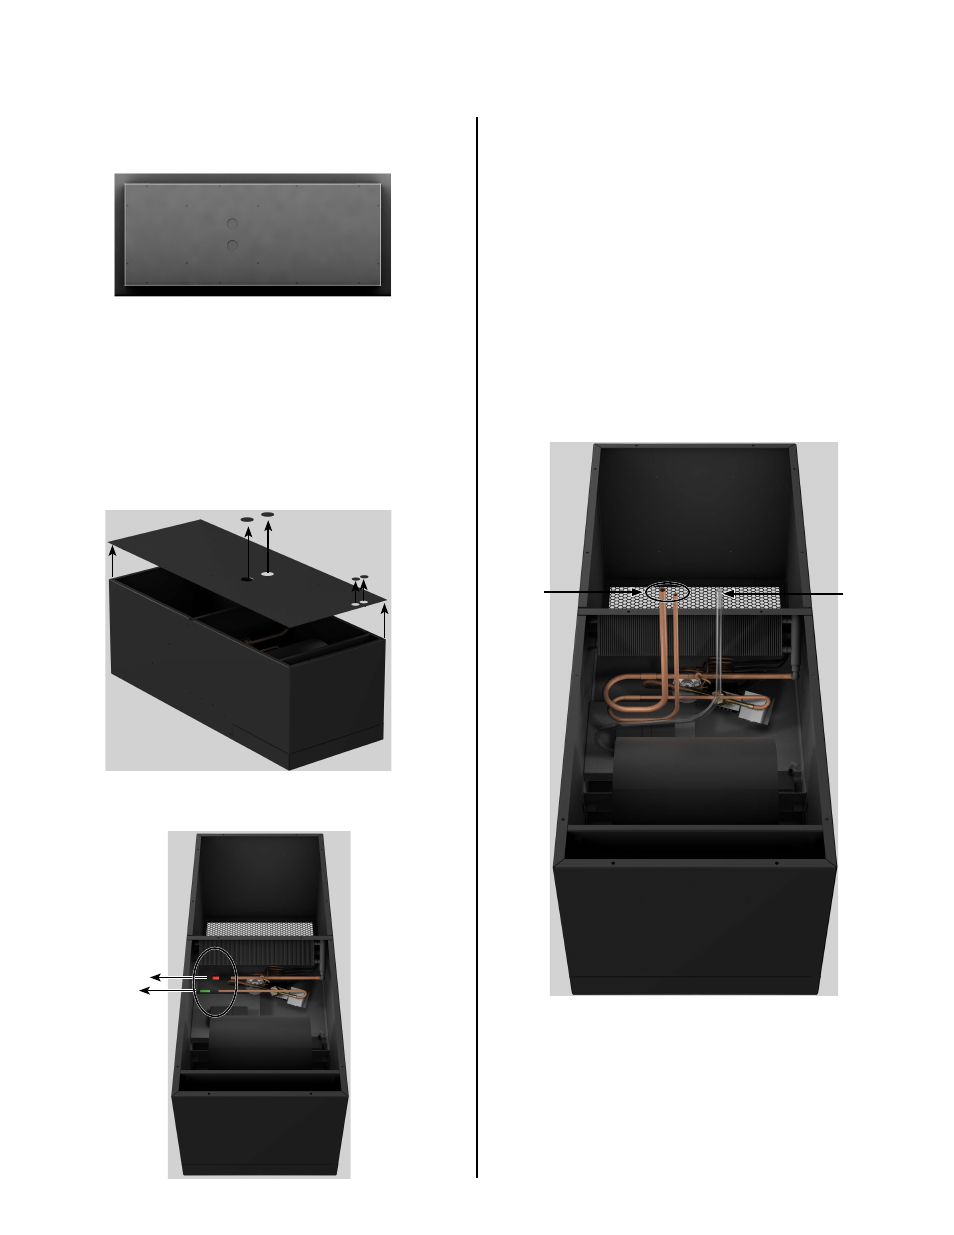
Figure 1
TOP VIEW
1.
Place the evaporator on a working table with the Top
Access Panel facing up as shown in Figure 1.
Note: Line Set and drain line should extend to the exterior of
the unit through the Knockout(s). Dimensioned Locations of
the knockouts are provided on page 3.
PREPARING THE EVAPORATOR FOR INSTALLATION
2.
Unscrew the 16 screws and remove the Top Access
Panel.
3.
Remove the Knockout(s) you will be using to route the
Line Set into the unit.
4.
Remove the Knockout(s) that you will be using to route
the items on the previous page into the unit (power
cable wiring, keypad cable, bottle probe cable, and
humidistat cable).
6.
Using 1/4” and 1/2” copper tubing, route the liquid and
suction lines through the knockouts in the wrapper.
Note: 1/2” copper tubing will slip over the 3/8” suction
line on the evaporator for an easy connection.
7.
Place a wet rag around the suction and liquid lines
approximately 4” from the braze joints. This will
prevent excess heat from damaging components.
8.
To prevent oxidation, purge nitrogen through the
system.
9.
Braze the copper tubing to the connections on the
evaporator unit
10.
Insulate the suction line using Armaflex or similar
insulation.
11.
Route the drain line out of the evaporator unit with the
line set.
5.
Remove the protective caps from the liquid and
suction line connection tubes. (as shown below)
LINE SET
DRAIN LINE