Fig. 70 – EFCO 945 Series User Manual
Page 50
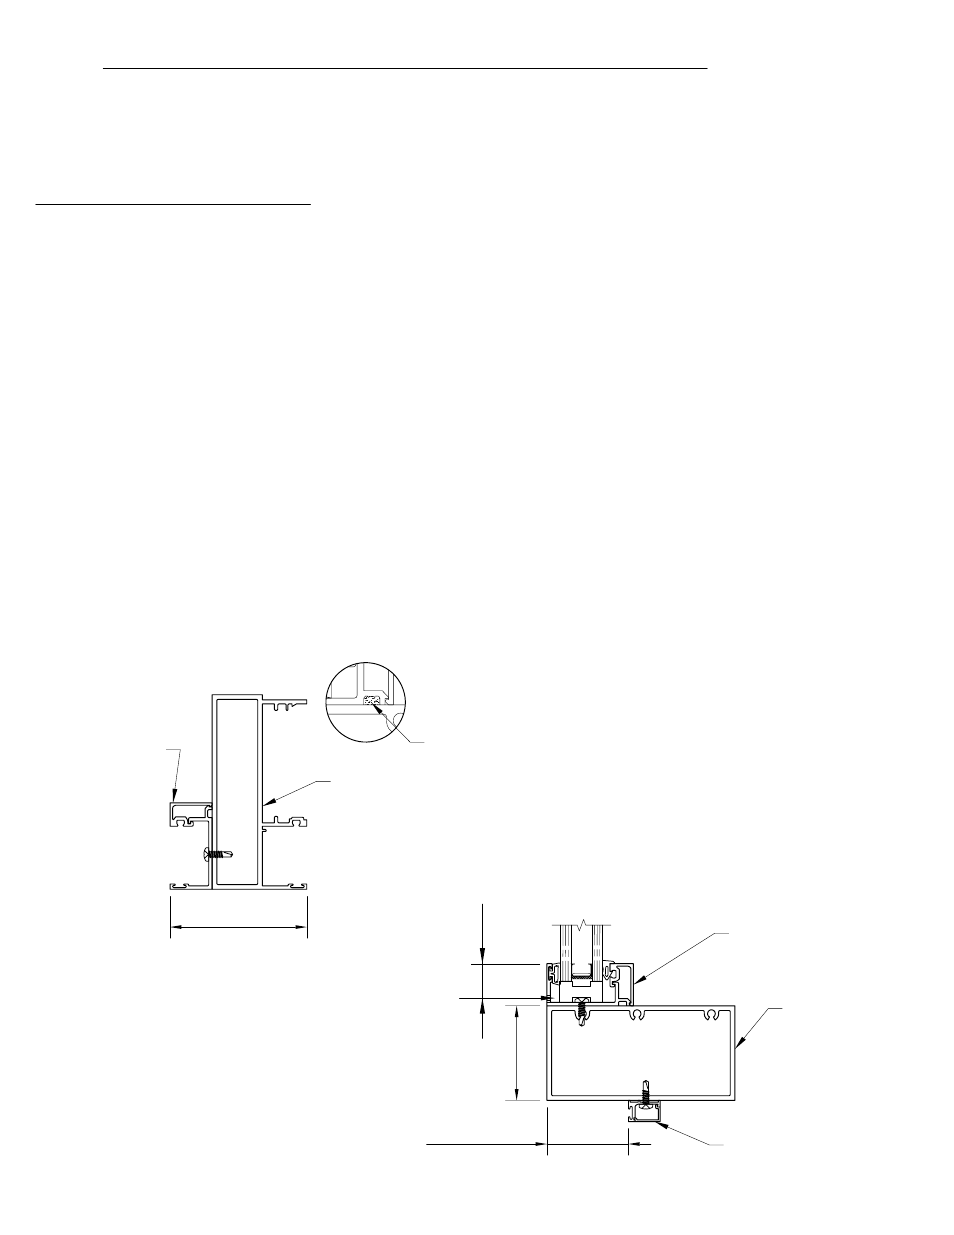
[FIG. 70]
TRANSOM LITE GLASS STOP
Install the transom lite glass stop with the long glass stop leg flush to the exterior of the door
framing at the transom area. Use a silicone type sealant the full perimeter of the transom lite
glass stop in the sealant raceway and at the ends to provide a water tight seal. Make sure that
all horizontal members run through. This will ensure that a water dam is established. Using
STT6 fasteners, 3" from each end and 12" on center, fasten the transom glass stop to the
appropriate door frame member. Drill 1/4" diameter weep holes 6" from each end in the face of
the transom lite glass stop or in the face of the transom lite door header, whichever is applicable.
In concealed overhead closure applications, install a transom lite glass stop horizontally on the
door header. See Figure 70.
STANDARD
DOOR JAMB
(8311)
STEP 2) TRANSOM GLASS STOP CUT LENGTH AND
INSTALLATION
SECTION X - DOOR FRAMES (con't)
TRANSOM LITE
GLASS BEAD &
STOP
(8316 &
8317)
3 1/4"
C.O.C. DOOR
HEADER
APPLIED
DOOR STOP
(9154/9155)
TRANSOM
LITE GLASS
BEAD & STOP
(8316 & 8317)
VARIES
SEALANT RACEWAY
2
1/4"
PAGE 48
HORIZONTAL CUT LENGTH = TRANSOM FRAME OPENING WIDTH
VERTICAL CUT LENGTH = TRANSOM FRAME OPENING HEIGHT
(FOR
STANDARD HEADER)
VERTICAL CUT LENGTH = TRANSOM FRAME OPENING HEIGHT - 1"
(FOR C.O.C. HEADER)
1/4" Dia. WEEP
at 1/4 POINTS
1
3
/16"
MDM
01/2007