Snapping the expansion mullion, Con't), Fig. 39 – EFCO 945 Series User Manual
Page 33: Fig. 40, Step 8) snapping the expansion mullion
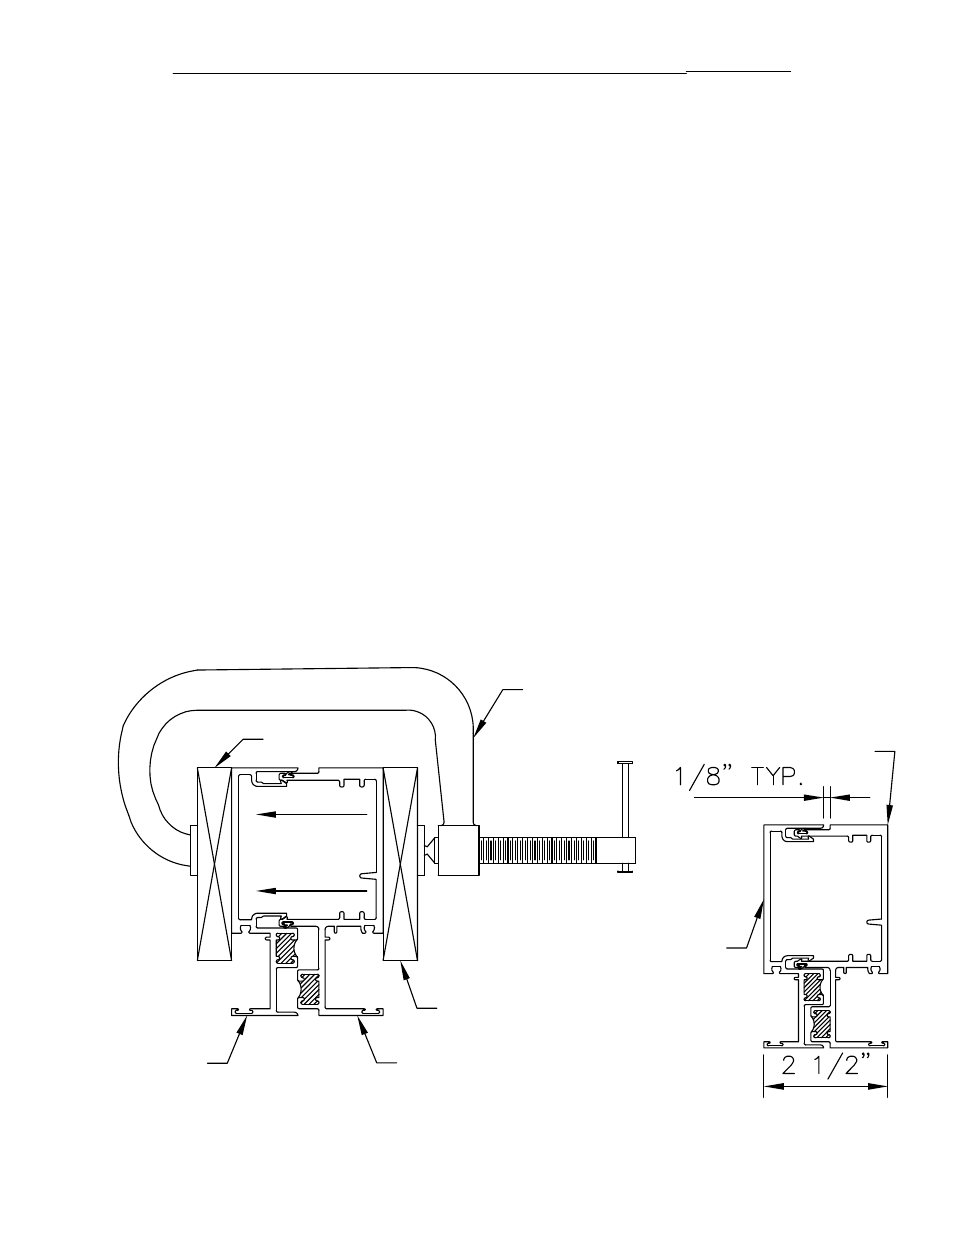
[FIG. 39]
WOOD BLOCK
8312
8313
WOOD BLOCK
[FIG. 40]
3-2009
INCLUDES CAPTURED AND STRUCTURAL GLAZED MULLION SYSTEMS
STEP 8) SNAPPING THE EXPANSION MULLION
(CAPTURED SYSTEM SHOWN, STRUCTURAL GLAZED SYSTEM SIMILAR)
SECTION VIII - INSTALLATION
(CON'T)
To snap the expansion mullion together, line up the mullion halves and
gaskets. See Figure 39. Place one clamp at the bottom of the expansion
mullion using wood blocks to protect the extrusions. Tighten the C-clamp until
the expansion mullion halves begin to snap together. Place another set of
wood blocks and a C-clamp at the middle of the expansion mullion and tighten
it. Then repeat the same process on the top. Tighten the C-clamps until the
sight line becomes 2 1/2". It may be necessary to work from one clamp to the
next several times, or move the clamps, to ensure the mullions are snapped
together evenly. See Figure 40. DO NOT try to hammer the expansion mullion
together! This will dent, bend, scratch, or deform the expansion mullion and
may cause it to leak. Anchor the head using the requirements on Page 27
before installing the next ladder using the requirements on Page 30. If this is
the last ladder, anchor the jambs as required on Page 28 and proceed to the
perimeter sealing process, Step 11 on Page 33.
C-CLAMP
PAGE 31
8312
8313