Step 5) end dam installation, Step 6) chalk line for subsill, Fig. 10 – EFCO 945 Series User Manual
Page 17: Con’t)
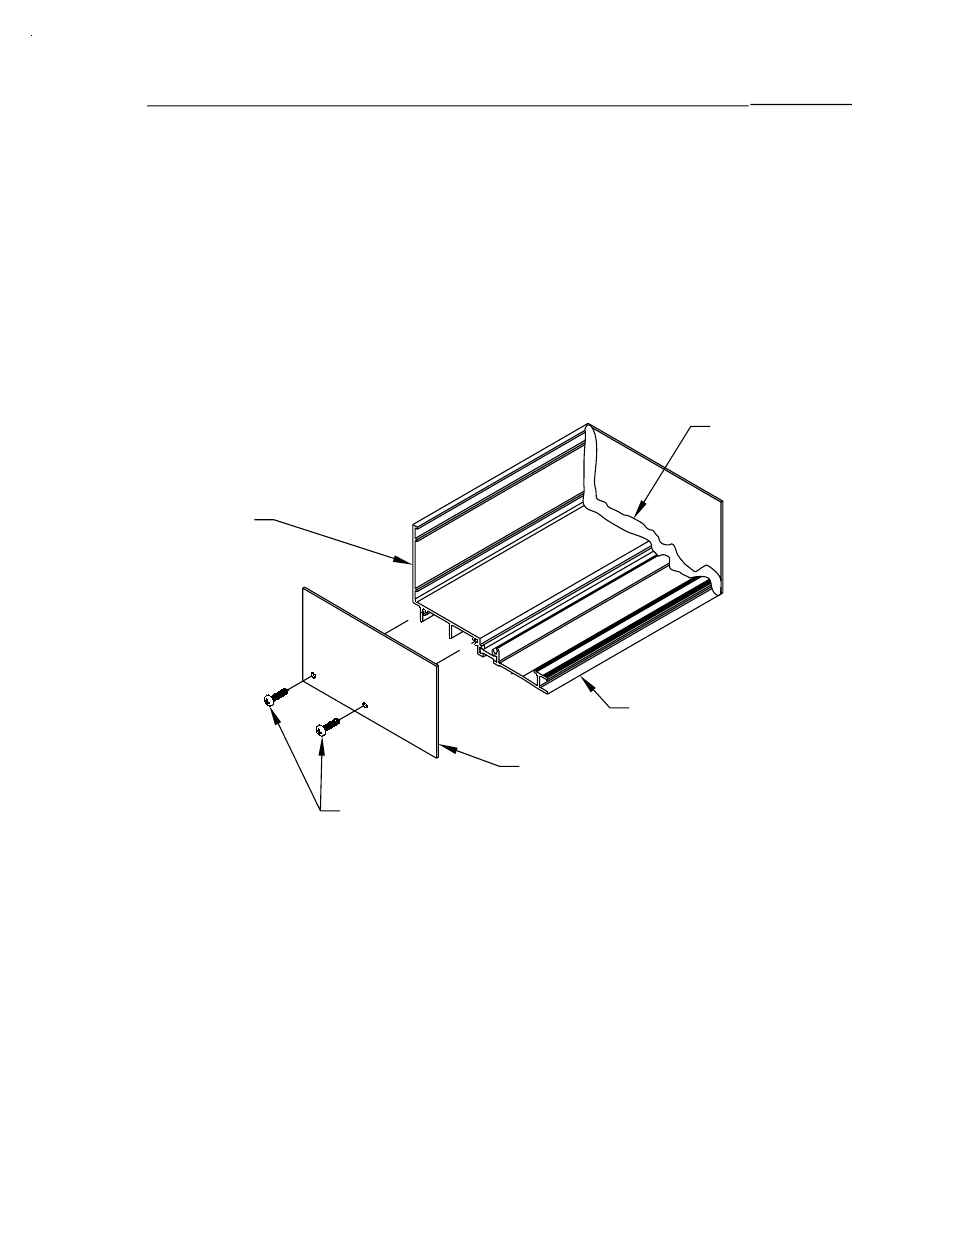
STEP 5) END DAM INSTALLATION
The end dam is to be attached to the subsill with 2 SLQ1 fasteners on
each end. Seal the end of the subsill with silicone sealant before
attaching the end dam to the subsill. Tool the sealant at the interior joint
of the end dam to ensure a good watertight seal. See Figure 10 below.
STEP 6) CHALK LINE FOR SUBSILL
Before installing the subsill, measure the distance from the exterior of
the condition to the desired location at the EXTERIOR of the subsill. (The
exterior of the subsill will be flush with the rest of the system.) Do this at
both ends of the condition. Snap a chalk line between the two marks to
align the subsill. If the condition is too wide for just two marks, measure
every 15 feet and snap a chalk line.
[FIG. 10]
APPLY
SEALANT
TO ENDS
OF THE
SUBSILL
BEFORE
ATTACHING
END DAM
SLQ1
BAB 11/2000
TOOL SEALANT
AT JOINT
2G22
K458
END DAM
SECTION V - SUBSILL FABRICATION
(CON’T)
INCLUDES CAPTURED AND STRUCTURAL GLAZED MULLION SYSTEMS
PAGE 15