Face cover splicing, Fig. 65] [fig. 63, Fig. 64 – EFCO 945 Series User Manual
Page 45: Step 6c) glass installation (structural glazed)
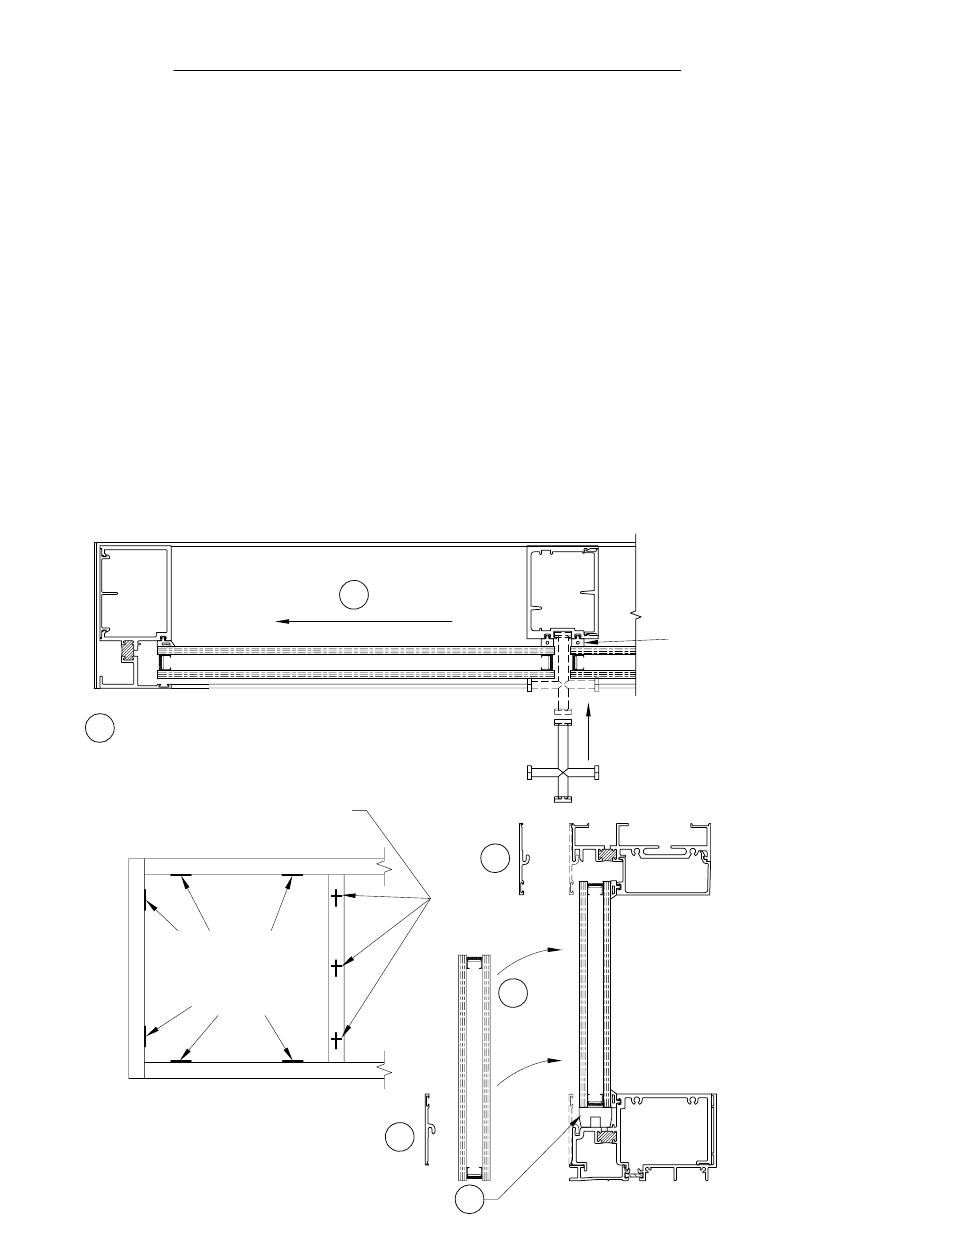
[FIG. 65]
[FIG. 63]
A
D
GLAZING
GASKET
TEMPORARY
GLAZING
CLIPS (HGR1)
TEMPORARY
PIECES
OF
GLAZING
GASKET
B
D
D
[FIG. 64]
- For the following steps, use Figures 64 and 65.
A) Make sure the setting blocks are placed at 1/4 points in each D.L.O. or as required on the
architectural drawings. (See Figure 57 on Page 41)
B) Position the glass at the exterior of the framing with the head and sill face covers removed.
Lift the glass into the frame and onto the setting blocks.
C) Shift the glass into the pocket in the perimeter jamb until there is the correct glass bite on
both edges of the D.L.O. (7/16" captured vertical or 7/8" SSG vertical)
D) Install the appropriate covers. Place temporary pieces of the glazing gasket along the head,
perimeter jamb, and sill. Place the temporary glazing clips in the structural mullion race and
rotate to hold glass at the structural mullion. See Figure 64. Install all glazing gaskets. See
Step 8 on Page 45. Install the next lite before filling the structural glazing gap. See Step 9 on
Page 46.
C
STEP 6C) GLASS INSTALLATION (STRUCTURAL GLAZED)
INCLUDES CAPTURED AND STRUCTURAL GLAZED MULLION SYSTEMS
SECTION IX - GLAZING (cont.)
PAGE 43
MDM
01/2007