Attaching the handwheel, Mounting the motor, Model 113.248210 only – Craftsman 113.248510 User Manual
Page 17: Mounting door attaching the handwheel
Attention! The text in this document has been recognized automatically. To view the original document, you can use the "Original mode".
^%L
b
W
i
lwl\irli#Eli«iii^
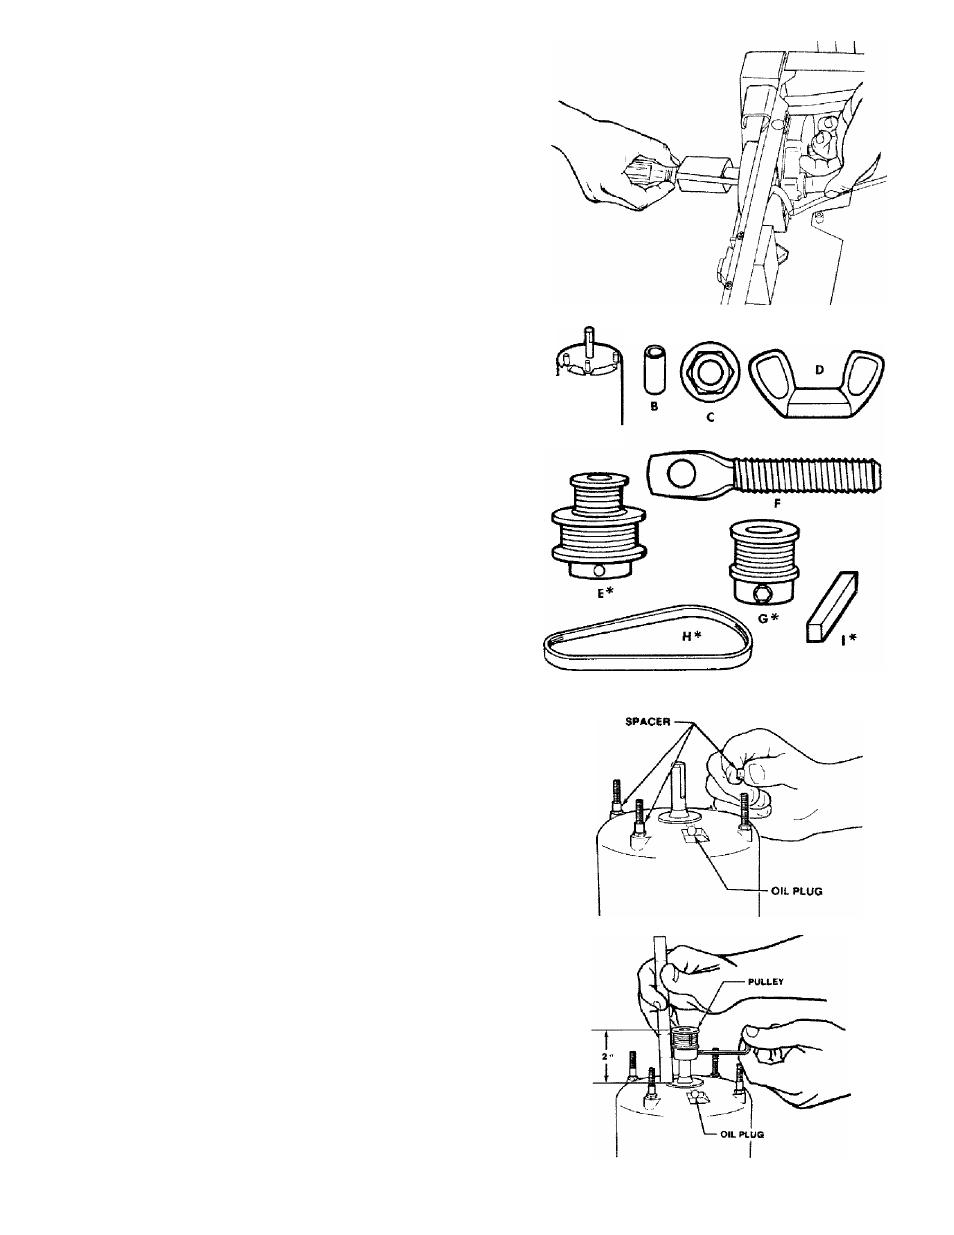
ATTACHING THE HANDWHEEL
1. From loose parts bag find one (1) pan head screw
10-32 X 2 and one (1) hex nut. Install the hand
wheel, Reach inside the base to the back side of
the bevel mechanism and put the nut in place.
Hold the nut in place with a finger. Install the
screw through the center of the handwheel and
tighten with a phillips screwdriver.
2. Hold the handle and pull the red release button
with your finger to close the handle.
MOUNTING THE MOTOR
1. Find the following parts:
ITEM
DESCRIPTION
QTY.
A Motor............................................................ 1
B Spacer(V4 0.D.x5/i6).................................... 3
C Flanged Locknut #10-32............................... 4
D Wing Nut 5/,6-18.......................................... 1
E Motor Pulley w/Set Screw
(Model 113.248320, 113.248440,
113.248510) ............................................. 1
F Belt Tension Stud......................................... 1
G Motor Pulley w/Set Screw
(Model 113.248210).................................. 1
H Poly “V” Belt................................................. 1
I Key YisSq.x 15/16
(Model 113.248320,113.248440,
113.248510) ............................................. 1
'
oddodo
®
*NOT SHOWN TO SCALE
2. Place the three (3) spacers onto the three motor
studs as shown. Pay attention to where the oil plug is
located. No spacer goes on the fourth motor stud.
MODEL 113.248210 ONLY
3. Install the motor pulley onto the motor shaft with the
set screw boss toward the motor. Position the outer
face of the pulley 2 inches from the end shield of the
motor and tighten the setscrew against the flat side
of the motor shaft using a 1/8-inch hex “L” wrench.
17