Vermont castings, majestic products dvrtsb, Optional top vent application – Vermont Casting DVRTSB User Manual
Page 9
9
Vermont Castings, Majestic Products DVRTSB
10003848
This appliance is shipped as a rear vent unit. If the
installation layout requires the unit to be a top vent
configuration the appliance can be converted by follow-
ing the steps below.
When removing and refitting the plates and adapter be
sure the associated gaskets are undamaged and
refitted as required.
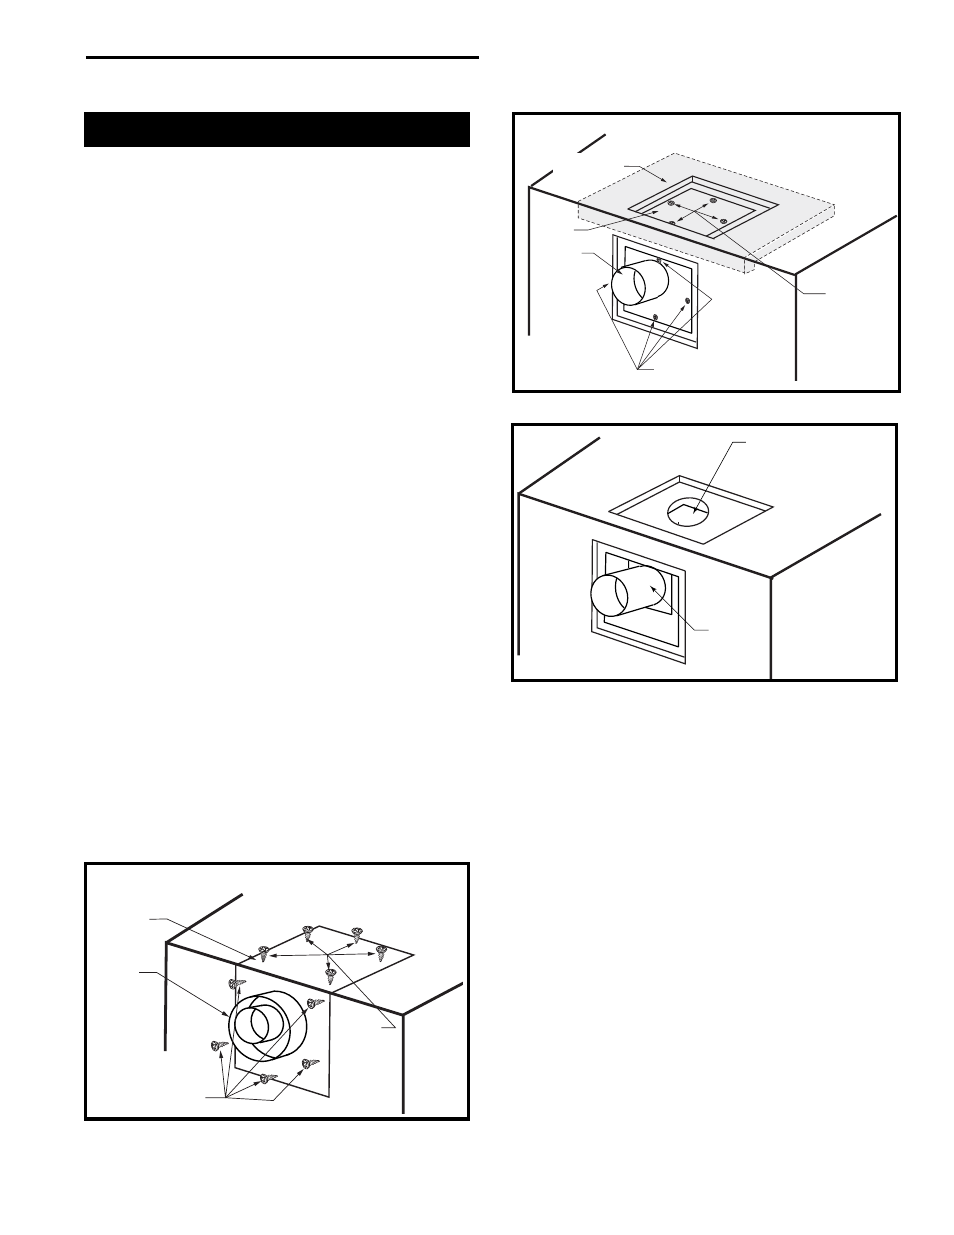
1. Remove the 10 screws securing the outer collar
adapter to the fireplace body. (Fig. 9)
2. Set the collar aside, complete with the gasket. Do not
damage the gasket as the adapter and gasket must
be refitted.
3. Remove all of the insulation material (exposed in
Step 2) from the top of the unit. (Fig. 10) This mate-
rial can be discarded, however if the unit is converted
back to rear vent for any reason a new piece of
insulation material approved by Vermont Castings,
Majestic Products must be used for this purpose.
4. Remove the four (4) screws securing the flue cover
plate to the top of the intake box and remove the
cover and gasket. (Fig. 11)
5. Remove four (4) screws securing the flue pipe to
back of the intake box and remove pipe and gasket.
(Fig. 11)
6. Secure the plate and gasket removed in Step 4 over
the flue opening in the back of the intake box. Ensure
the gasket is in place and undamaged.
7. Install the flue pipe and gasket removed in Step 5
over the flue opening in the top of the intake box.
8. Refit the outer collar adapter and gasket to the unit
with the round collar on the top. Secure the adapter
with the 10 screws removed in Step 1.
When converting the appliance to top vent, ensure
the insulation material referred to in Step 3 is com-
pletely removed.
Optional Top Vent Application
Outer
Collar
Adapter
Flue
Pipe
Remove
Screws (5)
Remove
Screws
(5)
Rear View
FP1030
Fig. 9 Remove screws from outer collar adapter.
Insulation
Flue
Cover
Flue
Pipe
Remove Screws (4)
Remove
Screws (4)
FP1027
Fig. 10 Remove flue cover and flue pipe.
Flue Cover Plate
Flue
Pipe
FP1378
Fig. 11 Remove flue pipe and flue cover plate.