Removing the hard-drive tray – Dell PowerEdge C8000 User Manual
Page 191
Installing System Components
191
Removing the Hard-Drive Tray
CAUTION:
Many repairs may only be done by a certified service technician. You
should only perform troubleshooting and simple repairs as authorized in your
product documentation, or as directed by the online or telephone service and
support team. Damage due to servicing that is not authorized is not covered by
warranty. Read and follow the safety instructions that came with the product.
1 Remove the sled from the enclosure. See "Removing a Sled" on page 143.
2 Remove the back cover. See "Removing the Back Cover" on page 150.
3 Remove the internal hard-drives. See "Removing a Hard-Drive Carrier" on
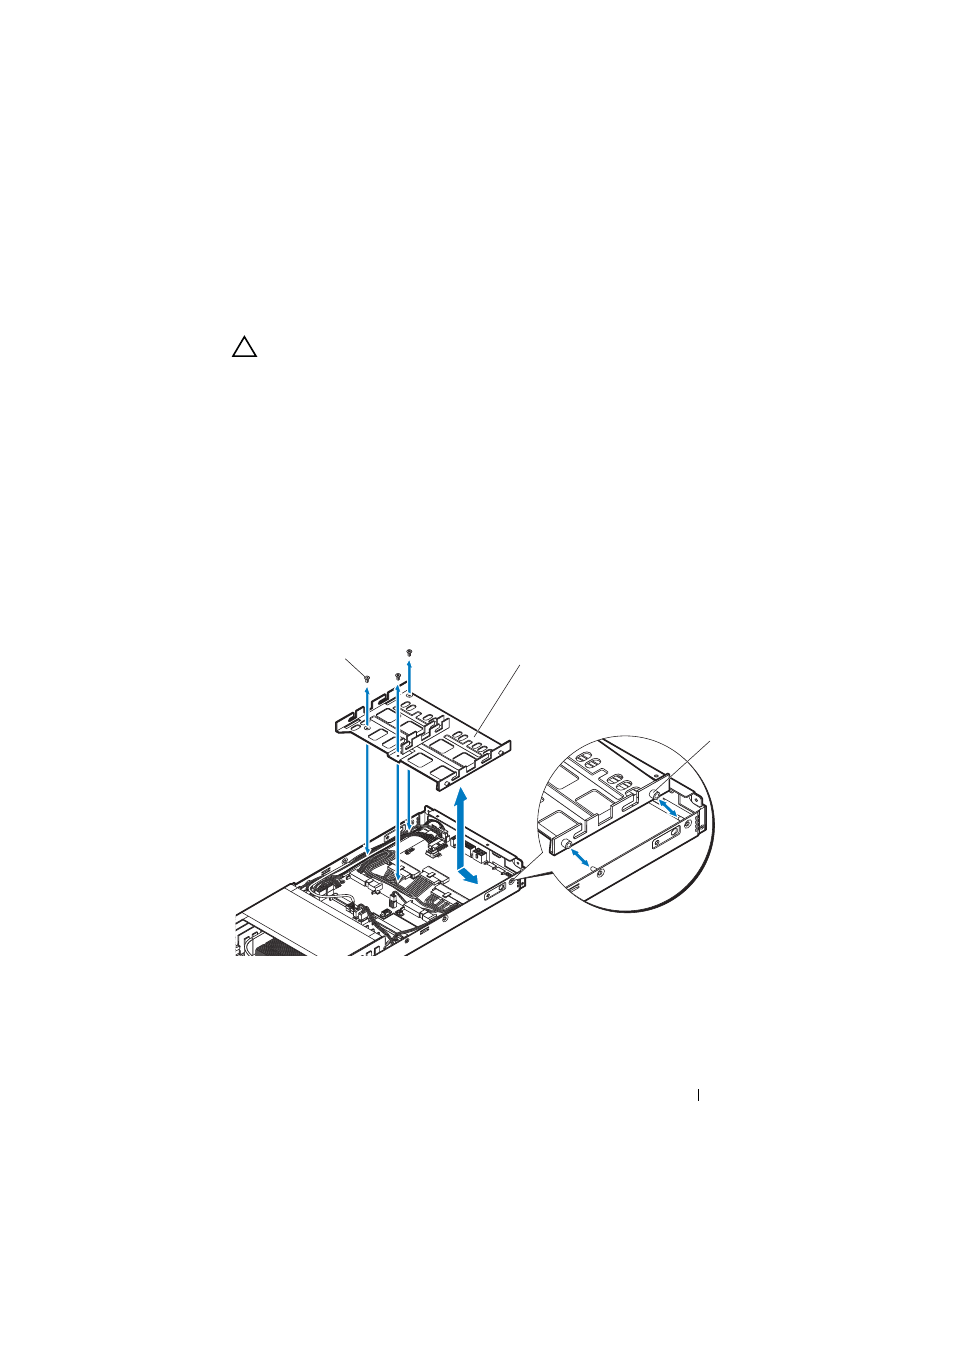
4 Remove the three screws securing the hard-drive tray. See Figure 3-36.
5 Lift the hard-drive tray at an angle and slide the standoff holes on the
hard-drive tray out of the sled tray standoffs. See Figure 3-36.
Figure 3-36. Removing and Installing the Hard-Drive Tray
1
M3 screws (3)
2
hard-drive tray
3
hard-drive tray standoff holes (2)
1
2
3
- PowerEdge RAID Controller H700 (56 pages)
- PowerEdge RAID Controller H700 (200 pages)
- PowerEdge RAID Controller H700 (178 pages)
- PowerVault TL2000 (3 pages)
- PowerVault TL2000 (116 pages)
- PowerVault 130T DLT (Tape Library) (49 pages)
- PowerVault TL2000 (1 page)
- PowerVault 110T DLT VS80 (Tape Drive) (49 pages)
- PowerVault TL2000 (22 pages)
- PowerVault TL4000 (306 pages)
- PowerVault TL2000 (2 pages)
- PowerVault TL4000 (2 pages)
- PowerVault TL2000 (176 pages)
- PowerVault TL2000 (16 pages)
- PowerEdge 800 (87 pages)
- PowerEdge 800 (24 pages)
- PowerEdge 800 (82 pages)
- PowerEdge 800 (2 pages)
- PowerEdge 800 (27 pages)
- PowerEdge 800 (28 pages)
- PowerEdge 800 (58 pages)
- PowerEdge 6400 (86 pages)
- PowerVault 124T (64 pages)
- PowerVault 124T (56 pages)
- PowerVault 124T (66 pages)
- PowerVault 124T (57 pages)
- PowerVault 110T LTO (Tape Drive) (28 pages)
- PowerVault 124T (55 pages)
- PowerVault 124T (73 pages)
- PowerVault 124T (65 pages)
- PowerVault 124T (4 pages)
- PowerVault 124T (79 pages)
- PowerVault 124T (2 pages)
- PowerVault TL4000 (176 pages)
- PowerVault TL4000 (2 pages)
- PowerVault TL4000 (16 pages)
- PowerVault TL4000 (116 pages)
- PowerVault TL4000 (1 page)
- PowerVault TL4000 (66 pages)
- PowerVault TL4000 (22 pages)
- PowerVault TL4000 (3 pages)
- PowerEdge RAID Controller 6i (120 pages)
- PowerEdge RAID Controller 6i (156 pages)
- PowerVault 715N (Rackmount NAS Appliance) (42 pages)
- PowerVault 715N (Rackmount NAS Appliance) (57 pages)