Removing and replacing a 3.5-inch f, Inch front-panel insert -3, Figure 3-2 – Dell Dimension L___cx User Manual
Page 45: Removing a 3.5-inch insert -3
support.dell.com
Installing Drives
3-3
Removing and Replacing a 3.5-Inch
Front-Panel Insert
Empty drive bays in the drive cage are covered by a front-panel insert. The insert for a
3.5-inch drive bay is mounted to the inside of the bezel.
After you have removed the bezel, remove the front-panel insert for the bay you plan
to use. From the back of the bezel, as shown
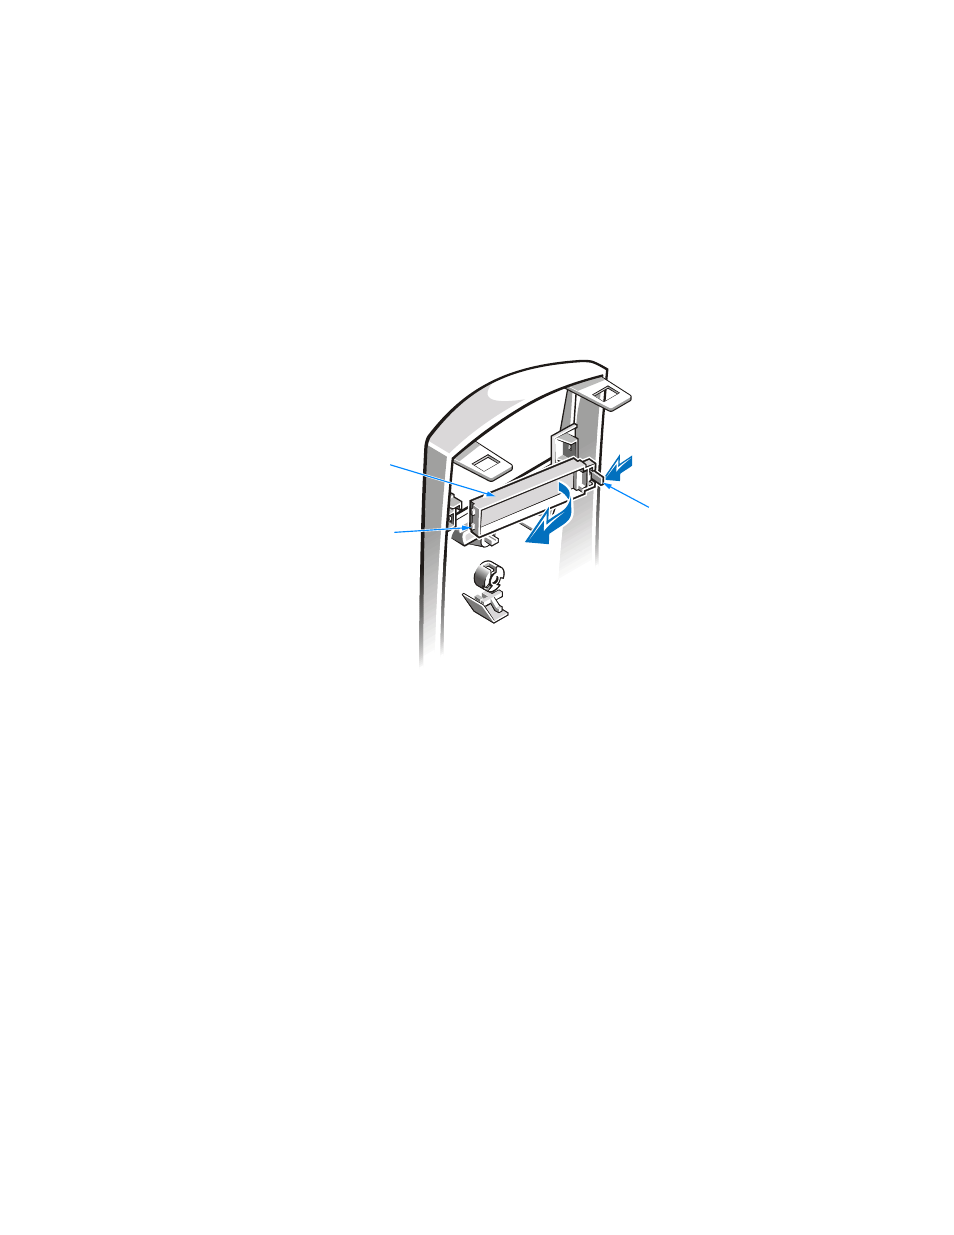
From the back of the bezel, as shown in Figure 3-2, press the release tab to
the side. Then rotate the insert toward you, and remove it from the bezel.
Figure 3-2. Removing a 3.5-Inch Insert
If you permanently remove a drive from the drive cage, replace the front-panel insert
by inserting its two tabs into the slot in the bezel and rotating the insert forward until
it snaps into place.
insert
release tab
tabs (2)
- Inspiron 530 (2 pages)
- OptiPlex 755 (248 pages)
- OptiPlex 755 (622 pages)
- OptiPlex 755 (528 pages)
- OptiPlex 755 (82 pages)
- OptiPlex 755 (45 pages)
- OptiPlex 760 (76 pages)
- OptiPlex 760 (203 pages)
- OptiPlex 745 (212 pages)
- OptiPlex 745 (360 pages)
- OptiPlex 745 (428 pages)
- OptiPlex 780 (73 pages)
- OptiPlex 780 (40 pages)
- OptiPlex 780 (14 pages)
- OptiPlex 780 (89 pages)
- OptiPlex 780 (10 pages)
- OptiPlex 780 (74 pages)
- OptiPlex 780 (80 pages)
- OptiPlex GX620 (221 pages)
- OptiPlex GX620 (294 pages)
- OptiPlex GX620 (338 pages)
- Inspiron 530 (226 pages)
- OptiPlex 960 (Late 2008) (16 pages)
- OptiPlex GX260 (100 pages)
- OptiPlex GX260 (235 pages)
- OptiPlex FX160 (Late 2008) (20 pages)
- OptiPlex FX160 (Late 2008) (132 pages)
- OptiPlex FX160 (20 pages)
- OptiPlex 210L (128 pages)
- OptiPlex 210L (300 pages)
- OptiPlex 210L (258 pages)
- OptiPlex 210L (150 pages)
- OptiPlex 210L (130 pages)
- OptiPlex 320 (266 pages)
- OptiPlex 320 (356 pages)
- OptiPlex 320 (44 pages)
- OptiPlex 320 (140 pages)
- OptiPlex 320 (132 pages)
- OptiPlex 320 (312 pages)
- OptiPlex GX240 (182 pages)
- OptiPlex GX240 (144 pages)
- OptiPlex GX240 (121 pages)
- OptiPlex GX240 (86 pages)
- OptiPlex GX240 (283 pages)
- OptiPlex GX240 (298 pages)