Removing the optical drive from the drive tray, Hard drives, The back of the drive. see figure 3-11 – Dell PowerEdge SC1435 User Manual
Page 55: See figure 3-11, Tab snaps into place. see figure 3-11, E back of the drive. see figure 3-11
Installing System Components
55
Figure 3-11.
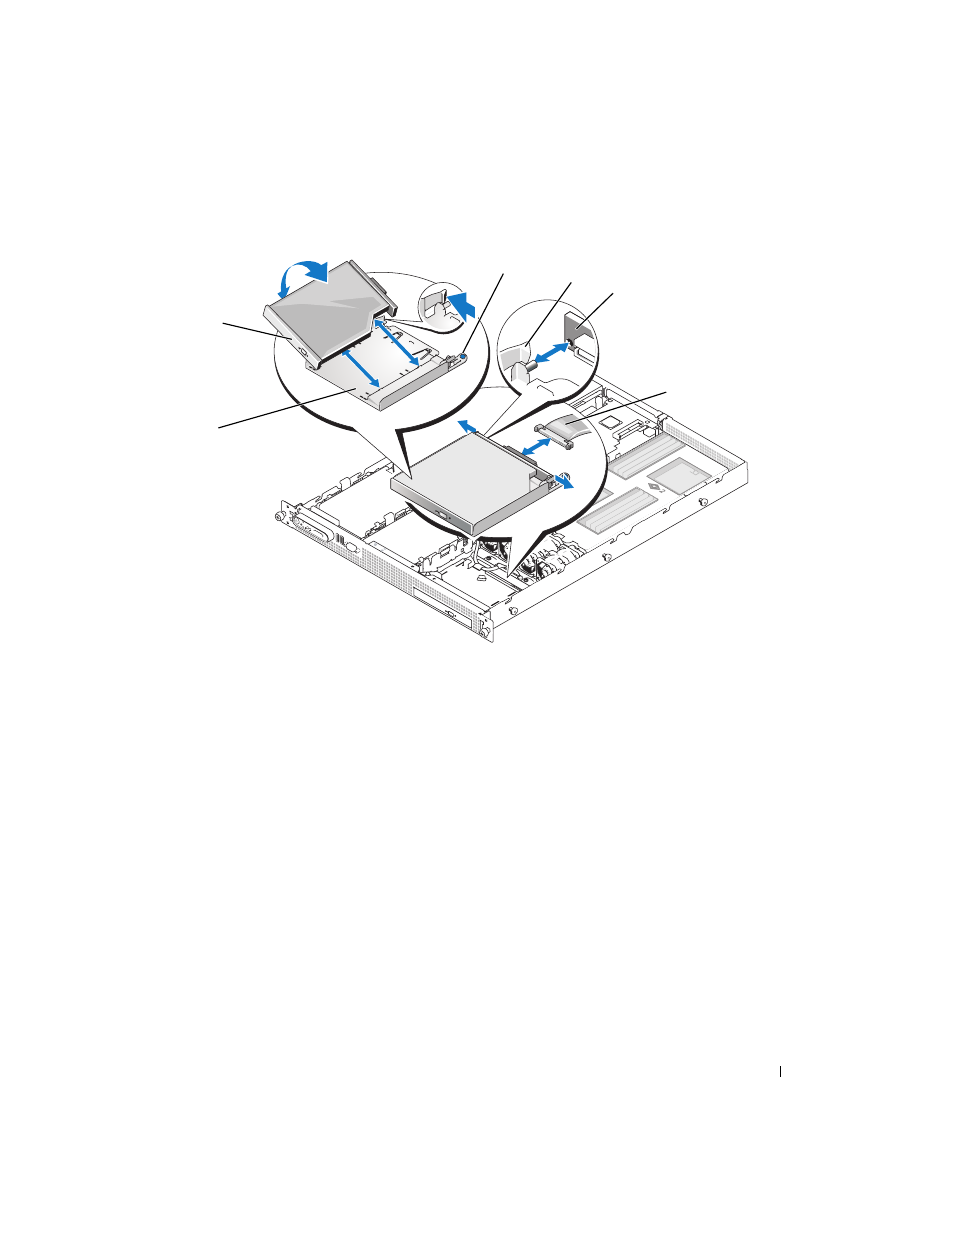
Removing and Installing the Optical Drive
Removing the Optical Drive from the Drive Tray
1 Remove the interposer board from the drive by deflecting the tab at each end of the board.
2 To remove the drive from the tray, push outward on the left retention tab at the back of the tray so as
to bend the tray wall out slightly and then pull up on the left side of the drive to disengage.
To install a new drive in the tray, fit the drive into the tray, then fit the interposer board onto the back of
the drive.
Hard Drives
This subsection describes how to install and configure SAS or SATA hard drives in the system's two
internal hard-drive bays.
1
drive tray
2
optical drive
3
tray release tab
4
interposer board retention
tabs (2)
5
interposer board
6
optical-drive cable
3
2
1
4
5
6
- PowerEdge RAID Controller H700 (56 pages)
- PowerEdge RAID Controller H700 (200 pages)
- PowerEdge RAID Controller H700 (178 pages)
- PowerVault 130T DLT (Tape Library) (49 pages)
- PowerVault TL2000 (1 page)
- PowerVault 110T DLT VS80 (Tape Drive) (49 pages)
- PowerVault TL2000 (22 pages)
- PowerVault TL4000 (306 pages)
- PowerVault TL2000 (2 pages)
- PowerVault TL4000 (2 pages)
- PowerVault TL2000 (176 pages)
- PowerVault TL2000 (16 pages)
- PowerVault TL2000 (3 pages)
- PowerVault TL2000 (116 pages)
- PowerEdge 800 (24 pages)
- PowerEdge 800 (82 pages)
- PowerEdge 800 (2 pages)
- PowerEdge 800 (27 pages)
- PowerEdge 800 (28 pages)
- PowerEdge 800 (58 pages)
- PowerEdge 800 (87 pages)
- PowerEdge 6400 (86 pages)
- PowerVault 124T (56 pages)
- PowerVault 124T (66 pages)
- PowerVault 124T (57 pages)
- PowerVault 110T LTO (Tape Drive) (28 pages)
- PowerVault 124T (55 pages)
- PowerVault 124T (73 pages)
- PowerVault 124T (65 pages)
- PowerVault 124T (4 pages)
- PowerVault 124T (79 pages)
- PowerVault 124T (2 pages)
- PowerVault 124T (64 pages)
- PowerVault TL4000 (16 pages)
- PowerVault TL4000 (116 pages)
- PowerVault TL4000 (1 page)
- PowerVault TL4000 (66 pages)
- PowerVault TL4000 (22 pages)
- PowerVault TL4000 (3 pages)
- PowerVault TL4000 (176 pages)
- PowerVault TL4000 (2 pages)
- PowerEdge RAID Controller 6i (120 pages)
- PowerEdge RAID Controller 6i (156 pages)
- PowerVault 715N (Rackmount NAS Appliance) (57 pages)
- PowerVault 715N (Rackmount NAS Appliance) (10 pages)