Installing a system board, Lease pin. see figure 3-16 – Dell PowerEdge SC1435 User Manual
Page 64
64
Installing System Components
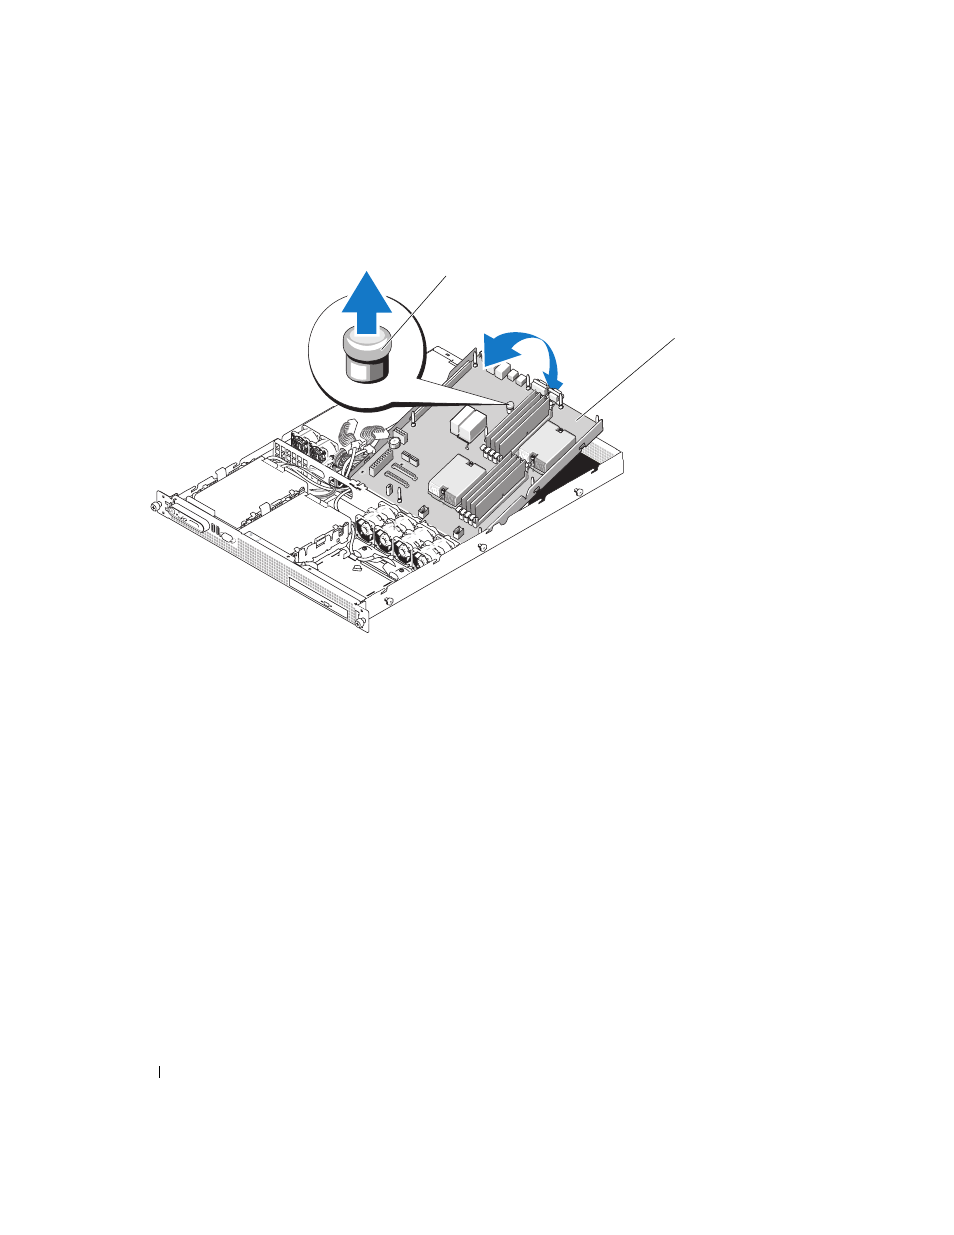
Figure 3-16.
System Board Removal
Installing a System Board
1 Install the heatsink(s) and microprocessor(s). See "Installing a Processor" on page 52
2 Install the memory modules in their original locations. See "Installing Memory Modules" on page 48.
3 Lower the system-board tray into the system until the tray sits flat on the bottom of the chassis.
4 Slide the system-board tray toward the back of the chassis until the system board release pin locks into
position.
5 Connect the control panel cable to the system board. See Figure 6-2.
6 If applicable, connect the optical drive cable to the system board. See Figure 6-2.
7 Reinstall the power supply. See "Installing the Power Supply" on page 43.
8 Replace the riser board. See "Installing an Expansion-Card Riser" on page 59.
9 Replace any expansion card(s). See "Installing an Expansion Card" on page 44.
10 Reconnect the two fan module power cables to the system board. See "Removing and Installing a
Cooling Fan Module" on page 41.
11 Replace the cooling shroud. See "Replacing the Cooling Shroud" on page 40.
1
system board release pin
2
system board attached to
system-board tray
2
1
1
2