I/o assembly, Removing the i/o assembly – Dell OptiPlex 960 (Late 2008) User Manual
Page 82
Back to Contents Page
Dell™ Optiplex™ 960 Mini Tower/Desktop/Small Form Factor Service Manual
I/O Assembly
Removing the I/O Assembly
1.
Perform the procedure
Before Working on Your Computer
.
2.
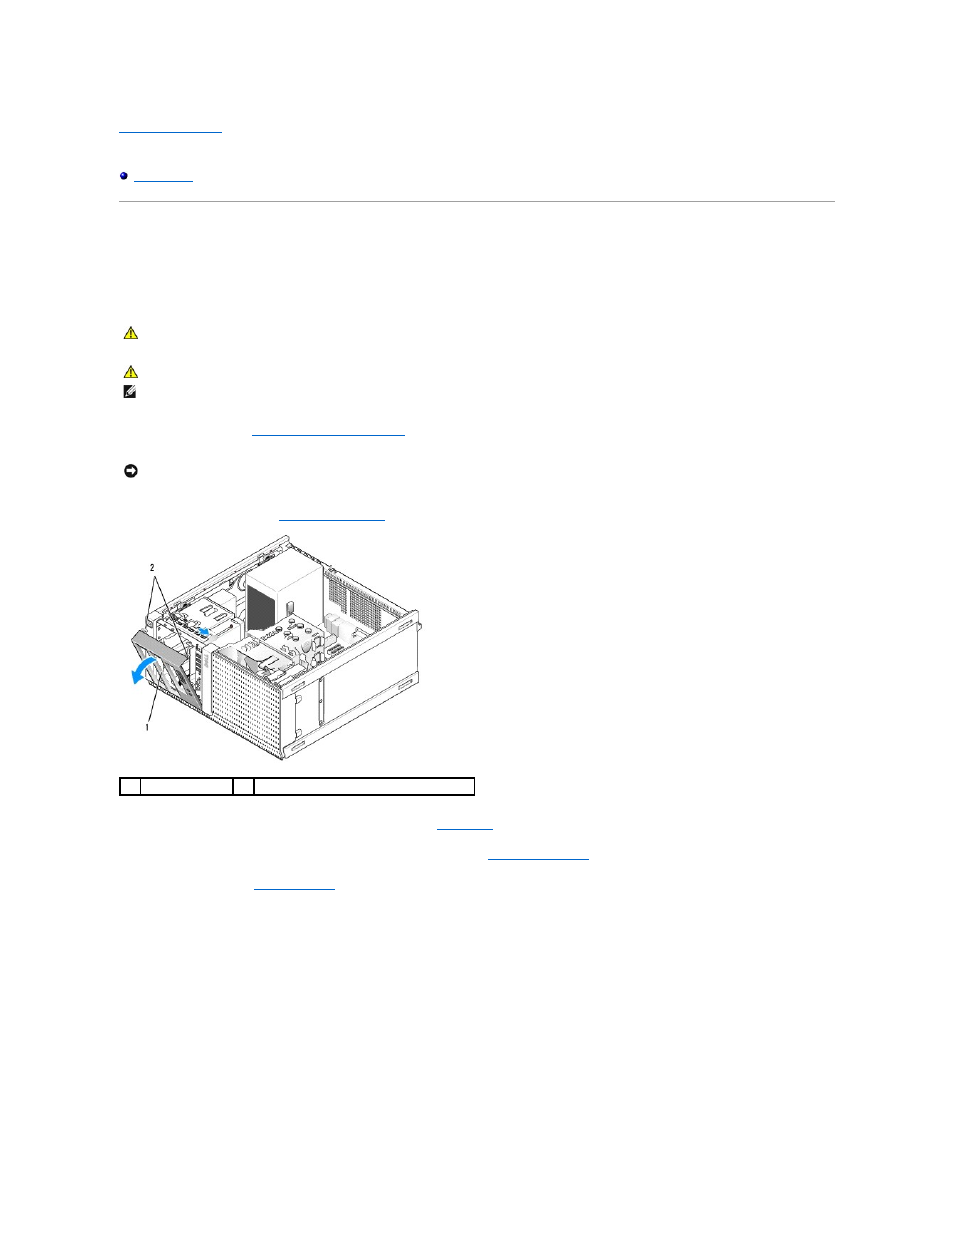
Remove the drive bezel (see
Remove the Drive Bezel
).
3.
Remove the optical drive in the upper most bay, if installed (see
Optical Drive
).
4.
Remove the drive bay caddy located in the lower most bay, if installed (see
Replacing a Hard Drive
).
5.
6.
Disconnect the I/O assembly cables from the system board and release them from the cable bundle and guides.
7.
Remove the screw that secures the I/O assembly, then push the I/O assembly toward the left side of the chassis (down) to release it from the retaining
clips.
8.
Slide the I/O assembly away from the front of the computer while carefully routing the cables out of the chassis.
CAUTION:
Before working inside your computer, read the safety information that shipped with your computer. For additional safety best
practices information, see the Regulatory Compliance Homepage at www.dell.com/regulatory_compliance.
CAUTION:
To guard against electrical shock, always unplug your computer from the electrical outlet before removing the cover.
NOTE:
Note the routing of all cables as you remove them so that you can re-route them correctly when installing the new I/O assembly.
NOTICE:
When sliding the I/O assembly out of the computer, be extremely careful. Carelessness may result in damage to the cable connectors
and the cable routing clips.
1
drive bezel
2
drive bezel securing tabs (2)