Mini tower computer cover, Removing the mini tower computer cover, Replacing the mini tower computer cover – Dell OptiPlex 960 (Late 2008) User Manual
Page 62
Back to Contents Page
Dell™ Optiplex™ 960 Mini Tower/Desktop/Small Form Factor Service Manual
Mini Tower Computer Cover
Removing the Mini Tower Computer Cover
1.
Perform the procedure
Before Working on Your Computer
.
2.
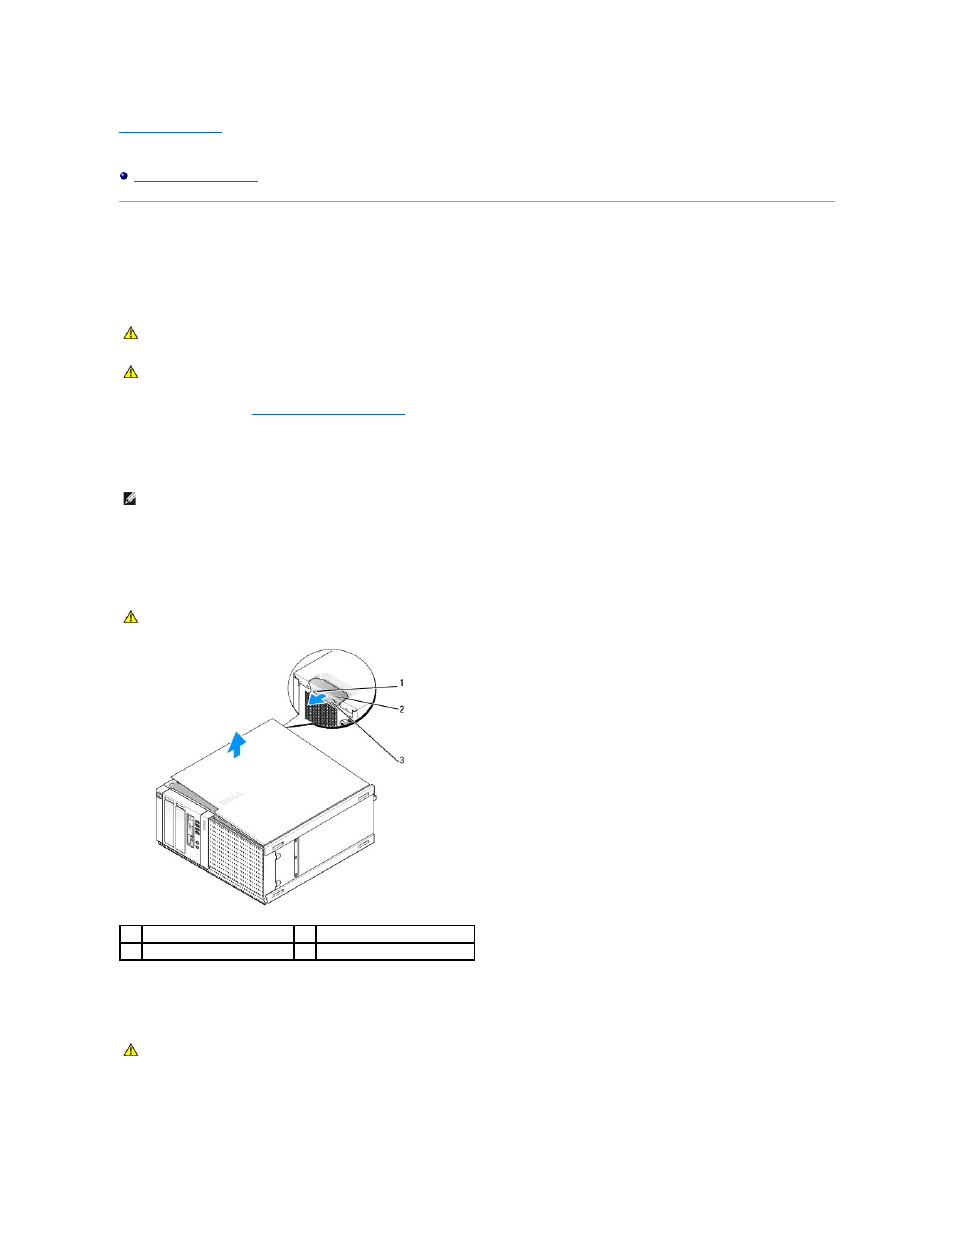
Lay the computer on its side as shown in the illustration.
3.
If a security cable or a padlock (through the padlock ring) is attached, remove it.
4.
Locate the cover release latch and slide it back as you lift the end of the cover near the latch.
5.
With the cover end near the latch raised slightly, slide the cover toward the latch end of the chassis to pull the tabs at the other end of the cover out of
the slots in the chassis.
Replacing the Mini Tower Computer Cover
1.
Ensure that all cables are connected, and fold cables out of the way.
CAUTION:
Before working inside your computer, read the safety information that shipped with your computer. For additional safety best
practices information, see the Regulatory Compliance Homepage at www.dell.com/regulatory_compliance.
CAUTION:
To guard against electrical shock, always unplug your computer from the electrical outlet before removing the computer cover.
NOTE:
For convenience, lay the computer on its side before working inside the chassis.
CAUTION:
Graphics card heatsinks can become very hot during normal operation. Ensure that a graphics card heatsink has had sufficient time to
cool before you touch it.
1
padlock ring
2
cover release latch
3
security cable slot
CAUTION:
Before working inside your computer, read the safety information that shipped with your computer. For additional safety best
practices information, see the Regulatory Compliance Homepage at www.dell.com/regulatory_compliance.