Control panel – Dell Precision 330 User Manual
Page 7
Back to Contents Page
Control Panel
Dell Precision™ WorkStation 330 Systems Service Manual
Components
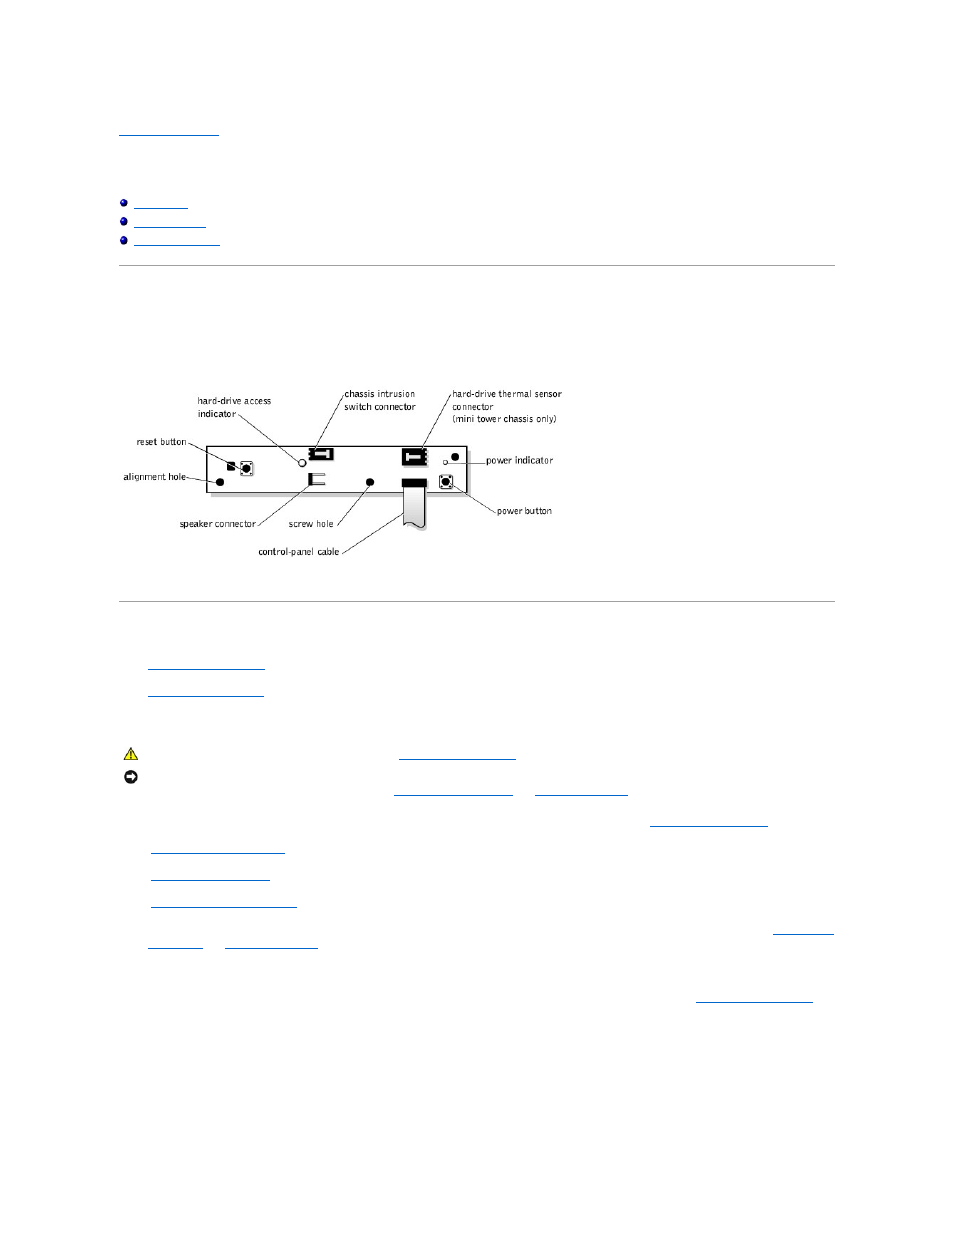
The following figure shows the control panel and the location of its principal connectors and components.
Control Panel Components
Desktop Chassis
l
l
Removing the Control Panel (Desktop Chassis)
1. Turn off the computer and peripherals, disconnect them from their electrical outlets, wait at least 5 seconds, and then
remove the computer cover
.
2.
Remove the hard-drive bracket
.
3.
Remove all expansion cards
.
4.
Remove the expansion-card guide
.
5. Disconnect the control-panel cable from the control-panel (PANEL) connector on the system board. To locate the control-panel connector, see "
System Board
Components
" or "
Interior Service Label
."
6. Feed the control-panel ribbon cable through the routing holes in the bottom and front wall of the chassis.
7. Disconnect the speaker and chassis intrusion switch cables from the control-panel connectors. To locate these connectors, see "
."
8. Remove the mounting screw.
9. Lift the control panel and control-panel ribbon cable away from the chassis.
Removing the Control Panel (Desktop Chassis)
CAUTION:
Before you perform this procedure, see "
Precautionary Measures
."
NOTICE:
Before disconnecting a peripheral from the system or removing a component from the system board, verify that the standby power indicator on the
system board has turned off. To locate this indicator, see "
System Board Components
" or "
Interior Service Label
."