Replacing the diskette drive – Dell Precision 330 User Manual
Page 23
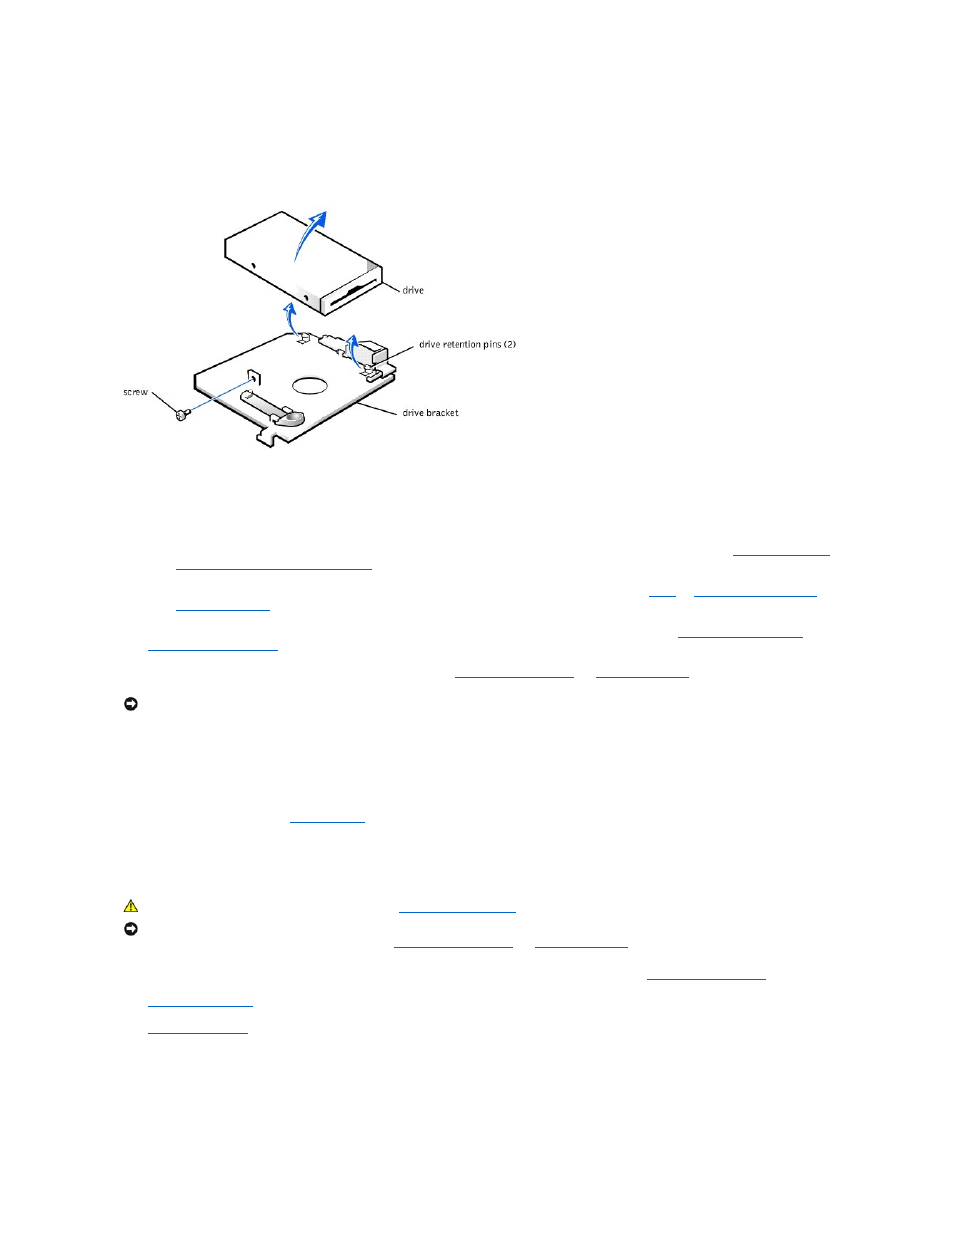
6. Remove the mounting screw.
7. Rotate the left side of the diskette drive upward and lift it free from the drive bracket (see the following figure).
Removing the Diskette Drive from the Bracket (Mini Tower Chassis)
Replacing the Diskette Drive (Mini Tower Chassis)
1. Mount the diskette drive on the bracket:
Drive from the Bracket (Mini Tower Chassis)
3. Connect the interface cable for the drive. To locate this connector, see "
System Board Components
" or "
Interior Service Label
."
4. Connect a DC power cable to the power input connector on the back of the drive.
5. Ensure that all cables are firmly connected. Fold cables out of the way to provide airflow for the fan and cooling vents.
6. Rotate the power supply back into position until the securing tab snaps into the release latch.
7. Replace the computer cover and
restart the system
.
8. Run the Dell Diagnostics to verify that the drive is operating properly.
Removing a CD, Zip, or Other Externally Accessible Drive (Mini Tower Chassis)
1. Turn off the computer and peripherals, disconnect them from their electrical outlets, wait at least 5 seconds, and then
remove the computer cover
.
2.
Rotate the power supply
away from the system board.
3.
Remove the front panel
.
4. Disconnect the DC power and interface cables from the back of the drive.
5. Remove the drive bracket from the chassis drive bay you want to use.
Squeeze together the metal tabs that extend from each side of the drive bracket, and pull the bracket out of the bay (see the following figure).
NOTICE:
To avoid possible damage, you must match the colored strip on the interface cable with pin 1 on both the drive and system board connectors.
CAUTION:
Before you perform this procedure, see "
Precautionary Measures
."
NOTICE:
Before disconnecting a peripheral from the system or removing a component from the system board, verify that the standby power indicator on the
system board has turned off. To locate this indicator, see "
System Board Components
" or "
Interior Service Label
."