Installing the system board – Dell PowerVault DP500 User Manual
Page 57
13.
Removing the SAS Backplane Board
.
14.
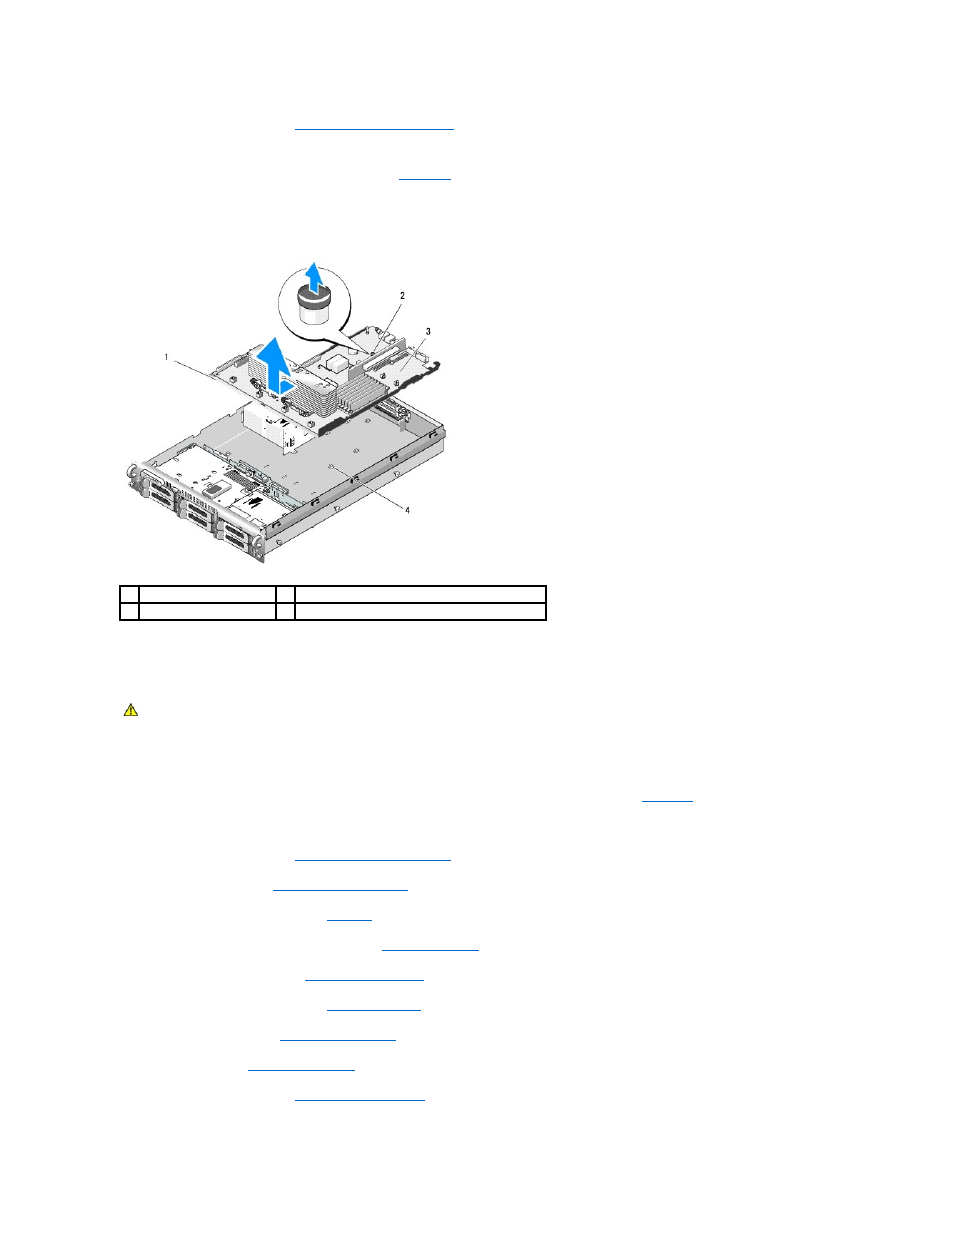
Remove the system board:
a.
Pull the system-board tray riser release pin. See
b.
While pulling the release pin, slide the system-board tray toward the front of the chassis.
c.
Lift up the system-board tray and remove it from the chassis.
Figure 3-35. System Board Removal
Installing the System Board
1.
Lower the system-board tray until the tray sits flat on the bottom of the chassis.
2.
Ensure that all 17 system-board securing tabs are fully inserted into the 17 system-board securing slots. See
3.
Slide the system-board tray toward the back of the chassis until it locks into position.
4.
Replace the SAS backplane. See
Installing the SAS Backplane Board
.
5.
Replace the sideplane. See
Installing the Sideplane Board
6.
Reinstall the TOE key, if applicable. See
Figure 6
-2
for the TOE key's location.
7.
Replace the heatsink(s) and microprocessor(s). See
.
8.
Replace the memory modules. See
.
9.
If applicable, replace the RAC card. See
.
10.
Replace the fan bracket. See
11.
.
12.
Replace the cooling shroud. See
1
system-board tray
2
system-board tray riser release pin
3
system board
4
system-board securing tabs
CAUTION:
Only trained service technicians are authorized to remove the system cover and access any of the components inside the system. See
your Product Information Guide for complete information about safety precautions, working inside the computer, and protecting against
electrostatic discharge.