Dell PowerVault DP500 User Manual
Page 28
1.
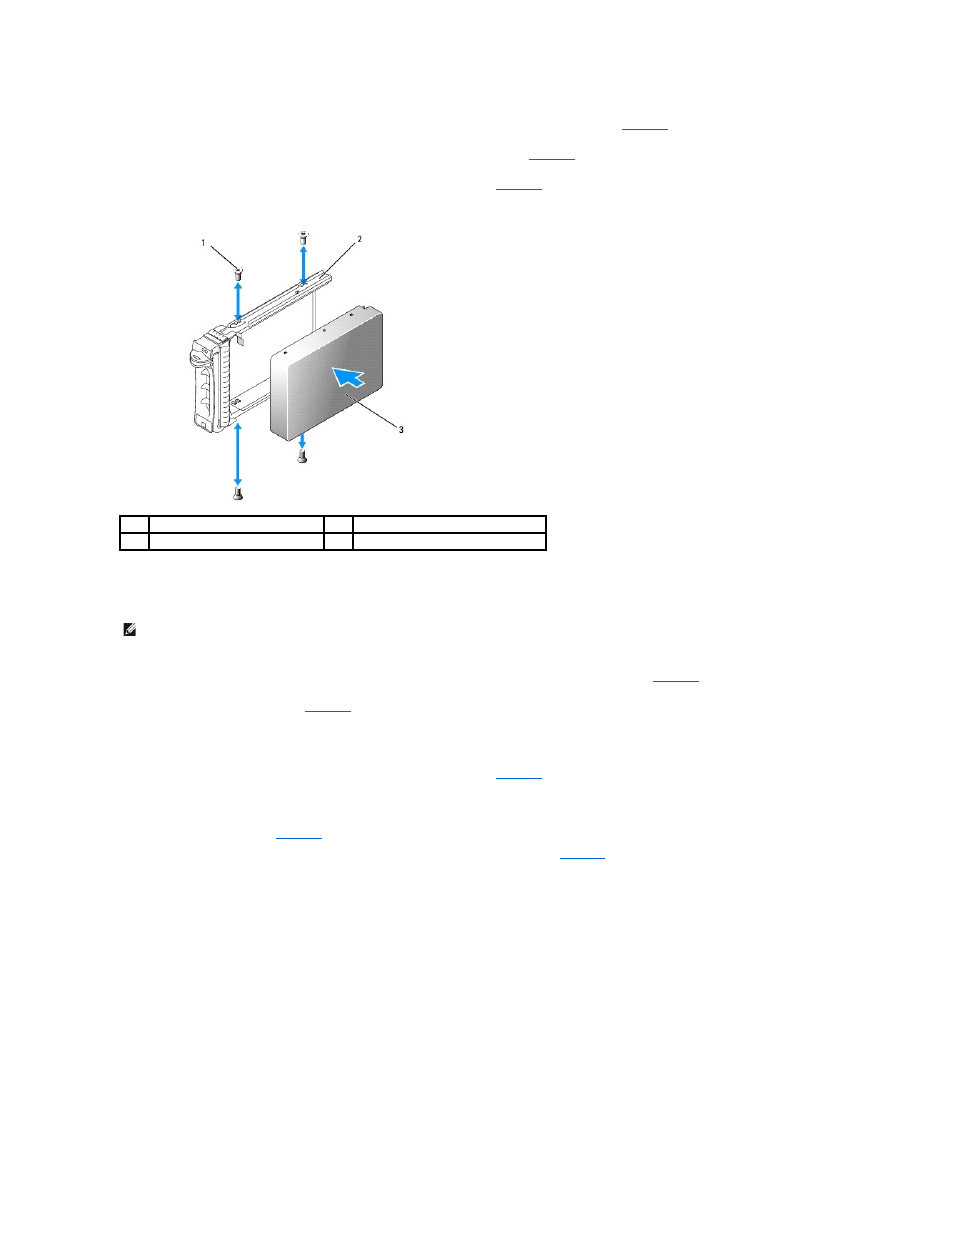
Insert the SATA hard drive into the hard-drive carrier with the connector end of the drive at the rear. See
2.
Align the screw holes on the hard drive with the holes on the hard-drive carrier. See
3.
Attach the four screws to secure the hard drive to the hard-drive carrier. See
Figure 3-6. Installing a SATA Hard Drive Into a SATA Drive Carrier
Installing a SATA Hard Drive and Interposer Card Into a SATAu Hard-Drive Carrier
1.
Insert the SATA hard drive into the SATAu hard-drive carrier with the connector end of the drive at the rear. See
2.
Viewing the assembly as shown in
, align the bottom rear screw hole on the hard drive with the hole labeled "SATAu" on the hard drive
carrier.
When aligned correctly, the rear of the interposer will be flush with the rear of the hard-drive carrier.
3.
Attach the four screws to secure the hard drive to the hard-drive carrier. See
4.
Attach the interposer card to the rear of the SATA hard drive:
a.
Angle the top of the interposer card into the inside top carrier rail so that the tabs on the interposer card bracket attach to the slots on the inside
b.
Rotate the bottom end of the card toward the hard drive to seat the connector. See
.
c.
Push the bottom end of the card to the hard drive until the latch on the card bracket clicks into place.
Figure 3-7. Installing a SATA Hard Drive and Interposer Card Into a SATAu Drive Carrier
1
screws (4)
2
SATA drive carrier
3
SATA hard drive
NOTE:
When you install a SATA hard drive into a SATAu drive carrier, you must install an interposer card onto the back of the hard drive. The SATAu drive
carrier is labeled "SATAu" and also has marks indicating the SAS and SATA mounting screws.