Diskette drive, Installing the optical drive, Removing the diskette drive from the system – Dell PowerVault DP500 User Manual
Page 40
1.
Turn off the system, including any attached peripherals, and disconnect the system from its electrical outlet.
2.
3.
4.
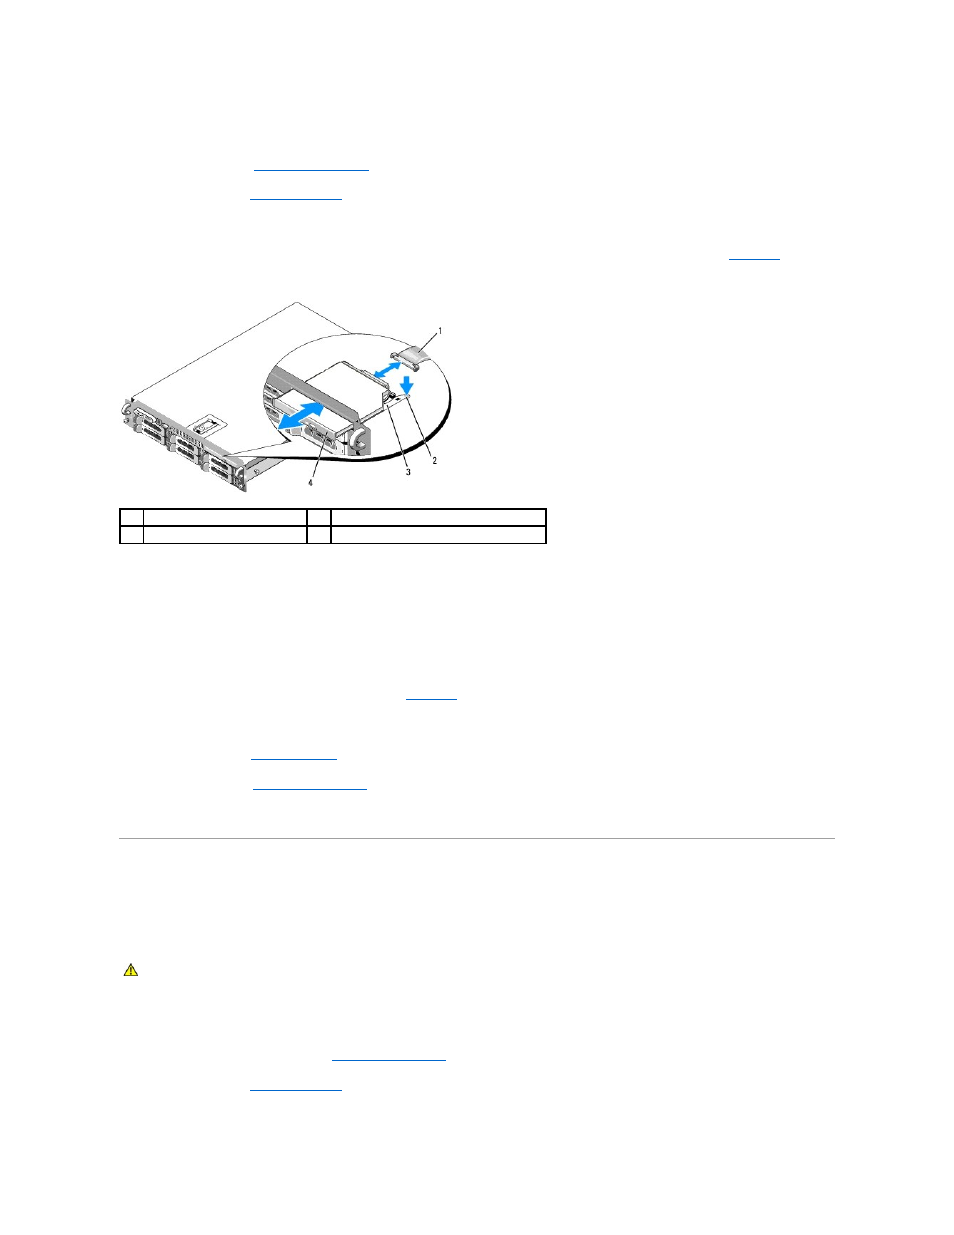
Disconnect the optical drive cable from the back of the drive.
5.
.
Figure 3-20. Removing and Installing the Optical Drive Tray
Installing the Optical Drive
1.
Align the optical drive tray with its opening in the front panel.
The optical drive opening is above the hard-drive slots on the far right, or the flex bay, depending on your system's drive configuration (the hard-drives
slots are identified by labels on the front panel of the system).
2.
Slide in the drive tray until the tray snaps into place. See
.
3.
Connect the optical drive cable to the connector on the back of the drive.
4.
.
5.
.
6.
Reconnect your system and peripherals to their electrical outlets, and turn on the system.
Diskette Drive
Removing the Diskette Drive From the System
1.
Turn off the system, including any attached peripherals, and disconnect the system from the electrical outlet.
2.
Remove the front bezel, if attached. See
.
3.
4.
If your system configuration includes a tape backup device installed in the optional media bay, remove the tape backup device's strain relief bracket. See
1
optical-drive cable
2
optical-drive release tab
3
optical -drive tray
4
optical drive
CAUTION:
Only trained service technicians are authorized to remove the system cover and access any of the components inside the system. See
your Product Information Guide for complete information about safety precautions, working inside the computer, and protecting against
electrostatic discharge.