System board tray levers, Microprocessors, Replace the system board tray (see – Dell PowerEdge 2650 User Manual
Page 52: Replacing the system board tray, Removing the system board tray levers, Replacing the system board tray levers
5.
Lift the front of the system board tray upward slightly and then pull the tray straight back until it clears the chassis.
Replacing the System Board Tray
1.
).
2.
Rotate the system board tray levers down simultaneously until the tray is secured in the chassis (see
3.
").
System Board Tray Levers
Removing the System Board Tray Levers
1.
Remove the system board tray (see "
Removing the System Board Tray
").
2.
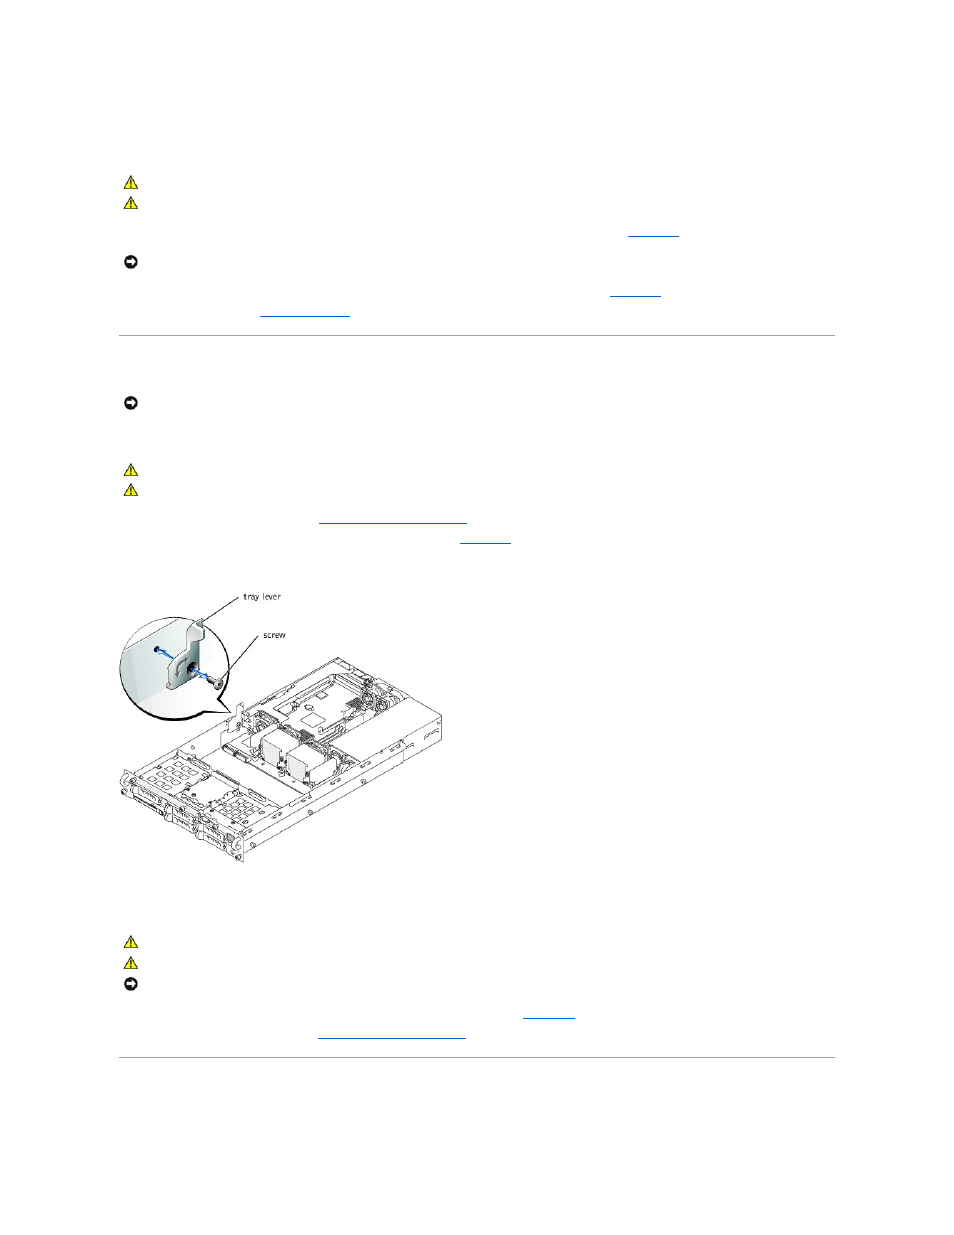
For each lever, remove the screw securing the lever to the tray (see
).
Figure 4-26. Removing the System Board Tray Levers
Replacing the System Board Tray Levers
1.
For each lever, replace the screw securing the lever to the system board tray (see
2.
Replace the system board tray (see "
Replacing the System Board Tray
Microprocessors
CAUTION:
Before you perform this procedure, read the safety instructions in your System Information document.
CAUTION:
See "Protecting Against Electrostatic Discharge" in the safety instructions in your System Information document.
NOTICE:
To prevent damage to the system board tray levers, rotate the levers simultaneously to remove or replace the system board tray.
NOTICE:
To prevent damage to the system board tray levers, rotate the levers simultaneously to remove or replace the system board tray.
CAUTION:
Before you perform this procedure, read the safety instructions in your System Information document.
CAUTION:
See "Protecting Against Electrostatic Discharge" in the safety instructions in your System Information document.
CAUTION:
Before you perform this procedure, read the safety instructions in your System Information document.
CAUTION:
See "Protecting Against Electrostatic Discharge" in the safety instructions in your System Information document.
NOTICE:
Ensure that the screw securing each lever to the system board tray is firmly tightened.