Replacing the system board – Dell PowerEdge 2650 User Manual
Page 57
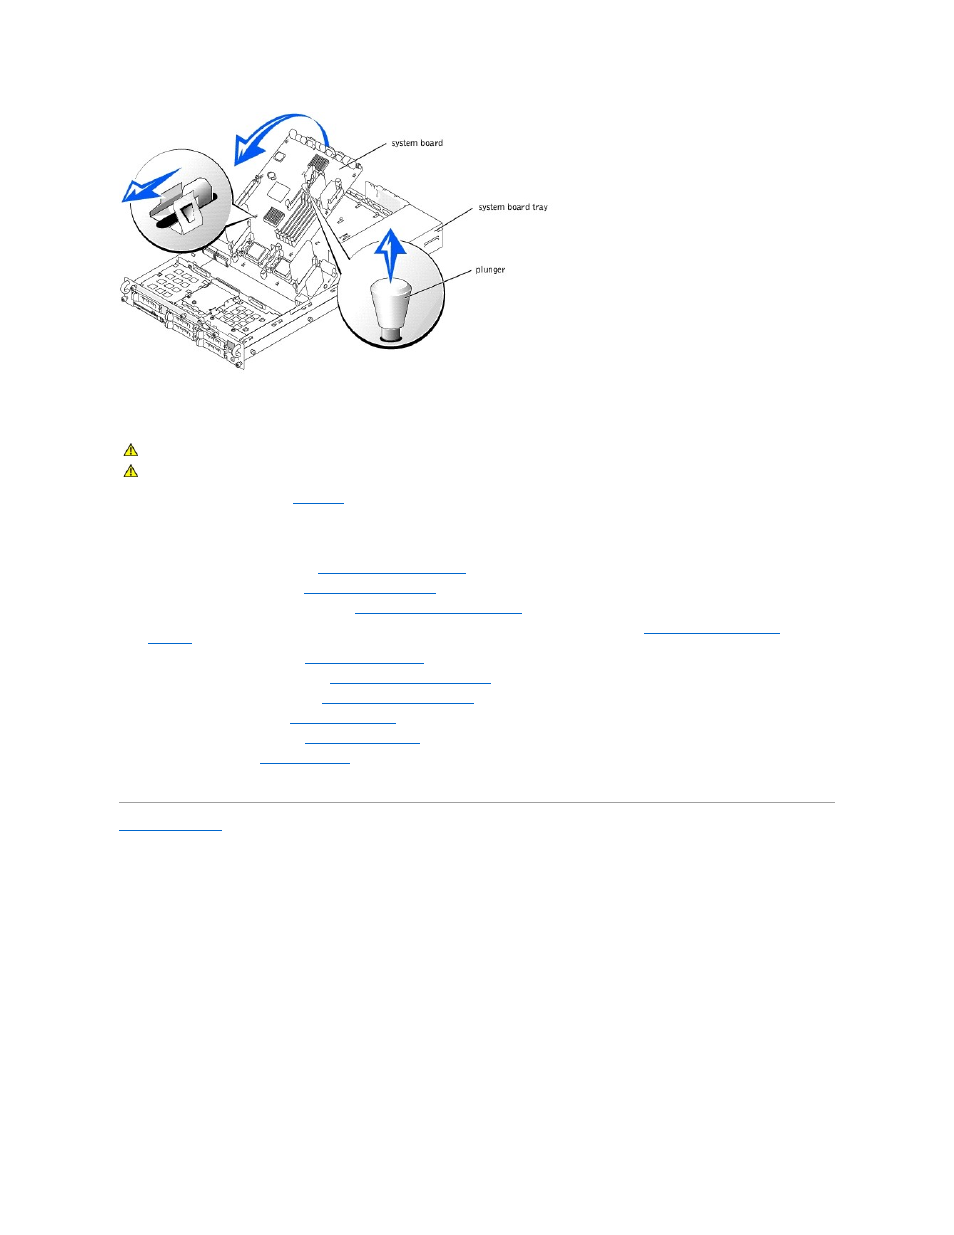
Replacing the System Board
1.
):
a.
Lower the front of the system board into the system board tray, under the tray levers.
b.
Lower the system board onto its grounding tabs in the system board tray and slide the system board back until the board's plunger snaps into
place.
2.
Replace the system board tray (see "
Replacing the System Board Tray
3.
Replace the system battery (see "
4.
Replace the microprocessors and VRMs (see "
Adding or Replacing a Microprocessor
5.
Activating the Integrated RAID
6.
Install the memory modules (see "
").
7.
Replace the expansion-card cage (see "
Replacing the Expansion-Card Cage
8.
Replace the system fan bracket (see "
Replacing the System-Fan Bracket
").
9.
Replace the cooling fans (see "
").
10.
Replace the power supplies (see "
11.
").
12.
Reconnect the system to its electrical outlet and turn the system on, including any attached peripherals.
Back to Contents Page
CAUTION:
Before you perform this procedure, read the safety instructions in your System Information document.
CAUTION:
See "Protecting Against Electrostatic Discharge" in the safety instructions in your System Information document.