System board tray, Removing the system board tray – Dell PowerEdge 2650 User Manual
Page 51
1.
Lower the backplane board into the system board tray.
2.
Connect the control-panel cable to the SCSI backplane board (see
3.
Align the bottom of the backplane board in the board's mounting grooves (see
).
4.
Rotate the top of the backplane board onto the board's grounding tabs.
5.
Slide the backplane board toward the left side chassis wall about 0.5 inch.
6.
Tighten the thumbscrew on the backplane board.
7.
Install all SCSI hard drives (see "
8.
Replace the CD/diskette drive tray (see "
Replacing the CD/Diskette Drive Tray
").
9.
If necessary, install the SCSI backplane daughter card (see "
Installing the SCSI Backplane Daughter Card
").
10.
Replace the system board tray (see "
Replacing the System Board Tray
11.
Replace the control-panel cable cover (see "
Replacing the Control-Panel Cable Cover
").
12.
").
13.
Reconnect your system and peripherals to their electrical outlets, and turn on the system.
System Board Tray
CAUTION:
Before you perform this procedure, read the safety instructions in your System Information document.
CAUTION:
See "Protecting Against Electrostatic Discharge" in the safety instructions in your System Information document.
NOTICE:
To avoid damage to the system, align the bottom of the backplane board in the board's mounting grooves before rotating the top of the board
System Board Tray
See
Figure 5
-3
to identify the system board components.
Removing the System Board Tray
1.
Turn off the system, including any attached peripherals, and disconnect the system from the electrical outlet.
2.
3.
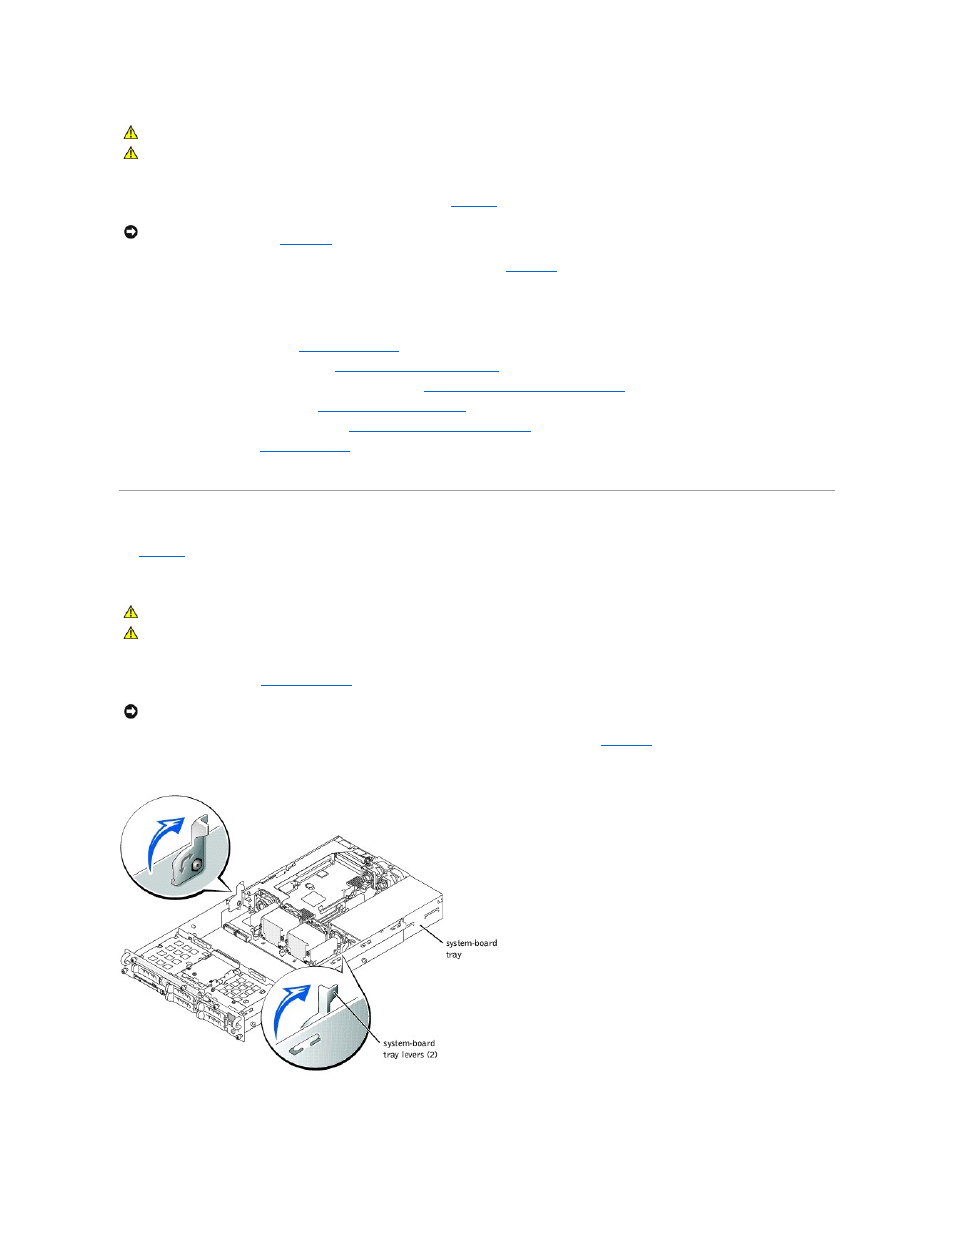
Rotate the system board tray levers up simultaneously until the tray releases from the chassis (see
).
Figure 4-25. Removing and Installing the System Board Tray
4.
Pull the system board tray straight back until it stops.
CAUTION:
Before you perform this procedure, read the safety instructions in your System Information document.
CAUTION:
See "Protecting Against Electrostatic Discharge" in the safety instructions in your System Information document.
NOTICE:
To prevent damage to the system board tray levers, rotate the levers simultaneously to remove or replace the system board tray.