Control panel, Replacing the front-panel i/o board, Removing the control panel – Dell PowerEdge 2650 User Manual
Page 31
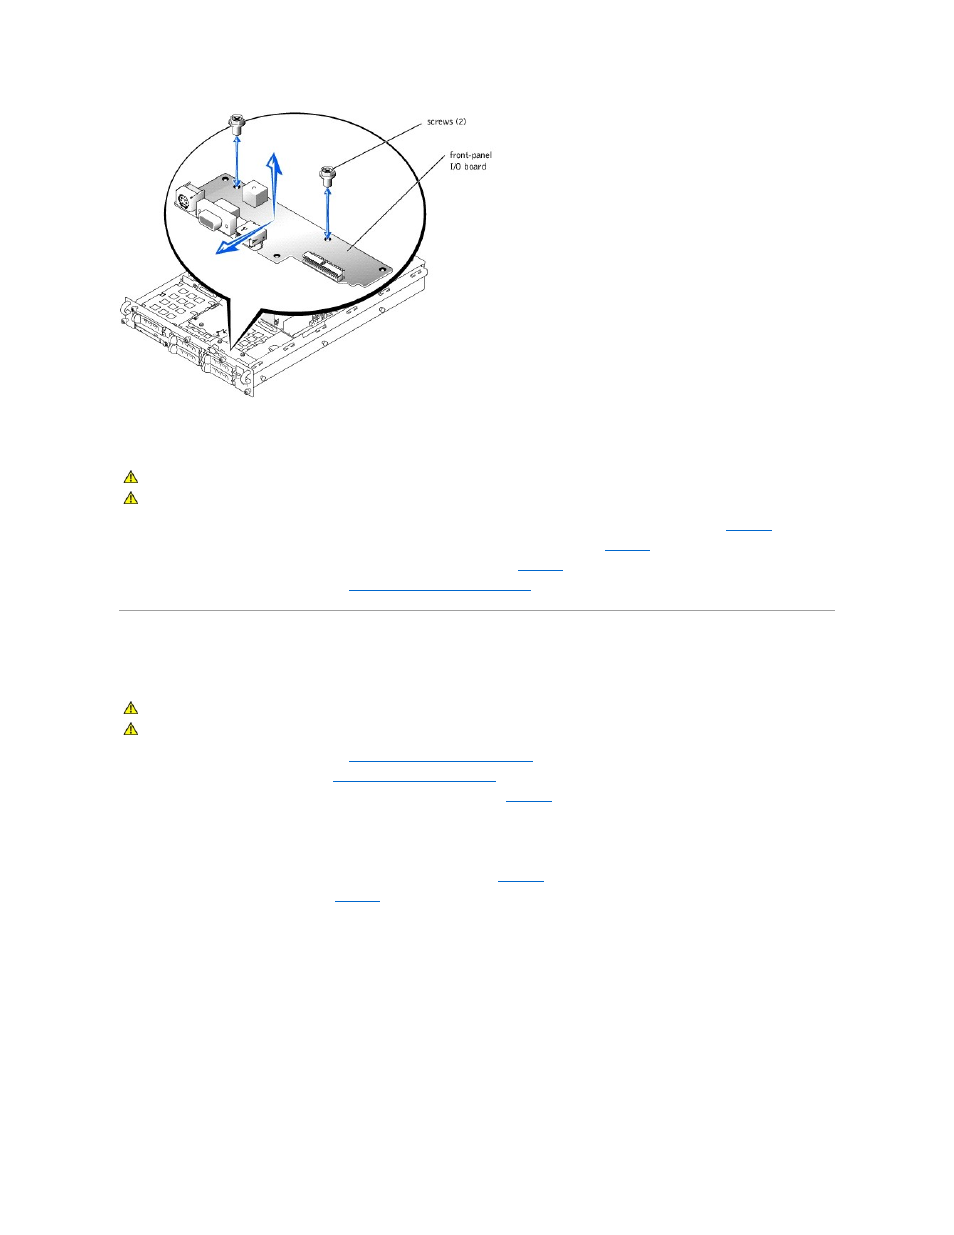
Replacing the Front-Panel I/O Board
1.
Lower the front-panel I/O board into the system and align the I/O board connector with the control panel board connector (see
2.
Press the I/O board toward the front panel to connect the I/O board to the control panel board (see
).
3.
Replace the two screws that secure the front-panel I/O board in the system (see
).
4.
Replace the control-panel cable cover (see "
Replacing the Control-Panel Cable Cover
").
Control Panel
Removing the Control Panel
1.
Remove the control-panel cable cover (see "
Removing the Control-Panel Cable Cover
2.
Remove the front-panel I/O board (see "
Removing the Front-Panel I/O Board
3.
Remove the screws that secure the control-panel assembly in the system (see
l
Two screws at the top of the control-panel assembly that secures the assembly to the front panel.
l
One screw at the bottom of the control-panel that secures the assembly to the bottom of the chassis.
4.
Slide the control-panel assembly away from the front panel.
5.
Lift the assembly and disconnect the cable from the control panel board (see
6.
Lift the assembly out of the system (see
).
Figure 4-7. Removing and Replacing the Control-Panel Assembly
CAUTION:
Before you perform this procedure, read the safety instructions in your System Information document.
CAUTION:
See "Protecting Against Electrostatic Discharge" in the safety instructions in your System Information document.
CAUTION:
Before you perform this procedure, read the safety instructions in your System Information document.
CAUTION:
See "Protecting Against Electrostatic Discharge" in the safety instructions in your System Information document.