Removing the dimm from a perc 5/i card – Dell PowerEdge RAID Controller 5i User Manual
Page 39
Hardware Installation and Configuration
37
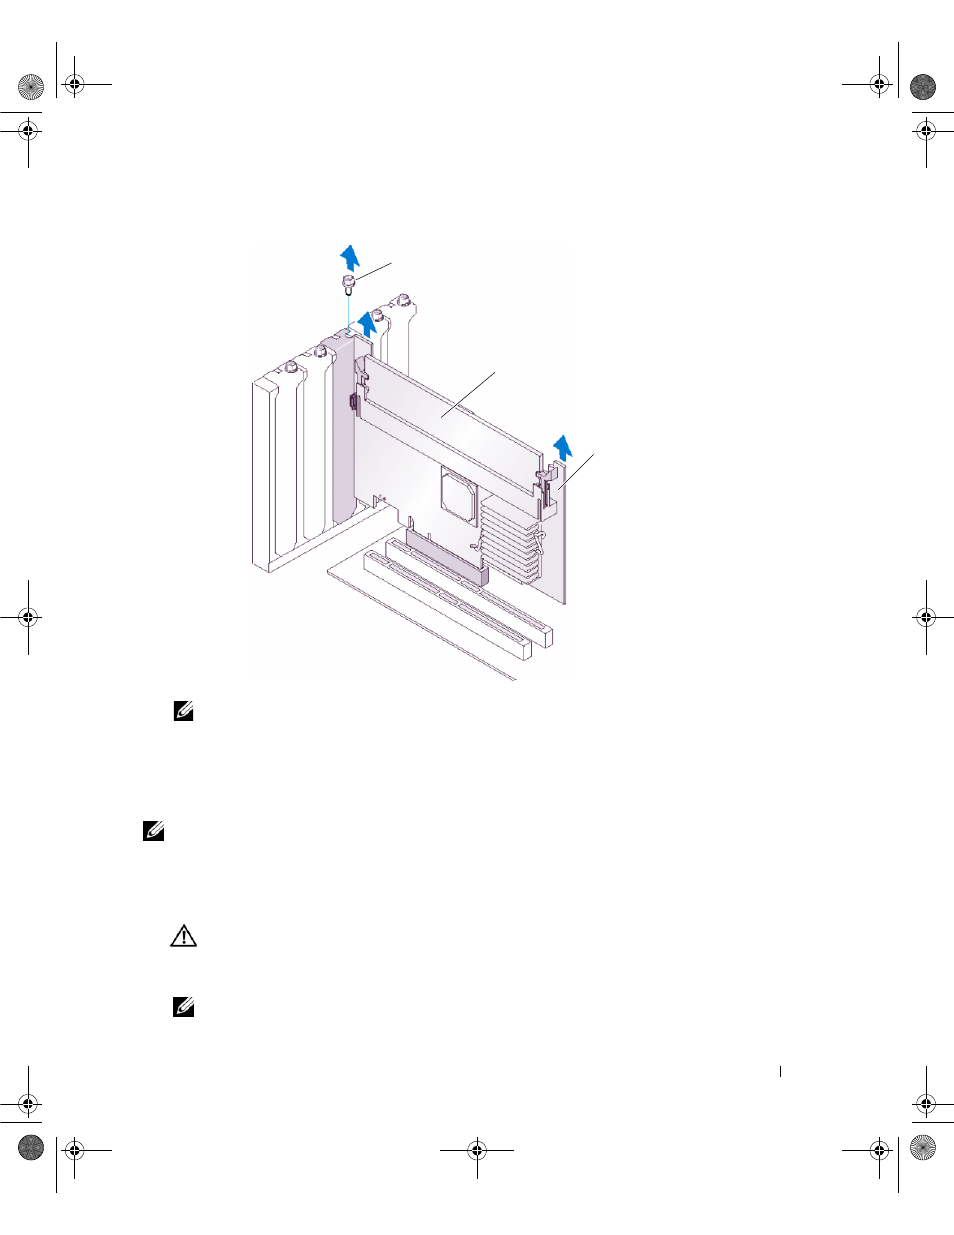
Figure 3-11.
Removing the PERC 5/i Adapter
NOTE:
See the Hardware Owner's Manual for information on removing the PERC 5/i from the system.
Removing the DIMM from a PERC 5/i Card
This section describes how to remove the memory module on a PERC 5/i Adapter or PERC 5/i that is
currently installed in a system.
NOTE:
PERC 5 cards support DELL-qualified 256-MB DDRII 400MHz ECC-registered DIMMs with x16 DRAM
components. Installing unsupported memory causes the system to hang at POST.
1 Perform a controlled shutdown on the system in which the PERC 5/i is installed and remove the
PERC 5/i from the system by following the instructions detailed in the section "Removing the
PERC 5/i Adapter" on page 35.
CAUTION:
Running a system without the system cover installed can cause damage due to improper cooling.
2 Remove the DIMM by pressing down on the tabs at each edge of the DIMM connector and lifting the
DIMM off the controller.
NOTE:
The location of the PERC 5/i varies from system to system. See the Hardware Owner’s Manual
that shipped with the system for specific information on the location of the PERC 5/i.
PERC 5/i Adapter
memory module
bracket screw
Dell_PERC5_UG.book Page 37 Tuesday, February 13, 2007 6:02 PM