Dell PowerEdge 1750 User Manual
Page 28
1-22
Ra c k I n s t a l l a t i o n G u i d e
www
.dell.com | support.dell.com
4
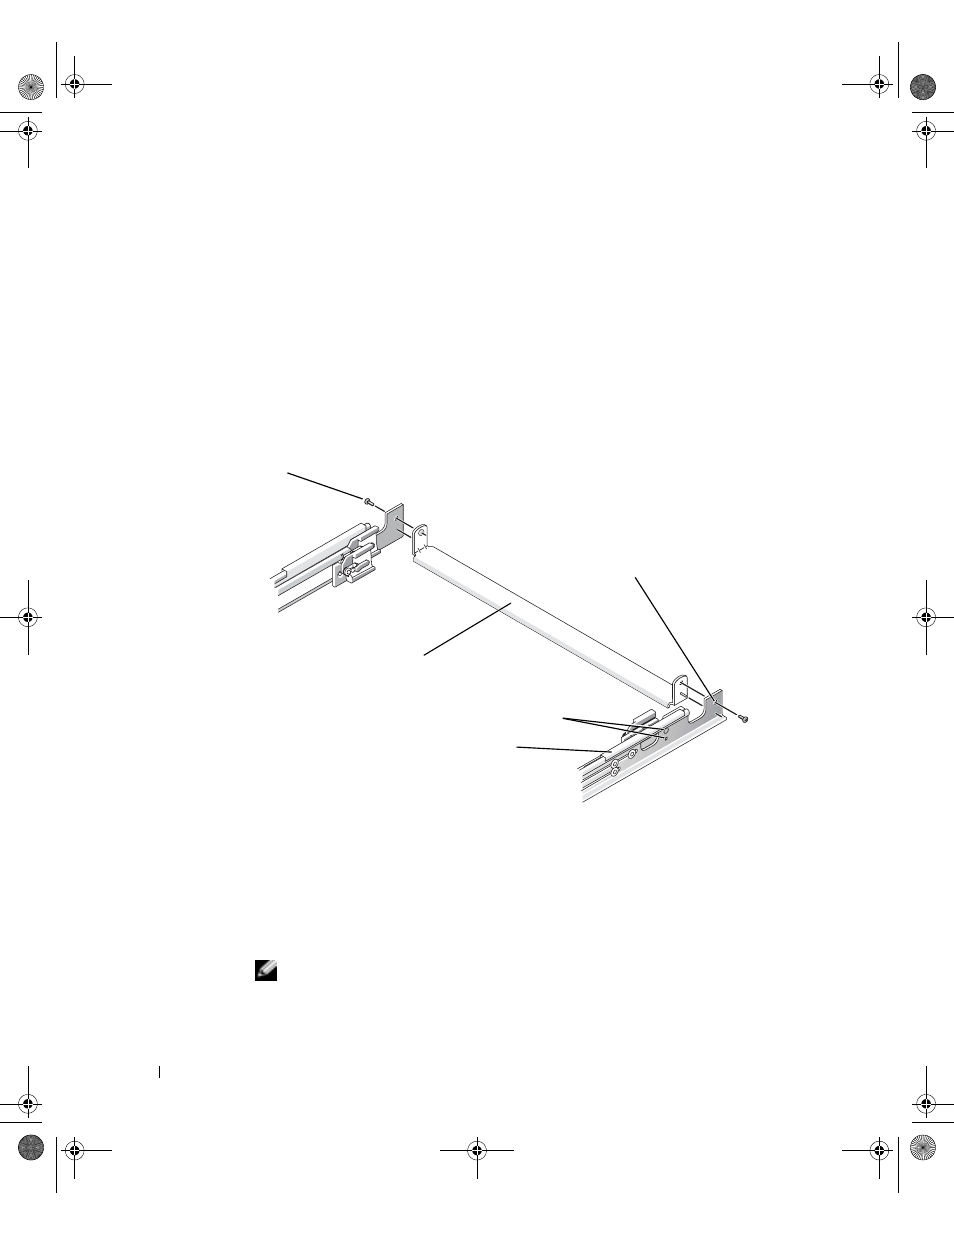
Install the stiffening bracket into the appropriate holes at the back of the slide
assemblies and secure the bracket with a 12-24 x 0.5-inch pan-head Phillips screw on
each slide assembly (see Figure 1-16).
If the vertical rack is 3 inches wide, use the holes at the back end of the slide
assemblies (shown in Figure 1-16). If the vertical rack is 6 inches wide, use the holes
located 3 inches in front of the holes at the back end of the slide assemblies.
F i g u r e 1 - 1 6 .
I n s t a l l i n g t h e S t i f f e n i n g B r a c k e t ( s h o w n i n 3 - i n c h r a c k
p o s i t i o n )
Flush-Mount Installation
The two-post rack kit is shipped configured for center-mount installation. To prepare the
slide assemblies for flush-mount installation, perform the following steps:
1
Locate the two slide assemblies and place them, side by side, on a smooth work
surface, with the front ends of the slide assemblies toward you. Position both slide
assemblies so that the center brackets are facing upward (see Figure 1-17).
NOTE: To prepare the slides for flush-mount installation, remove the front mounting
bracket, rotate it 180 degrees, and reinstall it on the opposite slide assembly.
stiffening bracket
12-24 x 0.5-inch
pan-head Phillips
screw (1 per slide
assembly)
holes for stiffening bracket
with 6-inch racks
slide assembly
holes for stiffening bracket
with 3-inch racks
5X860eb0.fm Page 22 Monday, October 21, 2002 11:49 AM