Bio-Rad PharosFX™ and PharosFX Plus Systems User Manual
Page 36
2. Turn off the eraser.
3. Wait five minutes for the bulbs to cool.
4. Unplug the power cable.
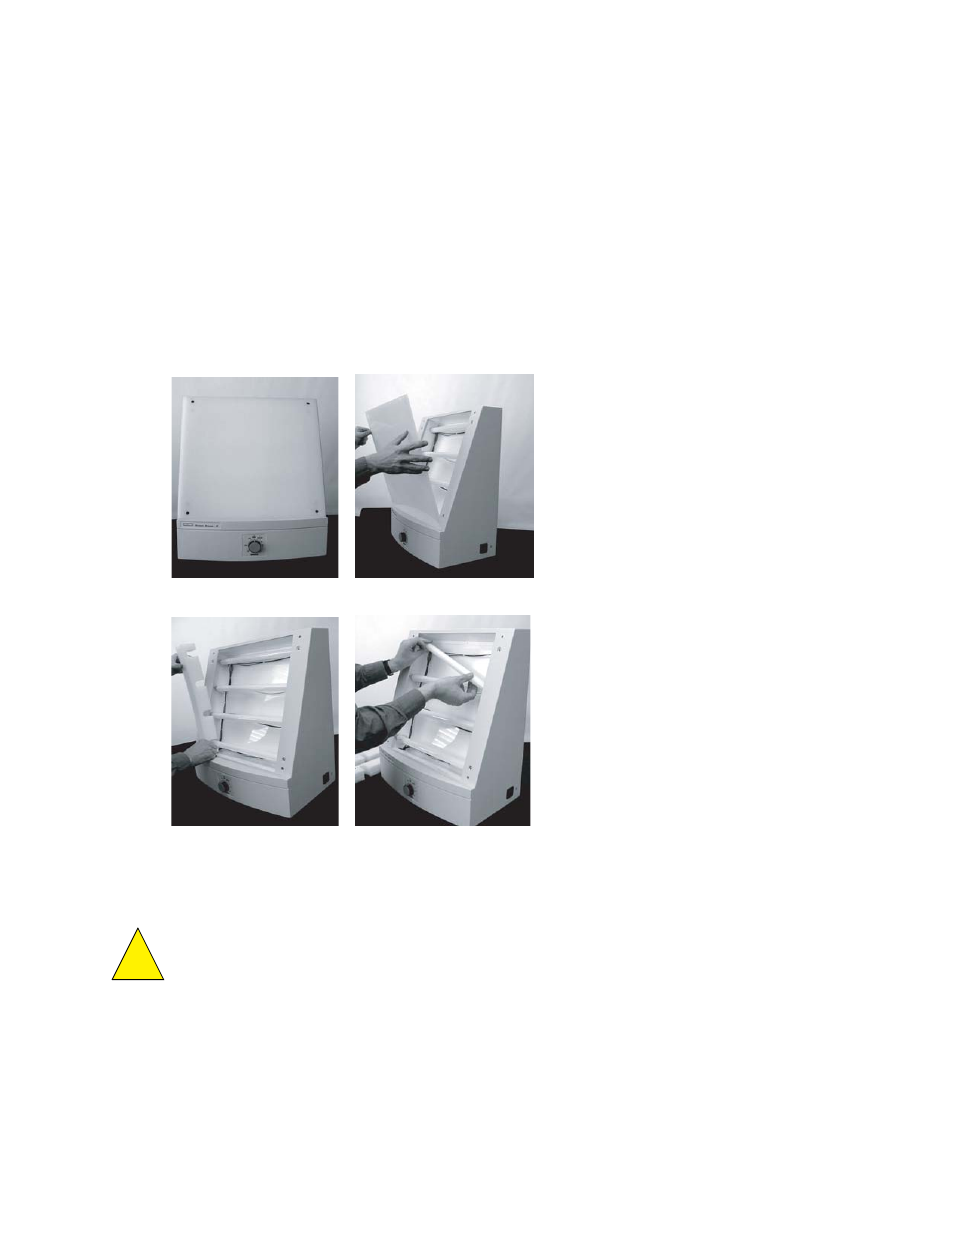
5. Open the four hex screws on the front of the eraser, using the hex tool stored on the
rear panel of the unit.
6. Remove the white plastic filter.
7. Remove the foam on both sides and replace the defective bulb.
8. Reassemble by reversing steps 4 to 7.
Step 6.
Step 7a
Step 7b
Fig. 5. Screen Eraser bulb replacement steps.
Caution: Use only 15 W bulbs. Higher wattage bulbs can damage the imaging screens
and weaker bulbs will not erase the screens effectively.
32
!
See also other documents in the category Bio-Rad Accessories for water:
- TransFectin™ Lipid Reagent (2 pages)
- Gene Pulser MXcell™ Electroporation System (19 pages)
- Gene Pulser MXcell™ Electroporation System (66 pages)
- Gene Pulser Xcell™ Electroporation Systems (83 pages)
- Gene Pulser® Electroporation Buffer (2 pages)
- MicroPulser™ Electroporator (31 pages)
- Helios® Gene Gun System (52 pages)
- PDS-1000 / He™ and Hepta™ Systems (51 pages)
- Criterion™ TGX Stain-Free™ Precast Gels (16 pages)
- TGX™ FastCast™ Acrylamide Solutions (2 pages)
- Criterion Stain Free™ Tris-HCl Gels (96 pages)
- Image Lab™ Software (212 pages)
- Gel Doc™ EZ System (22 pages)
- Mini-PROTEAN® TGX™ Precast Gels (52 pages)
- ChemiDoc™ XRS+ System (50 pages)
- GS-800™ Calibrated Densitometer (444 pages)
- ChemiDoc™ MP System (8 pages)
- Image Lab™ Software (236 pages)
- ChemiDoc™ XRS+ System (42 pages)
- ChemiDoc™ XRS+ System (4 pages)
- Criterion™ TGX™ Precast Gels (60 pages)
- Criterion™ Cell (13 pages)
- Image Lab™ Software (260 pages)
- Criterion™ XT Bis-Tris Precast Gels (26 pages)
- 2-D Electrophoresis Workflow (14 pages)
- PROTEAN® i12™ IEF System (4 pages)
- ReadyPrep™ 2-D Starter Kit (28 pages)
- EXQuest Spot Cutter (81 pages)
- Fluorescent Protein Stains (27 pages)
- 2-D Electrophoresis Workflow (22 pages)
- 2-D Electrophoresis Workflow (20 pages)
- Ready Gel® Zymogram Precast Gels (46 pages)
- Mini-PROTEAN 2-D Electrophoresis Cell (44 pages)
- Precision Plus Protein™ Prestained Standards (3 pages)
- Precision Plus Protein™ Unstained Standards (16 pages)
- Prestained SDS-PAGE Standards (3 pages)
- Unstained SDS-PAGE Standards (3 pages)
- Silver Stains (20 pages)
- Biotinylated Standards (3 pages)
- Biotinylated Standards (11 pages)
- IEF and 2-D Standards (3 pages)
- Mini-PROTEAN 2-D Electrophoresis Cell (20 pages)
- Mini-PROTEAN® Tetra Handcast Systems (10 pages)
- Mini-PROTEAN 3 Multi-Casting Chamber (10 pages)
- PROTEAN® Plus Hinged Spacer Plates and Combs (21 pages)