7 load the chip – Bio-Rad Experion Protein Analysis Kits User Manual
Page 17
3.7 Load the Chip
1. Using a pipet, remove and discard any remaining GS from the gel priming well. Pipet 12 µl GS into all
4 wells labeled GS (including the gel priming well, Figure 3.2).
2. Pipet 12 µl filtered gel (G) into the well labeled G (Figure 3.2).
3. Pipet 6 µl of each diluted sample into sample wells 1–10.
4. Pipet 6 µl diluted Pro260 ladder into the ladder well labeled L (Figure 3.2). Use the Pro260 ladder
within 8 hr of preparation. Every chip must have Pro260 ladder loaded into the ladder well labeled L.
Technical Support: 1-800-4BIORAD • 1-800-424-6723 • www.bio-rad.com
13
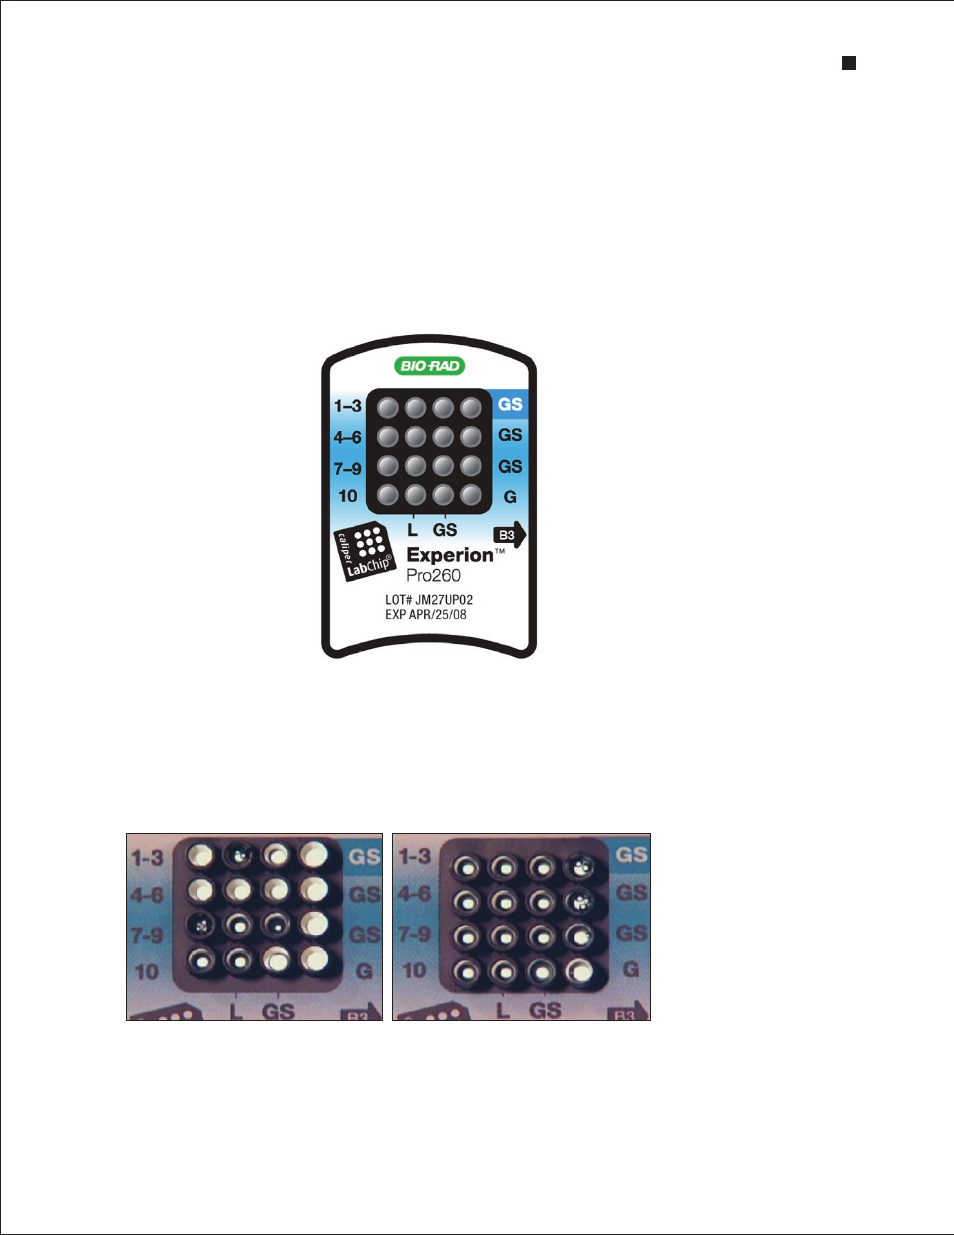
Fig . 3 .2 . Experion Pro260 chip . Wells for loading GS, G, samples, and ladder are indicated.
5. Inspect all wells for bubbles by holding the chip above a light-colored background and looking
through the wells (Figure 3.3). Dislodge any bubbles at the bottom of a well with a clean pipet tip or
by removing and reloading the solution.
6. Place the loaded chip into the Experion electrophoresis station and start the run within 5 min.
Fig . 3 .3 . Bubble formation during loading of Experion Pro260 chips . Surface bubbles do not generally cause
problems during a run, but bubbles at the bottoms of wells must be removed. Left, bubbles trapped at the bottom of
wells. The GS and G wells and sample wells 1, 3, and 4–6 contain no solution. Wells 8, 10, and L are filled properly and
have no bubbles, but large bubbles have formed at the bottoms of wells 7 and 9 (note the difference in the diameter of
the light-colored circles in wells 8 and 9). Right, bubbles have formed at the surface of the three GS wells on the right
side of the chip; the rest of the wells have no bubbles.
Experion Pro260 Analysis Kit
Load 12 µl G into well labeled
G
Load 12 µl GS into all 4 wells labeled
GS
Load 6 µl ladder into well
labeled
L
Load 6 µl sample into wells
1–10