Connect seed hose rack – Great Plains 3PYP Predelivery Manual User Manual
Page 36
32 3PYP
401-312Q
07/19/2011
Connect Seed Hose Rack
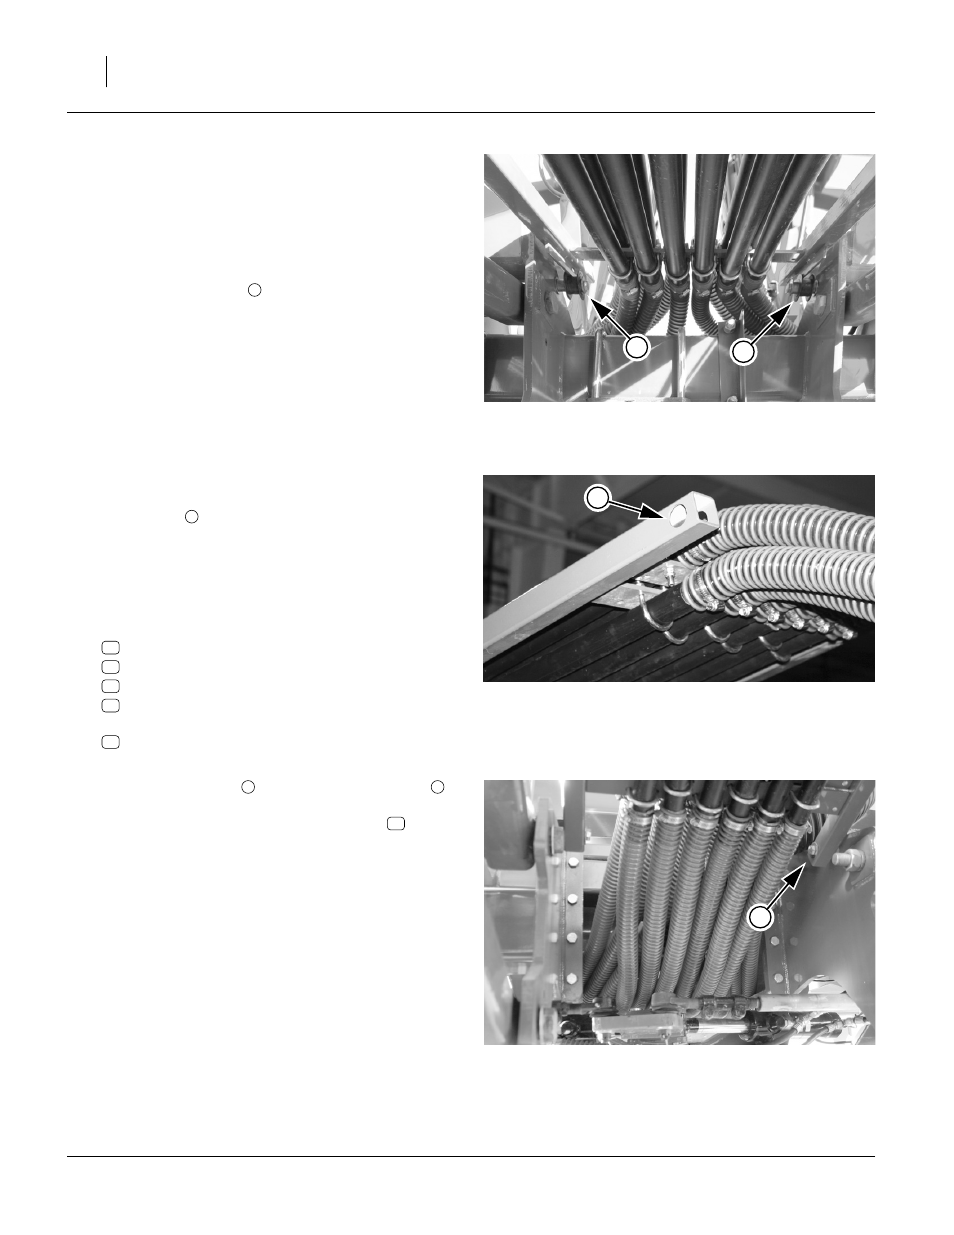
Refer to Figure 57
For shipping, the seed tube hoses and rack are turned
forward and set on top of the main section. The seed
tubes/rack need to be unfolded back and connected to
the air box manifold.
105. Note the idler spools
on each side of the inner
rear portion of the parallel arm brackets. The for-
ward end of the rack rests on these and is free to
slide during vertical movement of planter compo-
nents.
106. Cut the bands holding the hose rack forward.
The following process works best with two people.
107. Lift and flip the seed tube rack up and over towards
the rear.
Refer to Figure 58
The rear ends of the outside tubes of the seed tube rack
have large holes
to accept a pivot sleeve for mounting.
Refer to Figure 59
The hardware for this mount is normally pre-installed on
the rear parallel arm flange weldments, but may be in the
miscellaneous crate.
108. Select or remove two sets of:
803-020C NUT HEX 1/2-13 PLT
804-015C WASHER LOCK SPRING 1/2 PLT
120-306D TUBE RND 1 OD X 7/32W X 2.13
802-042C HHCS 1/2-13X3 3/4 GR5
and two (four total):
804-113C WASHER FLAT 1/2 USS HARD PLT
Place the lock washer on the bolt.
109. Align the rack holes
with the weldment holes
.
Insert a bolt with lock washer from the outside of the
weldment flange. Add a large flat washer
.
110. Place the 1in diameter tube inside the rack arm hole
and over the bolt threads.
111. Add the large flat washer and secure with lock
washer and nut.
The next activity (connecting seed hoses to the air box
manifold) requires the port mapping tables on the follow-
ing two pages. Installation steps resume on page 35.
FigureSpacer:
Figure 57
Seed Tube Rack, Below Forward
29170
1
1
1
FigureSpacer:
Figure 58
Rear Rack Pivot Hole
25379
2
2
35
44
12
46
48
FigureSpacer:
Figure 59
Rack Pivot Installed
29173
3
2
3
48