Inner wing locks in field, Inner wing locks pre-fold – Great Plains NP4000 40-foot Operator Manual User Manual
Page 37
Great Plains Manufacturing, Inc.
Operating Instructions
33
2012-03-28
407-776M
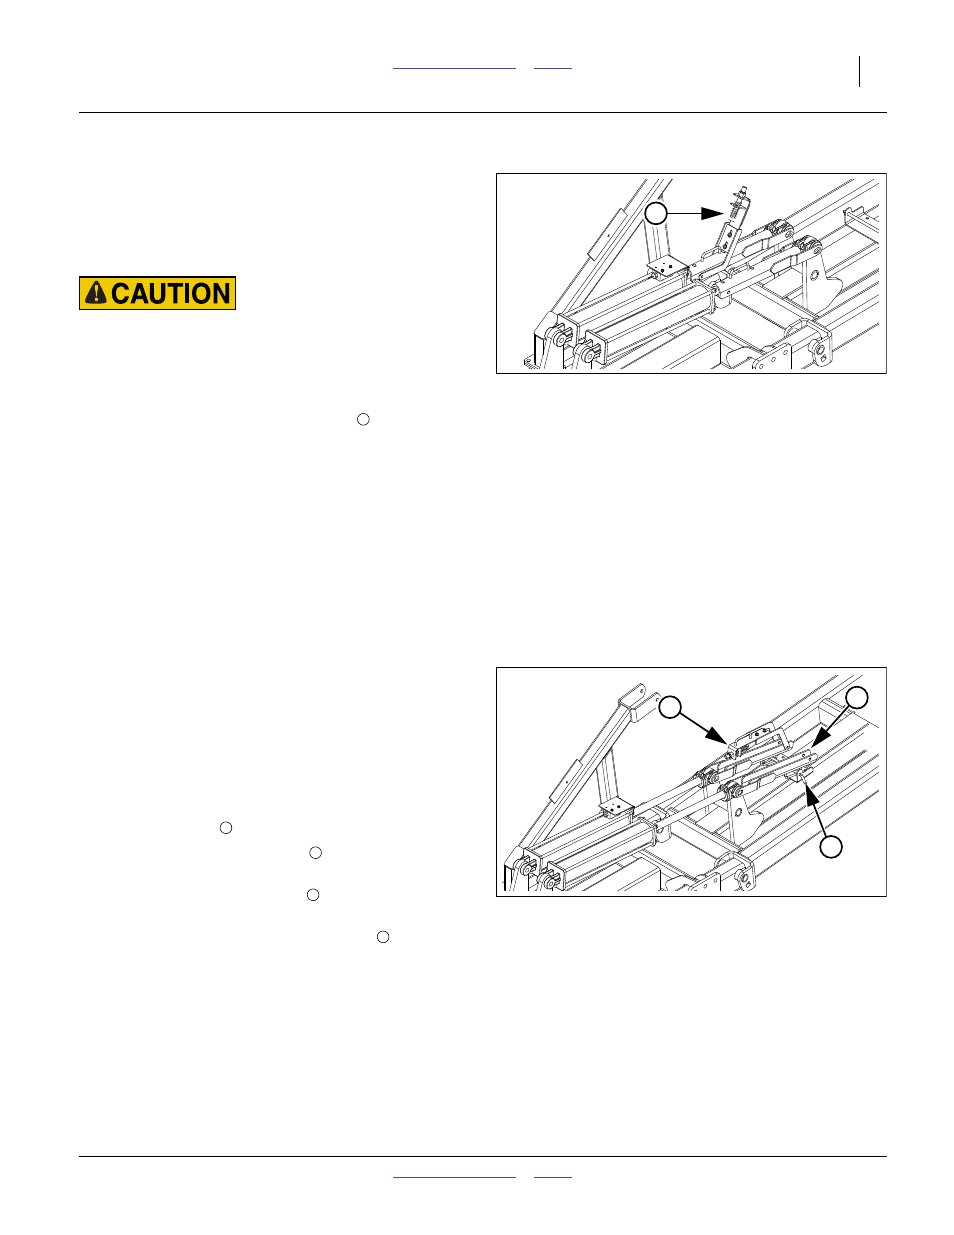
Inner Wing Locks in Field
See “Raising/Lowering Applicator” on page 35 for
complete field lift and lower instructions.
Refer to Figure 20
1.
After initial unfold is complete (including outer wings,
see page 37), set the fold circuit to Neutral.
Crushing Hazard:
Keep body parts clear of, and not beneath blades and knives
when performing the next step. If the hydraulics are damaged
or incorrectly configured, some vertical motion could occur
when the spring-plunger is disengaged.
2.
Rotate the spring-plunger assembly
outward onto
the lock channel.
Note: Normally, nothing happens when the plunger is
disengaged. The actuator of the stroke control
valve remains depressed until the next step.
3.
As needed, set or reset the height of the wing gauge
wheels.
4.
Retract the fold circuit slightly. This resets (releases)
the stroke control valve.
5.
Extend the fold circuit until the gauge wheels are in
ground contact.
6.
Set the fold circuit to Float.
Inner Wing Locks Pre-Fold
See “Unfolding and Folding” on page 37 for complete
unfolding and folding instructions.
Refer to Figure 21
1.
As needed, extend the fold circuit to free the inner
wing lock channels. If the inner wing is partially
raised, the channels may be captured by the bolts at
the cylinder faces.
2.
Remove the pin
at the holder.
3.
Rotate the front lock channel
fully outward.
4.
Rotate the rear lock channel outward, while rotating
the spring-plunger assembly
inward, until the rear
lock channel rests in the holder.
5.
Secure both lock channels with the pin
.
Figure 20
Inner Wing Locks: Field
34105
5
5
Figure 21
Inner Wing Locks: Pre-Fold
34106
3
1
5
3
1
5
3