Seed firmer adjustments, Keeton seed firmer adjustment – Great Plains YP1220 Operator Manual User Manual
Page 51
Great Plains Manufacturing, Inc.
Adjustments
47
03/14/2012
401-506M
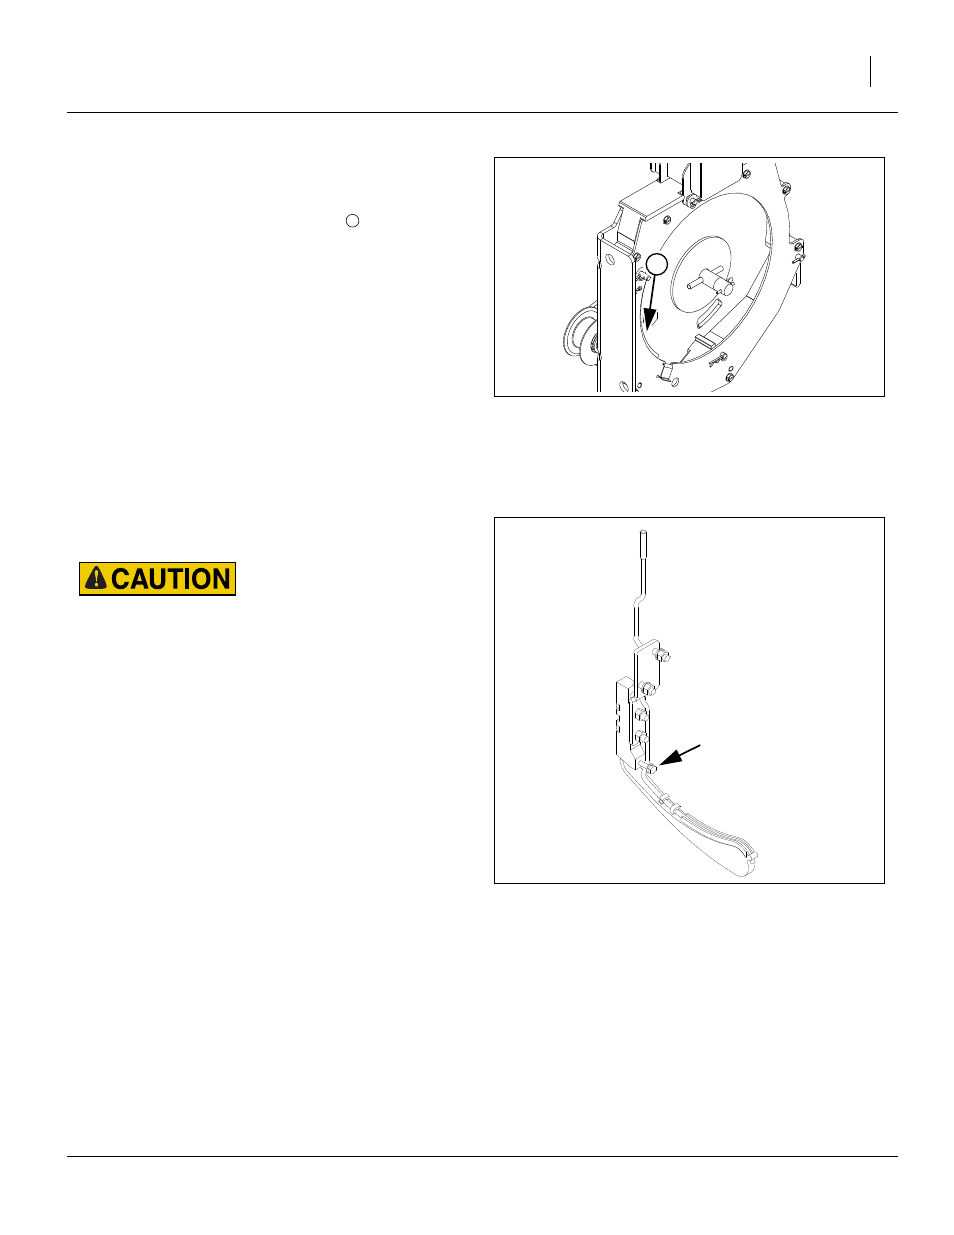
Refer to Figure 54
Note: With the seed meter wheel removed, you may want
to check the meter for internal damage or trash.
Note: Some wear on top edge of slide
is normal. Ex-
cess wear is cause for replacement.
6.
When changing crops be sure to clean out air sys-
tem before installing new meters or wheels. “Clean-
ing Out Air System” on page 59.
Note: When installing a seed wheel that requires Flow
Gate, also remove the meter slide. If replacing a
rice wheel with another seed wheel, re-install the
meter slide. See page 58.
7.
Place new wheel on meter wheel shaft. Seat wheel
fully on cross-pin.
8.
Replace spring-loaded wheel retainer. Make
1
⁄
4
turn
to seat cross-pin in shallow groove of retainer.
Seed Firmer Adjustments
20 Series row units include a seed flap, and accept one
of two optional firmers.
Sharp Object Hazard:
Row unit disk blades may be sharp. Use caution when making
adjustments. To adjust the Keeton Firmer, lower the planter
until the disks of the row units are resting on the ground.
Keeton Seed Firmer Adjustment
The optional Keeton Seed Firmer is an engineered poly-
mer shape that slides down the seed trench. It traps
seeds as they exit the seed tube and firms them into the
bottom of the furrow.
Refer to Figure 55
The Firmer is provided with a preset tension which is rec-
ommended for using the first year. The tension screw
can
➂
be tightened in subsequent years according to
your needs. Firmers should provide just enough tension
to push seeds to the bottom of the trench.
Measure the distance from the ground to the head of the
tension screw. This distance should be 4 to 4
1
⁄
2
in. If not,
loosen the bolts in the mounting bracket and select differ-
ent holes until the proper measurement is attained.
Figure 54
Inspect Meter
27462
1
1
Figure 55
Keeton Seed Firmer
20327
➂