05 power supply parts replacement – Tweco PakMaster 100XL Plus User Manual
Page 33
Manual 0-2784
27
SECTION 5: SERVICE
I. AC POWER indicator ON; Fans operate; No gas
flow
1. Gas not connected or pressure too low
a. Check source for at least 70 psi (4.8 bar).
2. Gas supply pressure too high
a. Max 125 PSI inlet pressure
3. Faulty components in unit
a. Return for repair or have qualified technician
repair per Service Manual.
J. Torch cuts but not adequately
1. Drag circuit active
a. Lift tip from work piece.
2. Current set too low
a. Increase current setting.
3. Torch is being moved too fast across workpiece
a. Reduce cutting speed (refer to Instruction
Manual supplied with torch.
4. Excessive oil or moisture in torch
a. Hold torch 1/8 inch (3 mm) from clean surface
while purging and observe oil or moisture
buildup (do not activate torch)
5.05 Power Supply Parts
Replacement
WARNING
Disconnect primary power to the system before dis-
assembling the torch, leads, or power supply.
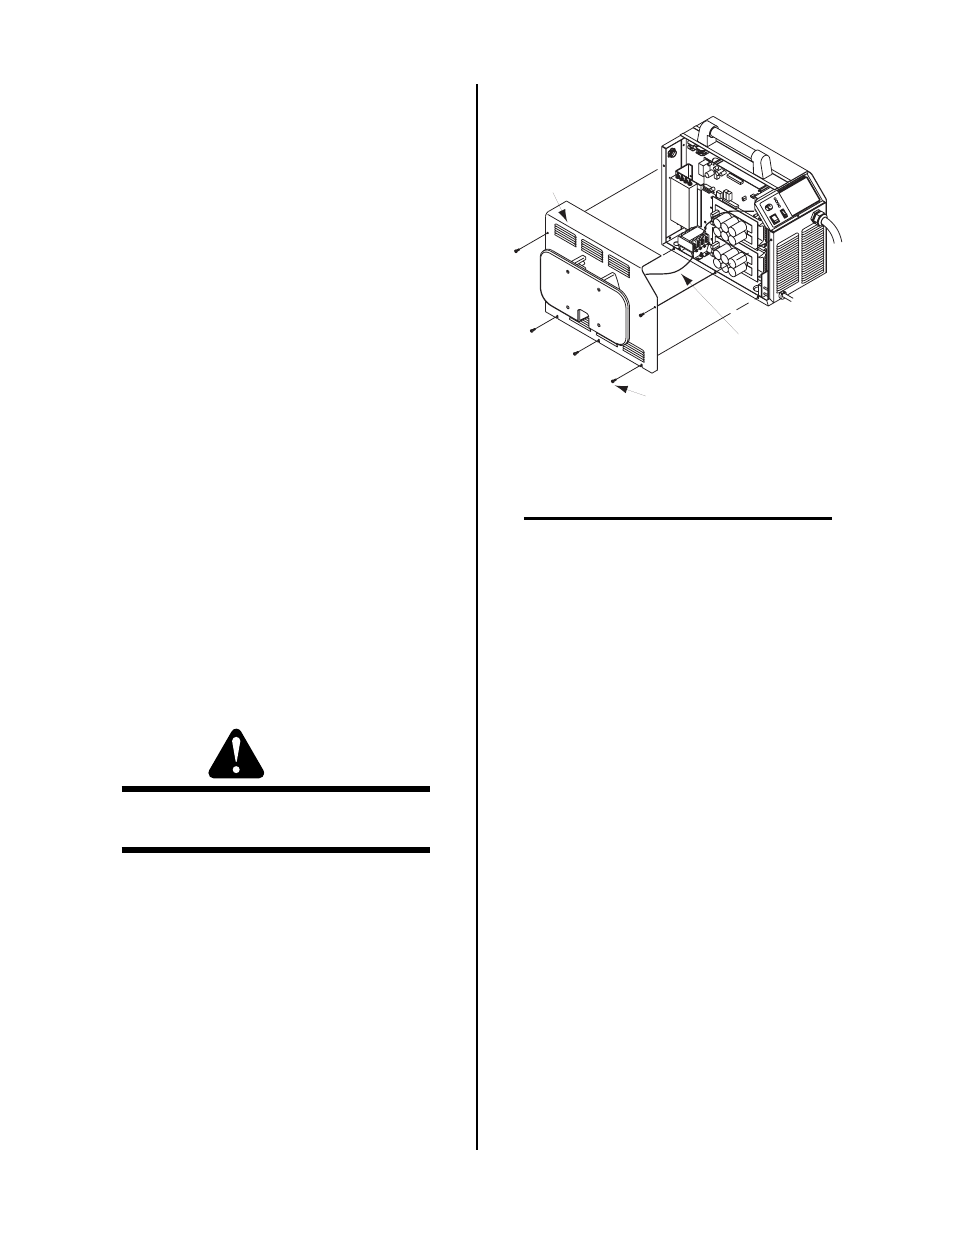
A. Left Side Panel Removal
1. Using a phillips head screw driver remove the five
screws which secure the left side panel (viewed
from front of unit) to the frame assembly.
A-02612
Left Side
Panel
Screws
(5 places)
Ground Wire
Figure 5-3 Left Side Panel Removal
NOTE
There is a ground wire connection to the Left Side
Panel on the inside of the unit. There is no need to
disconnect the ground wire.
2. Carefully pull the Left Side Panel up and away
from the unit to gain access to the inside of the
unit.
3. To reinstall the left side panel do the following:
a. Place the left side panel onto the frame and
slide the top edge under the lip on the top of
the right side panel.
b. Reinstall all the screws to secure the left side
panel.
B. Fuse Replacement
1. Remove the left side panel per paragraph "A"
above.
2. Locate the internal fuse above the input power con-
tactor on the left side of the unit.
3. Replace the fuse (0.8 amp, 600V).
4. Reinstall the left side panel per paragraph "A"
above.