E-flite P-51B Mustang 32e ARF User Manual
Page 6
6
E-flite P-51B Mustang 32e ARF Assembly Manual
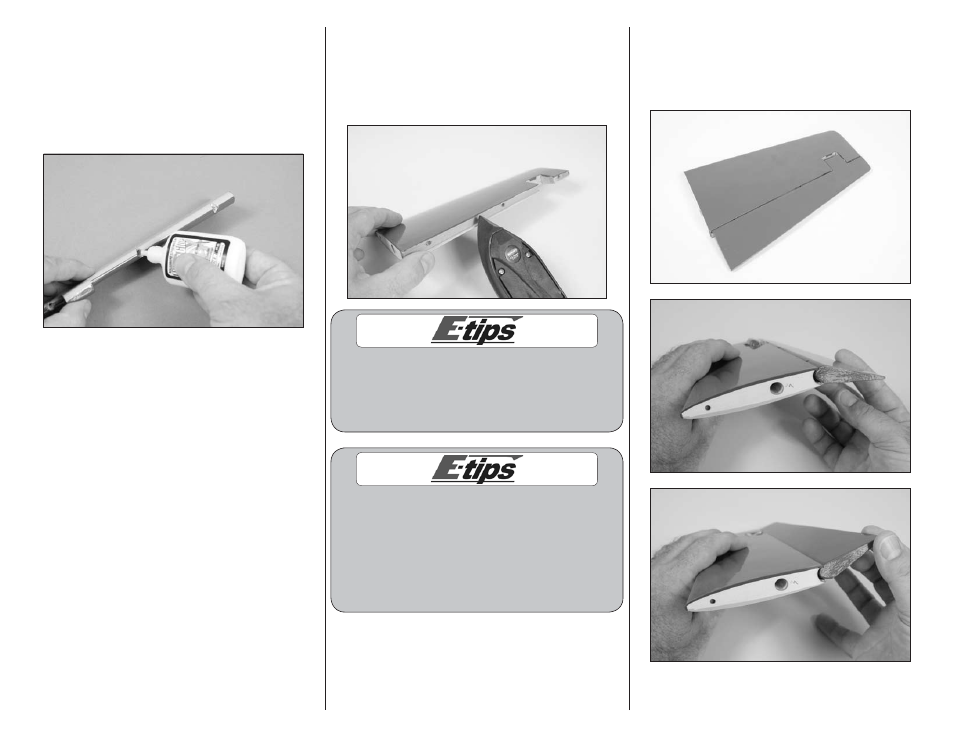
7. Remove the hinges and apply a small amount of
hinge glue in each of the holes in the control surface
for the hinges. Follow Steps 5 and 6 to insert the
hinges in the control surface. Allow the adhesive
to fully cure before attaching the control surface.
Attaching the control surface before the adhesive
cures may change the location of the hinge and
cause binding.
8. Once the hinges are in place, use a paper towel
and the appropriate solvent (water for hinge glue,
rubbing alcohol for epoxy) to remove any excess
adhesive that may have seeped out when the hinges
were installed.
9. Repeat Steps 1 through 8 for the
remaining stabilizer and elevator, as well as the
ailerons and rudder. Do not hinge the flaps at
this time.
10. While the hinge glue is curing, use a covering
iron or trim seal tool to iron the covering on the
fixed surface. Make sure the covering has no
wrinkles and is ironed tightly, especially near the
hinge line of the surfaces. Check the stabilizers,
wing and fuselage at this time.
Read through the following steps on positioning the
control surfaces before applying any glue. Improper
installation of the surfaces will cause the control
surfaces to bind, which can cause premature drain
on the battery or even damage to the servos.
Ensure you have at least this much control
throw when surfaces are installed.
Elevator:
1/2-inch (13mm) up and down
Aileron:
3/8-inch (9mm) up and down
Rudder:
1
1
/
4
-inch (32mm) right and left
11. Fit the control surface to the fixed surface.
Check that the control surface can move to the
throws specified without any binding. If binding
occurs, adjust the position or determine where the
binding is occurring and correct as necessary.