E-flite P-51B Mustang 32e ARF User Manual
Page 37
37
E-flite P-51B Mustang 32e ARF Assembly Manual
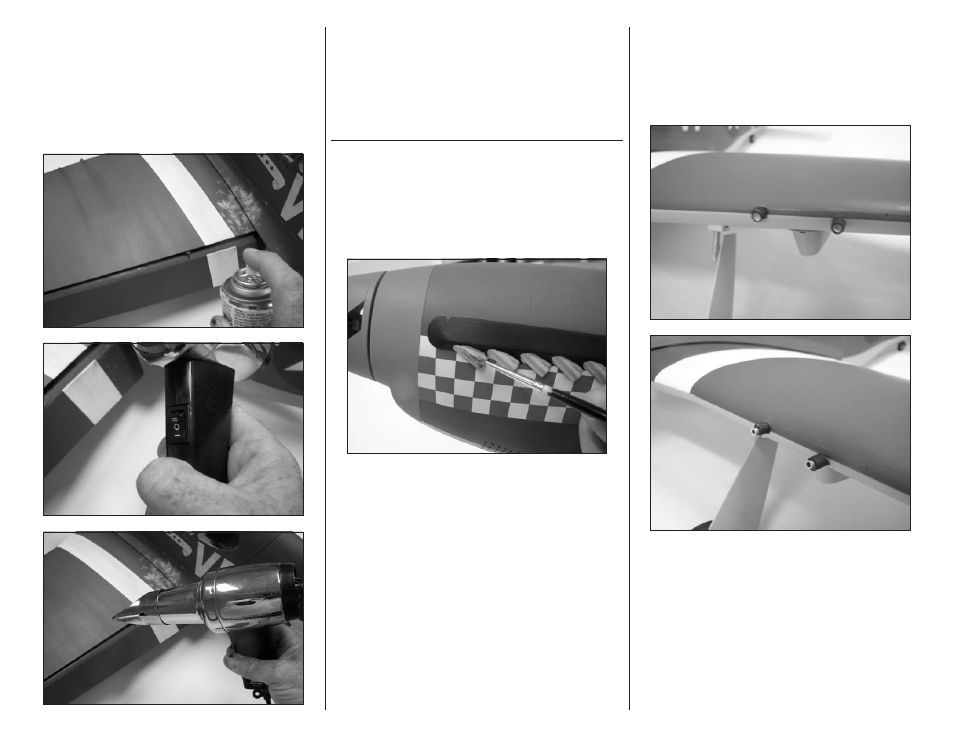
4. Using the dullcote lacquer – mist the entire model
lightly. The key is several light mist coats. Spray
a section at a time. Once you have sprayed the
dullcote lacquer use a heat gun on the low setting
about 8–12 inches (200mm–300mm) above the
surface to help accelerate the drying time. We have
found it takes between 3–4 coats to get a nice even
coverage and a truly flat finish.
5. You should now be looking at a brand new
clean and flat North American P-51B Mustang
straight out of the factory as it would be in 1943.
You may wish to stop here or continue to add some
weathering to your model and make it even more
personalized to your taste.
BASIC WEAThERING AND DETAILS
1. We want to start by painting the exhaust pipes
aluminum. Using a small #2 detail brush and
some aluminum paint, brush 2 light coats on
the exhaust pipes of the manifolds until they are
silver in color. These need to dry fully before you
weather them further.
2. Using a razor blade cut four pieces of 1/8–inch
(3mm) diameter aluminum tubing into lengths
approximately 3/16–inch (5mm) long.
3. Using a drill with a 1/8-inch (3mm) drill bit, drill
a hole in the center of each machine gun. This hole
needs to be approximately 1/8-inch (3mm) deep.
4. Now using medium CA glue in a piece of the
aluminum tube you cut earlier into each gun. The
end result is a nice barrel sticking out of the wooden
gun approximately 3/32-inch (2mm). Although not
perfectly correct for the scale enthusiast, this delivers
a more real look to the model.