Flap servo installation – E-flite P-51B Mustang 32e ARF User Manual
Page 22
22
E-flite P-51B Mustang 32e ARF Assembly Manual
18. Slide a silicone clevis retainer over a nylon
clevis. Thread the clevis on the pushrod wire. With
the radio system on and the aileron servo centered,
connect the clevis to the outer hole of the control
horn. It may be necessary to adjust the clevis so it
lines up with the control horn. Once attached, slide
the clevis retainer over the forks of the clevis to
prevent it from opening accidentally.
19. Repeat Steps 1 through 18 to install the
remaining aileron servo and linkage.
20. Remove the tape holding the flaps and ailerons
on both wing panels. Also make sure your radio
system has been turned off as to not run the
batteries down.
Flap Servo Installation
Required Parts
Wing panel (right and left)
Transmitter
Receiver
Nylon clevis (2)
Silicone clevis retainer (2)
Receiver battery
Servo with hardware (2)
2mm x 8mm sheet metal screw with shoulder (8)
3-inch (76mm) pushrod wire (2)
Required Tools and Adhesives
Thin CA
Low-tack tape
Ruler
Phillips screwdriver: #1
Side cutter
Pin vise
Felt-tipped pen
Drill bit: 5/64-inch (2mm)
Before starting the installation of the flap servos,
set the throw for the flaps to 0% in both the UP
and DOWN positions. This will center the flap
servo and allow for adjustment once the flap servo
and linkage are installed in the wing and prevent
any damage to the servo or control surface.
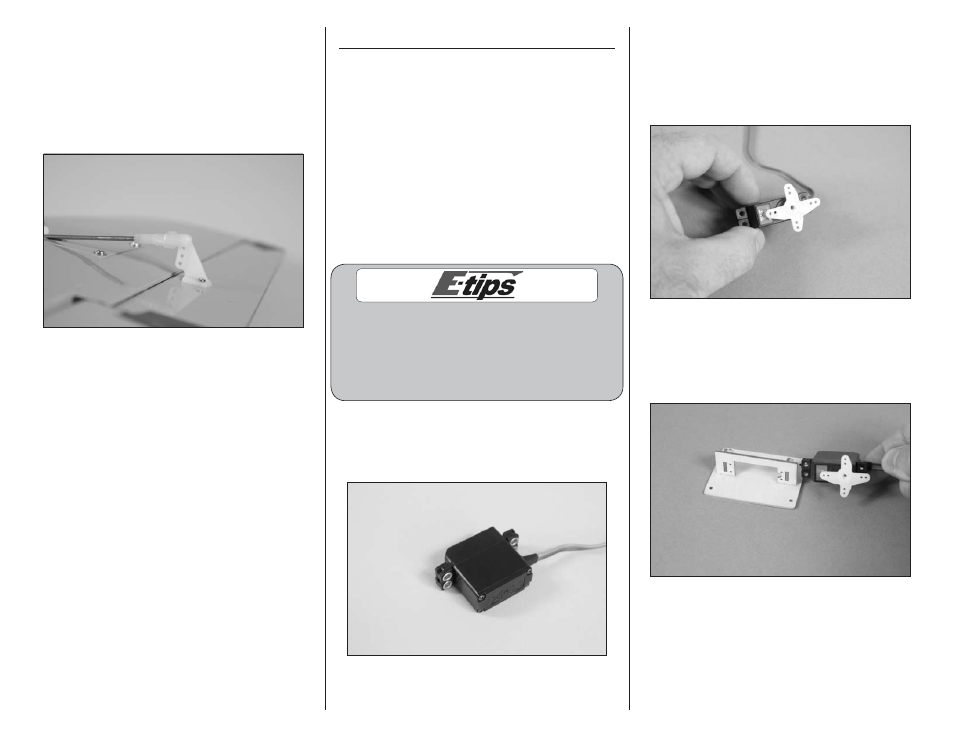
1. Prepare the flap servo by installing the
brass eyelets and rubber grommets in the servo.
Also remove the stock servo horn using a #1
Phillips screwdriver.
2. Use the radio system to center the flap servo.
Place the servo horn on the servo so the longer
portion of the arm is parallel to the servo center
line. If the horn does not align, rotate the horn
180-degrees, as there are an odd number of splines
on the servo output.
3. Check the servo in relationship to the flap servo
cover. The notch in the cover mount will be located
where the lead exits the flap servo. Use a felt-tipped
pen to mark the arm on the servo horn that faces
away from the servo cover.