Hinging the control surfaces – E-flite P-51B Mustang 32e ARF User Manual
Page 5
5
E-flite P-51B Mustang 32e ARF Assembly Manual
hinging the Control Surfaces
Required Parts
Fuselage
Rudder
Nylon hinge (20 total)
Stabilizer and elevator (right and left)
Hinge template: rudder, elevator and aileron
Wing panel with control surfaces (right and left)
Required Tools and Adhesives
Covering iron
Trim seal tool
Petroleum jelly
Paper towel
Toothpick
Ruler
Felt-tipped pen
Hinge glue
Water
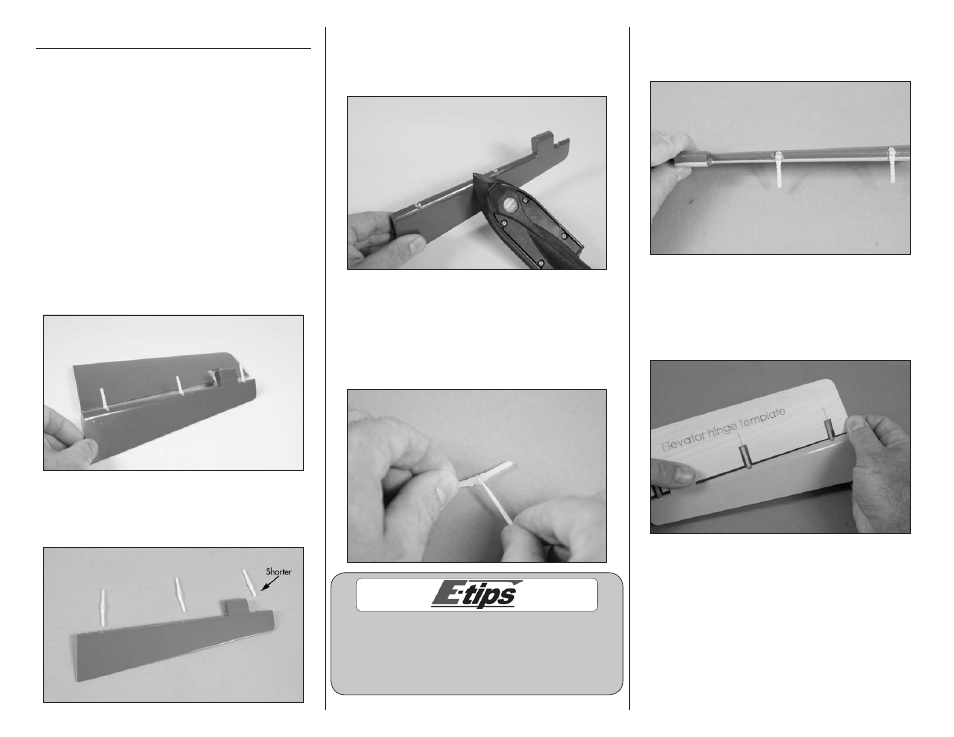
1. Locate the stabilizer assembly. Carefully remove
the elevator from the stabilizer.
2. Remove the hinges from the elevator. Note that
the hinge at the tip has been trimmed shorter than
the remaining hinges.
3. Use a trim seal tool and covering iron to iron the
covering down on the control surface. Make sure
the covering is smooth around the hinge line or it
might bind when installed.
4. Prepare the hinges by applying a small amount
of petroleum jelly using a toothpick to the knuckle
of the hinge. Work the hinge so the petroleum jelly
penetrates the hinge. The petroleom jelly will keep
the adhesive from entering the knuckle, causing the
hinge to bind.
Read through the following steps on positioning
the hinges before applying any glue. Improper
installation of the hinges will cause the control
surfaces to bind, which can cause premature drain
on the battery or even damage to the servos.
5. Insert the hinges into the control surface. Flex the
hinge in the direction of the control deflection. Check
that the hinge is perpendicular to the hinge line.
6. Check the depth of the hinges using the
appropriate template. The template will rest flush
against the hinge line with the end of the hinge
just touching the template as shown in line with the
center of the control surface.