Metrohm 817 Bioscan User Manual
Page 38
2 Installation
817 Bioscan
30
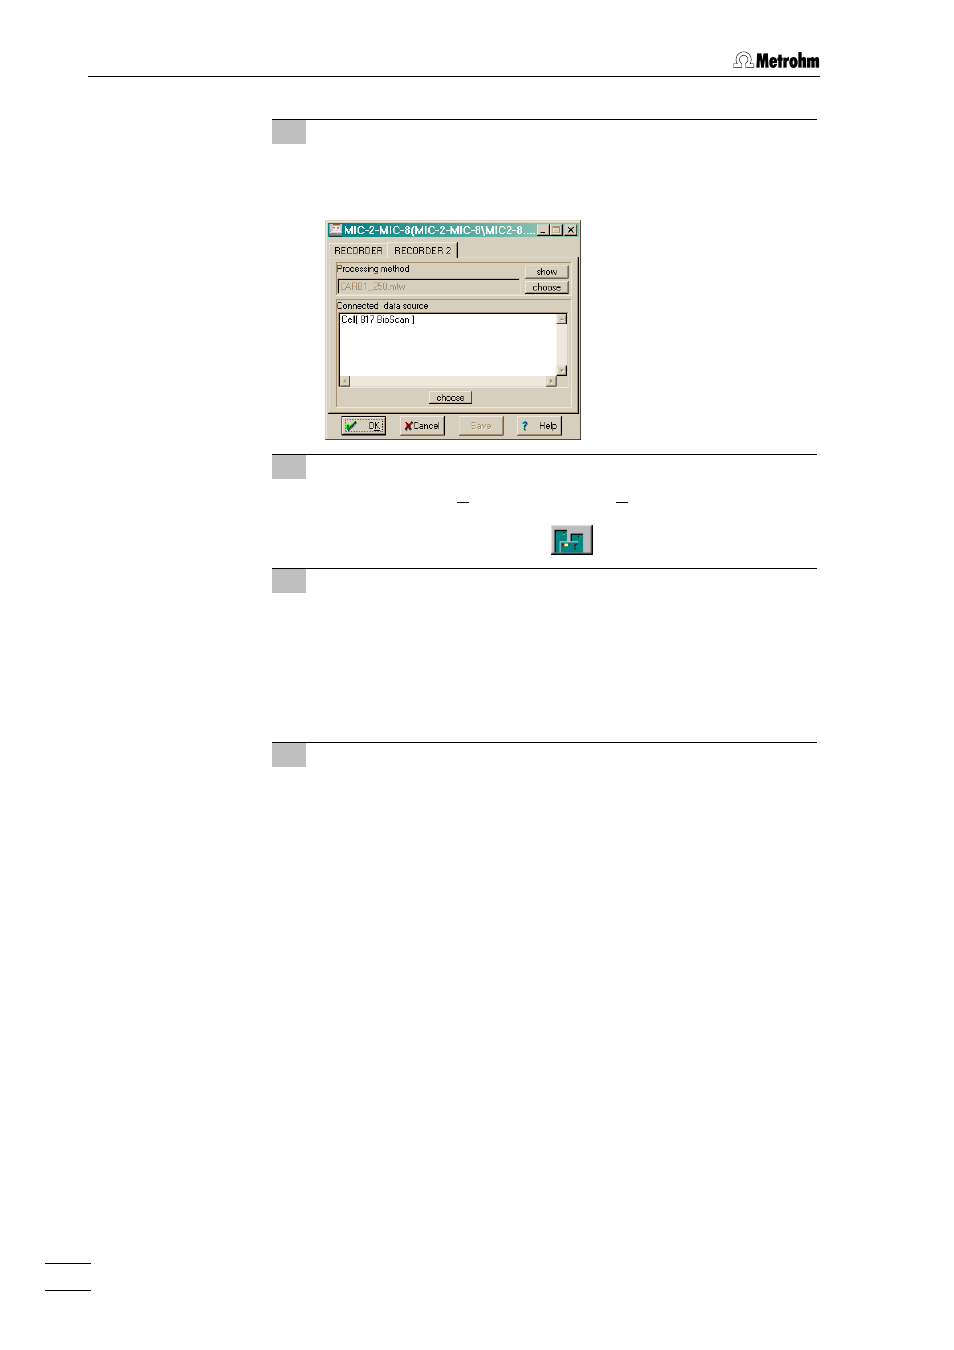
13 Bioscan method and data source
The Bioscan method and corresponding data source must be
selected in the
Setup
menu which can be accessed by a right-
hand mouse click on the second data recorder symbol.
14 Connect system with workplace
Under
SYSTEM / Control / Connect to workplace
connect the
new system with the workplace.
At the same time the symbol
appears in the symbol bar.
15 Check measuring cell
If the 817 Bioscan is switched on without the flow-through cell
being constantly rinsed by a conducting eluent (e.g. 0.1 M
NaOH) then the measuring cell must not be switched on!
You should now check this in the instrument window of the 817
Bioscan (accessed with a double-click with the mouse on in-
strument symbol) under
Manual / Cell
.
16 Check connections
You can now check the electronic connections to all modules.
This is done by double-clicking with the left-hand mouse key on
each instrument symbol. If the connection is functioning properly
then the current status of the instrument parameters will be
shown.
Remarks
• The event-line for the suppressor of the 753 Suppressor Module
is only set up as a "dummy connection" (Step 8). The real com-
mand for switching the suppressor further is made by the 766
Sample Changer via a remote line.
• For the installation described above the option
System face /
Stacked recorder icons
must be activated in IC Net 2.1 under
Options / Global preferences
. This is why only a symbol for the
data recorder is visible in the system overview. With a right-hand
mouse click and the offered
Setup
option the setting possibili-
ties described for both recorders man (Step 10 and Step 13)
can be accessed.