Installation instructions – Brandmotion 9002-1015 User Manual
Page 4
INSTALLATION INSTRUCTIONS
1015 Instructions 11-14-13.doc
4 of 6
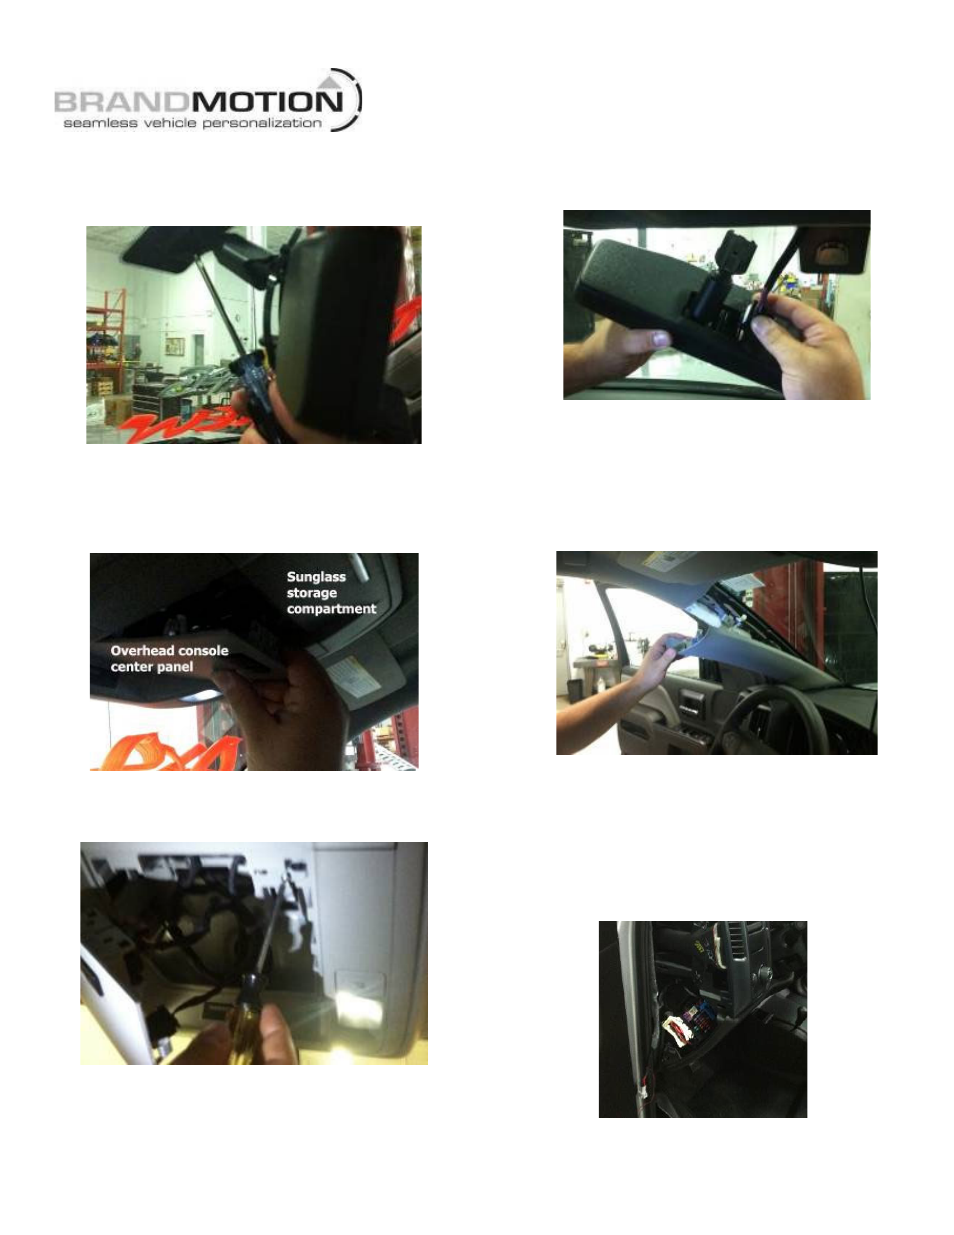
28. Use a T10 Torx Bit to loosen the screw that secures
the mirror and carefully slide mirror upward to
remove. (Figure 13)
Figure 13
29. Open sunglass storage compartment of vehicle
overhead console to gain access to the rear edge of
the center panel and gently release the retaining
clips of the center panel. (Figure 14)
Figure 14
30. Use a T10 Torx driver to remove (2) screws securing
the overhead console. (Figure 15)
Figure 15
31. Insert 16-pin mirror connector of supplied Mirror
Harness into supplied Mirror until it clicks into place
(Figure 16).
Figure 16
32. Route RCA connector of supplied Mirror Harness
through the center of the overhead console, out the
front edge of the headliner.
33. Remove driver side A-pillar cover using a Plastic
Trim Removal Tool. Work slowly, starting at the
headliner and moving down to the dash. (Figure 17)
Figure 17
34. Taking care not the interfere with existing airbag
harness or other wiring, route supplied Mirror
Harness down the A-pillar and secure with Wire Ties
(recommended).
35. Route supplied Mirror Harness through the end of
dash cover opening and toward the supplied Chassis
Harness. (Figure 18)
Figure 18