Mount the display computer in a panel – Rockwell Automation 6180P-xxxx Integrated Display Computers with Keypad User Manual User Manual
Page 23
Rockwell Automation Publication 6180P-UM001C-EN-P - February 2014
23
Installation
Chapter 2
Mount the Display Computer in a Panel
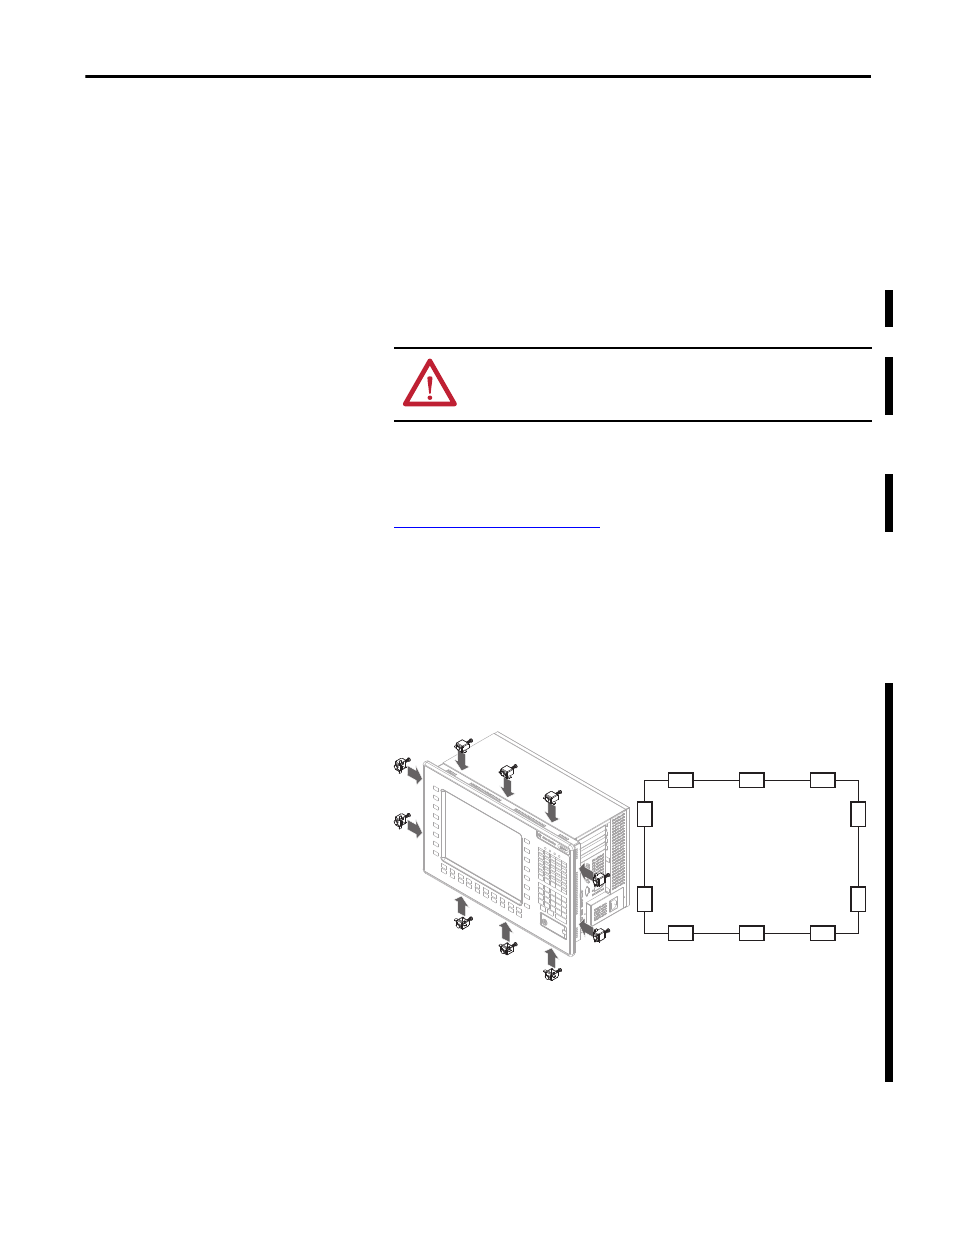
Mounting clips secure the computer to the panel, which total 10 for both
computer models.
Follow these steps to mount the computer in a panel.
1. Remove power from the panel.
2. Verify that the panel surface around the area to be cut is clean and free of
be debris.
3. Cut an opening in the panel using the appropriate panel cutout dimensions.
4. Attach cables to the computer before installation if rear access to the
computer will be limited after installation. For where to attach cables, see
Connect Peripherals on page 24
5. Make sure the sealing gasket is properly positioned on the computer.
This gasket forms a compression-type seal. Do not use sealing compounds.
6. Place the computer in the panel cutout.
7. Slide the mounting clips into the slots on the top, bottom, and sides of the
computer.
8. Hand-tighten the mounting clips around the bezel by following the
tightening sequence below.
9. Repeat this process at least three times until the clips are hand-tight and
the gasket is compressed uniformly against the panel.
10. Tighten the mounting clips to a torque of 1.4 N•m (12 lb•in.) by
following the torque sequence above, being sure to not overtighten.
ATTENTION: Take precautions so metal cuttings do not enter
components already installed in panel to avoid personal injury or
damage to the panel components.
5
4
3
6
9
1
10
8
2
7
Hand-tighten and Torque Sequence for
1200P and 1500P Computers