Mechanically latched contactor set-up procedure – Rockwell Automation 1502 Medium Voltage 400A Contactor - Series E User Manual
Page 52
52
Rockwell Automation Publication 1502-UM052H-EN-P - June 2013
Chapter 4
Maintenance
Mechanically Latched
Contactor Set-up Procedure
1. The overtravel, contact gap and auxiliary set-up procedures are the same
for mechanically latched contactors as they are for electrically held
contactors except that instead of energizing the contactor with the
“TEST” circuit, the contactor must be held closed mechanically by means
of a clamp or special fixture as shown in Figure 4.25. It is important that
the contactor is held closed tightly with the armature against the magnet
cores when gauging the overtravel, contact gap and auxiliary positioning.
Allen-Bradley part number 80154-149-51 is recommended, however, a C-
clamp can be used at the rear of the contactor to pull up the actuator plate
(care must be taken not to overtighten the C-clamp and bend the actuator
plate).
Figure 49 - Clamping a Mechanically Latched Contactor Closed
2. Clamp the contactor closed as detailed in Step 1. The latch mechanism
should be in place with the mounting bolts loose enough to allow sliding
along the adjustment slots.
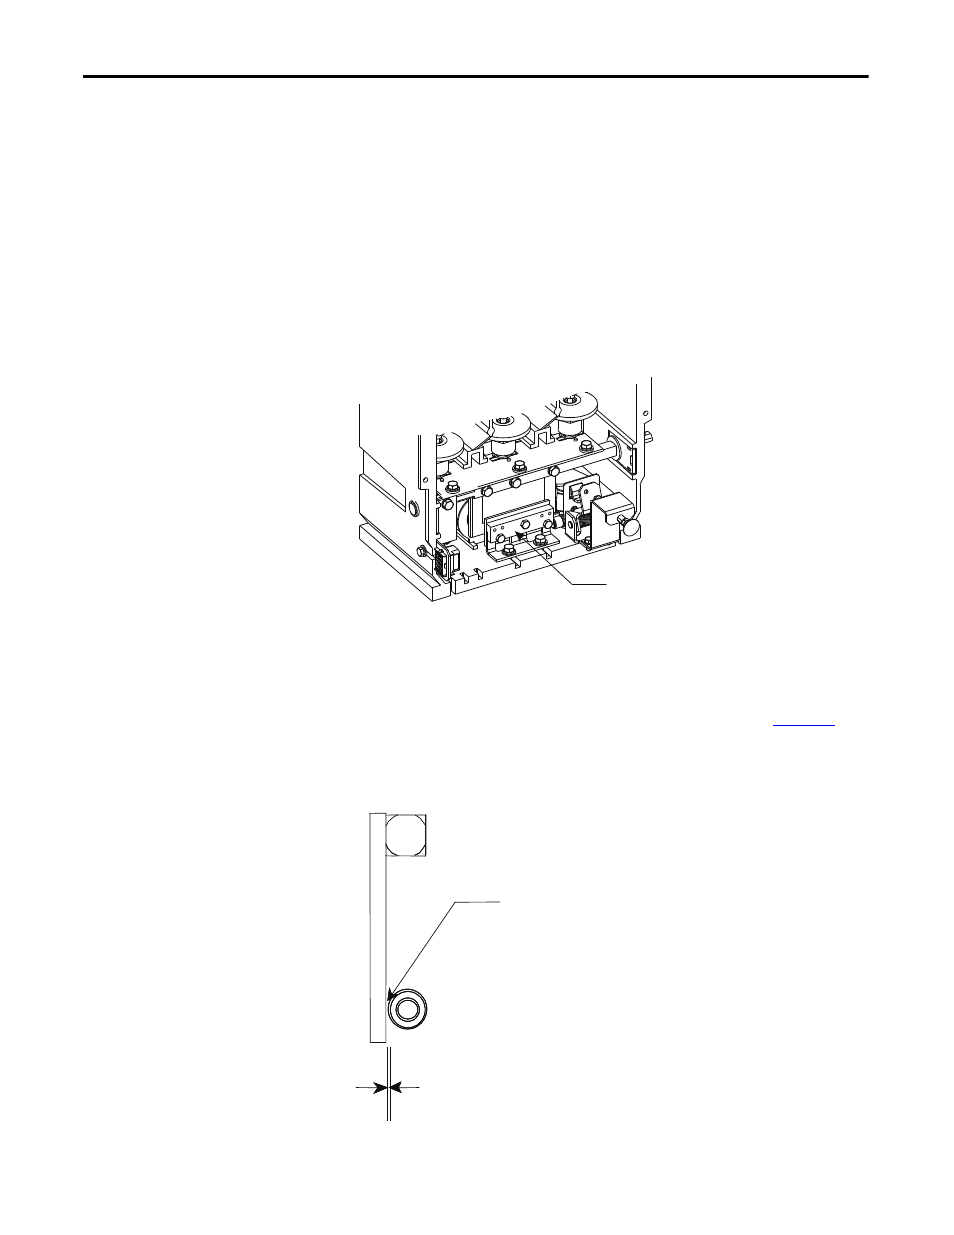
3. With the contactor lying on its back, insert a .015 in. (0.38) feeler gauge
between the latch roller and the armature plate as shown in
Tighten the mounting blots (do not overtorque 1/4 inch nuts or 5/16 in
bolts).
Figure 50 - Gauging Mechanical Latch Location
Mechanically Latched
Contactor Clamping Fixture
0.010 in. [0.25 mm]
Insert feeler gauge here