Using the drive erase function – Western Digital My Book Duo User Manual User Manual
Page 61
MY BOOK DUO
USER MANUAL
MANAGING AND CUSTOMIZING THE DEVICE
– 56
The WD Drive Utilities software provides two ways to erase your device drives,
depending on whether your device is locked or not:
Using the Drive Erase Function
1.
Open the WD Drive Utilities software by clicking either:
The WD Drive Utilities desktop shortcut icon if you created one when you
installed the application
Start > All Programs > Western Digital > WD Apps > WD Drive Utilities
See Figure 4 on page 9.
2.
If you have more than one supported device connected to your computer, click the
icon of the one that you want to erase.
3.
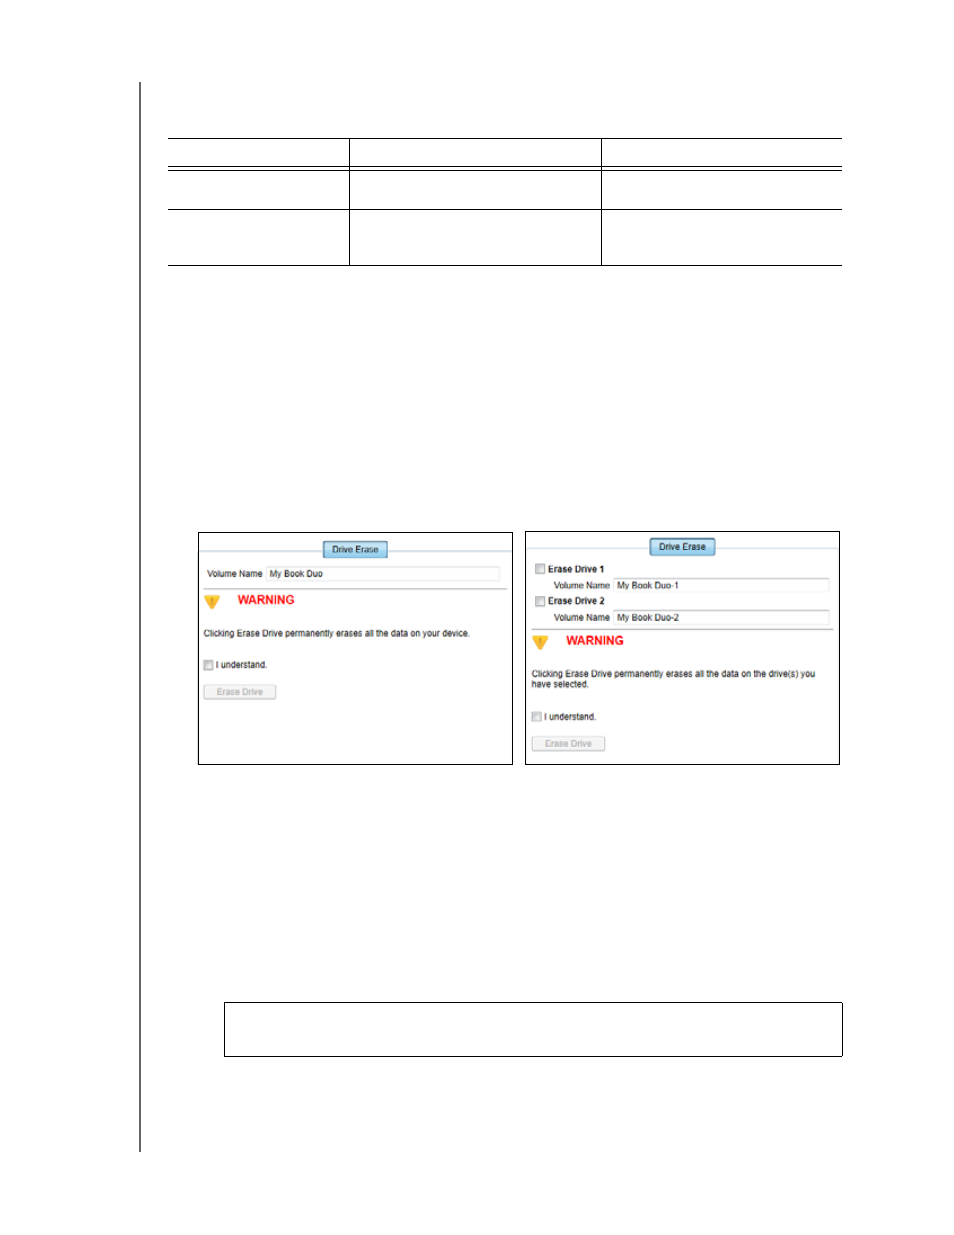
Click Drive Erase to display the Drive Erase dialog:
4.
On the Drive Erase dialog:
a. For individual drives, select the check box for each drive that you want to erase:
Erase Drive 1
Erase Drive 2
b. If you want to change the name of a volume, type over the name in the Volume
Name box.
c. Read the warning about the loss of data if you erase your device or a drive.
d. Select the I understand check box to signify that you accept the risk and
activate the Erase Drive button.
e. Click Erase Drive.
IF your device is . . .
AND you . . .
THEN see . . .
Not locked,
Want to erase the drive,
“Using the Drive Erase
Function” in the next section.
Locked
Have forgotten or lost your
password and must erase the
drive,
“Using Five Invalid Passwords”
on page 57.
Important:
If you want to save any of the data that is on the device drives,
back it up to another device before continuing with the drive erase.
For Individual Drives
For RAID Array Configurations