5 setting time, 1 through webcctv web application, Webcctv installation manual – Quadrox WebCCTV Installation Manual User Manual
Page 12
WebCCTV Installation Manual
12
Version 4.4 Series
2.2.5
Setting time
For the WebCCTV to function properly, it is very important to use the applicable Time Zone
setting. This can be done in two ways, or by the WebCCTV application configuration (See
WebCCTV User Manual Chapter 3.3.10 Time Synchronisation), or by the Windows XPe
OS configuration.
We strongly advise you to use the WebCCTV application way as this is the easiest
way to configure your time settings.
2.2.5.1
Through WebCCTV Web Application
Time synchronization allows you to synchronize time on all devices connected to your unit
(e.g. cameras) and synchronize your server with a specific time server. This can be done by
going to the Settings menu in the Video Manager Web Application and selecting the Time
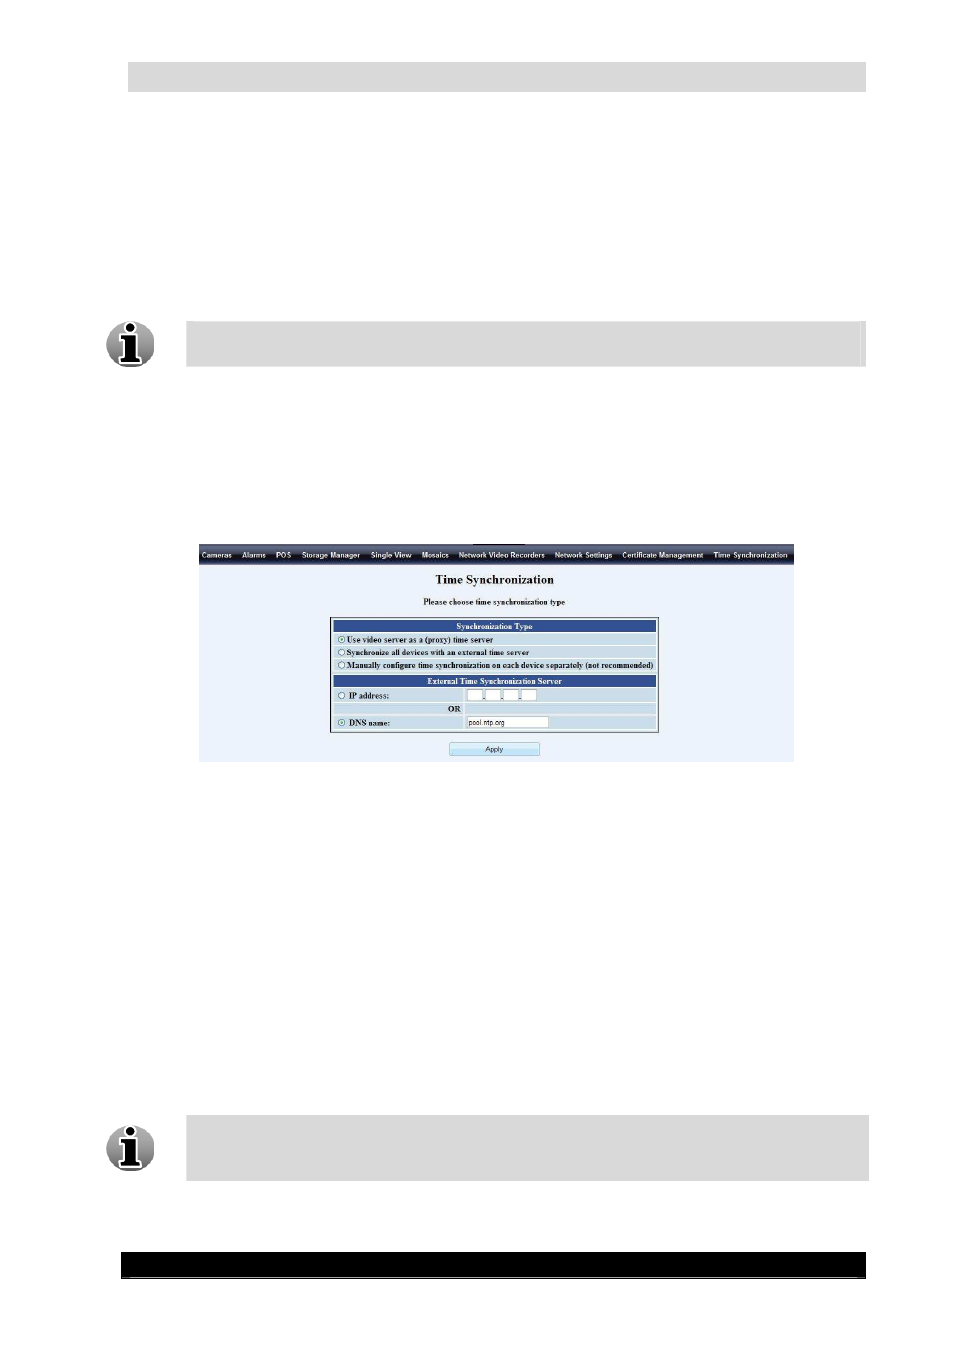
Synchronisation link in the top bar
Time Synchronization Screen
There are three options:
Use video server as a (proxy) time server – The unit will synchronize with an
external time server if configured in the bottom part of the screen. If empty, the unit
will act as a time server for itself and the connected devices (e.g. cameras).
Synchronize all devices with an external time server – The unit and all the
connected devices (e.g. cameras) will be synchronized with an external time server.
Configure the IP address or DNS name of the external time server in the bottom part of
the screen.
Manually configure time synchronization on each device separately (not
recommended) – No synchronization at all is performed, neither for the unit nor for
the connected devices (e.g. cameras)
If your unit is part of a domain, this menu will not be available. The unit and
connected devices (e.g. cameras) will be synchronized automatically with the Active
Directory of the domain.
Click Apply to save the settings.