Basic operation and calibration – INCRA Jig User Manual
Page 5
5
Basic Operation and Calibration
Right angle fixture operation.
Before clamping a workpiece to your Right Angle Fixture,
always press the fixture against your fence, then
immobilize by clamping it to the table with a spring clamp,
Fig. 15. When positioning the workpiece against the
faceplate, make sure that the edges of the boards are
against the fence and the ends are contacting the table
surface, then clamp in place using a wooden handscrew
clamp.
CAUTION: Do not allow any part of your
hands to hang below the body of the Right
Angle Fixture. Always keep hands well away
from the bit.
TIP:
To avoid contacting the wooden runners with the
router bit, clamp your stop to the outfeed end of the fence
to stop the forward travel before contact.
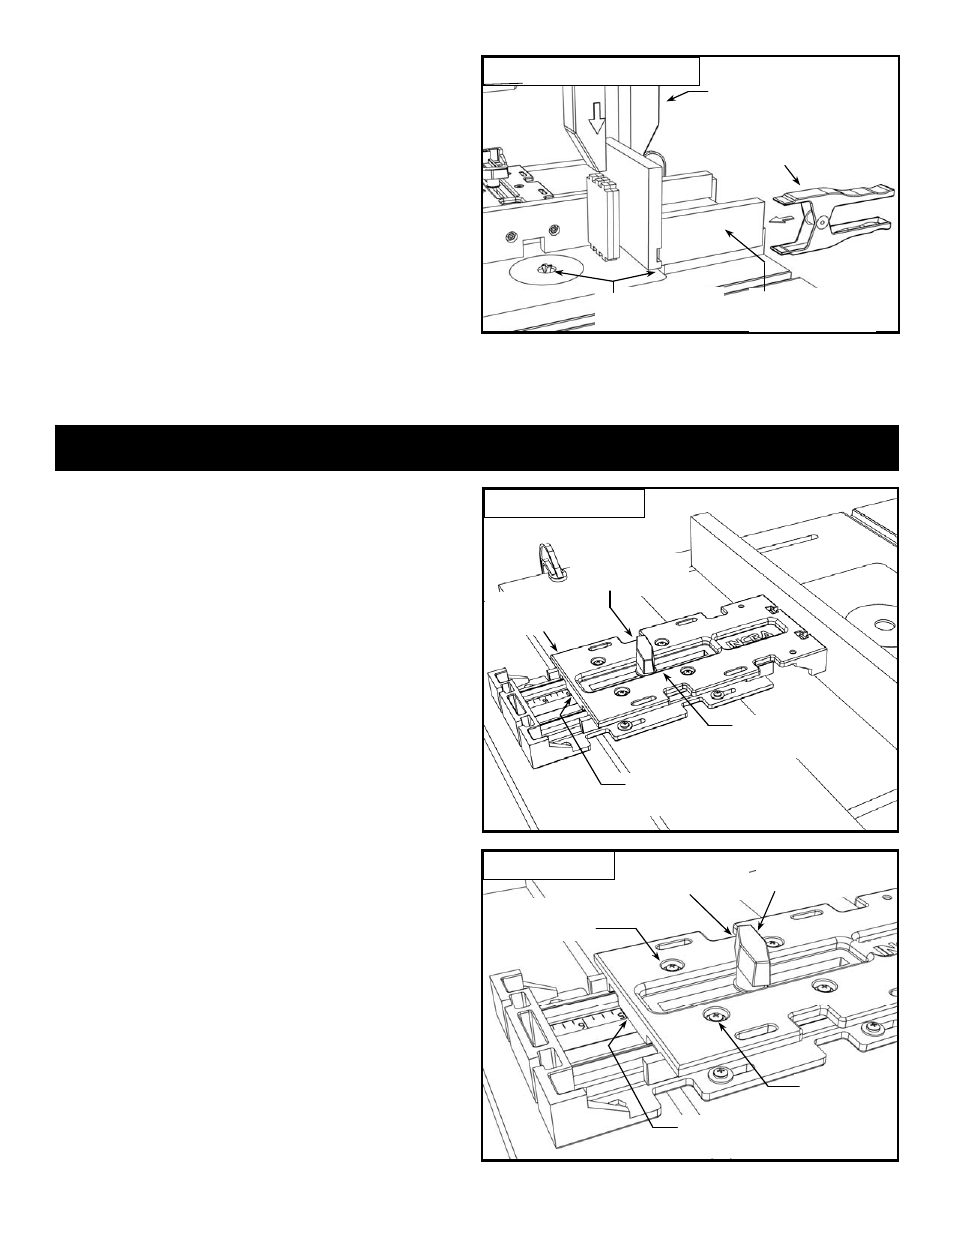
Basic INCRA Jig operation
To move your INCRA Jig’s fence from one scale setting to
another, loosen the clamping knob two full turns and lift the
rear of the INCRA Jig’s upper body. This disengages the
saw-toothed racks and allows you to slide the Jig forward.
Slide to align the rear of the upper body over the desired
mark on the scale, then lower the upper body to re-engage
the racks. You should be able to shift the upper body from
side to side easily when the racks are engaged properly.
Tighten the clamping knob, Fig 16.
First: Loosen clamping
knob 2 full turns
Second: Lift back
end of upper body
Third: Slide upper body to desired
alignment over scales
Fourth: Lower body then
tighten clamping knob
Fig. 16
Basic operation
First: Loosen all (4)
Phillips screws
Second: Loosen clamping
knob 1/2 turn
Third: Shift upper body until desired
alignment over scales is achieved
Fourth: Tighten
clamping knob
Fifth: Tighten all (4)
Phillips screws
Fig. 17
Calibration
INCRA Jig calibration
Initially, the alignment between the scale and body may
appear slightly off, but the one-time-only adjustment is
easy. Loosen the four Phillips head screws that secure the
upper racks, then loosen the clamping knob about one-half
turn. Now shift the upper body slightly forward or
backward until the rear of the upper body aligns clearly
over any scale mark. Tighten the clamping knob, then
secure the racks by re-tightening all four Phillips head
screws, Fig. 17. From now on, the scale will align perfectly
at all INCRA Jig settings.
Note: All subsequent illustrations
reflect use of the factory accessories.
TIP:
A wooden jaw clamp works BEST! One-handed
clamps typically don’t have enough holding power, and a
C-clamp can mar your work, and can be difficult to handle.
Fig. 15
Right angle fixture operation
Second: Immobilize with spring
clamp (acts like a “third hand”)
Third: Position stock against fence and
clamp with a wooden jaw clamp
First: Push Right Angle
Fixture against the fence
Avoid contacting wooden
runners with router bit