Chapter two quick startup guide, 1 cmx, Overview – Dakota Ultrasonics CMX DL User Manual
Page 6
2
CHAPTER TWO
QUICK STARTUP GUIDE
Turn the CMX
DL
on and off using the switch located on the bottom right corner of the
keypad. When CMX
DL
is initially turned on, a flash logo and blinking lights will be
displayed, followed by attempting to identify the transducer(probe) currently plugged
into the gauge. The CMX
DL
is equipped with an “Auto Probe Recognition” feature
that attempts to identify special transducers with this built in feature. If the CMX
DL
doesn’t find a transducer equipped with this feature, the user will be advanced to a
list of transducers requiring the user to select a specific transducer type. The
following sections outline each scenario. Note: This section is primarily written as a
basic startup guide only.
2.1 CMX
DL
Overview
In order to understand how to operate the CMX
DL
, it’s best to start off with an
understanding of what it is we’re looking at exactly. The CMX
DL
has a lot of great
features and tools that will prove to be a huge benefit for the variety of applications
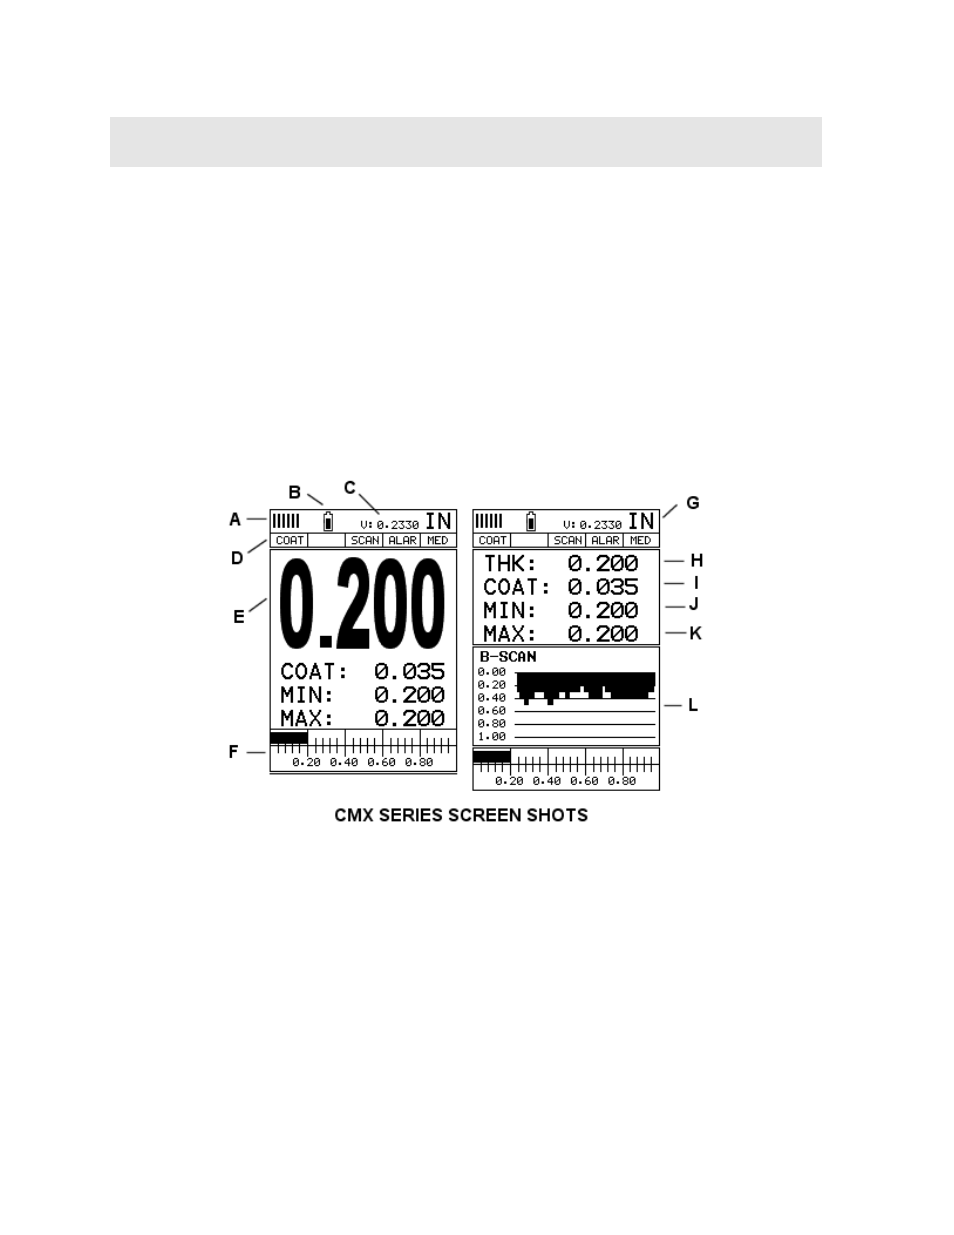
you’re constantly facing on a continual basis. Let’s have a brief look at the screens
you’ll be looking at most often:
A. Repeatability/Stability Indicator – This indicator should be commonly used
in conjunction with the digital thickness values displayed. When all the vertical
bars are fully illuminated and the last digit on the digital thickness value is
stable, the CMX
DL
is reliably measuring the same value 3 to 200 times per
second, depending on which measurement mode and features are enabled.