Caution – COATS 5040 A/E Tire Changer User Manual
Page 19
Important: Always read and follow operating instructions.
• 15
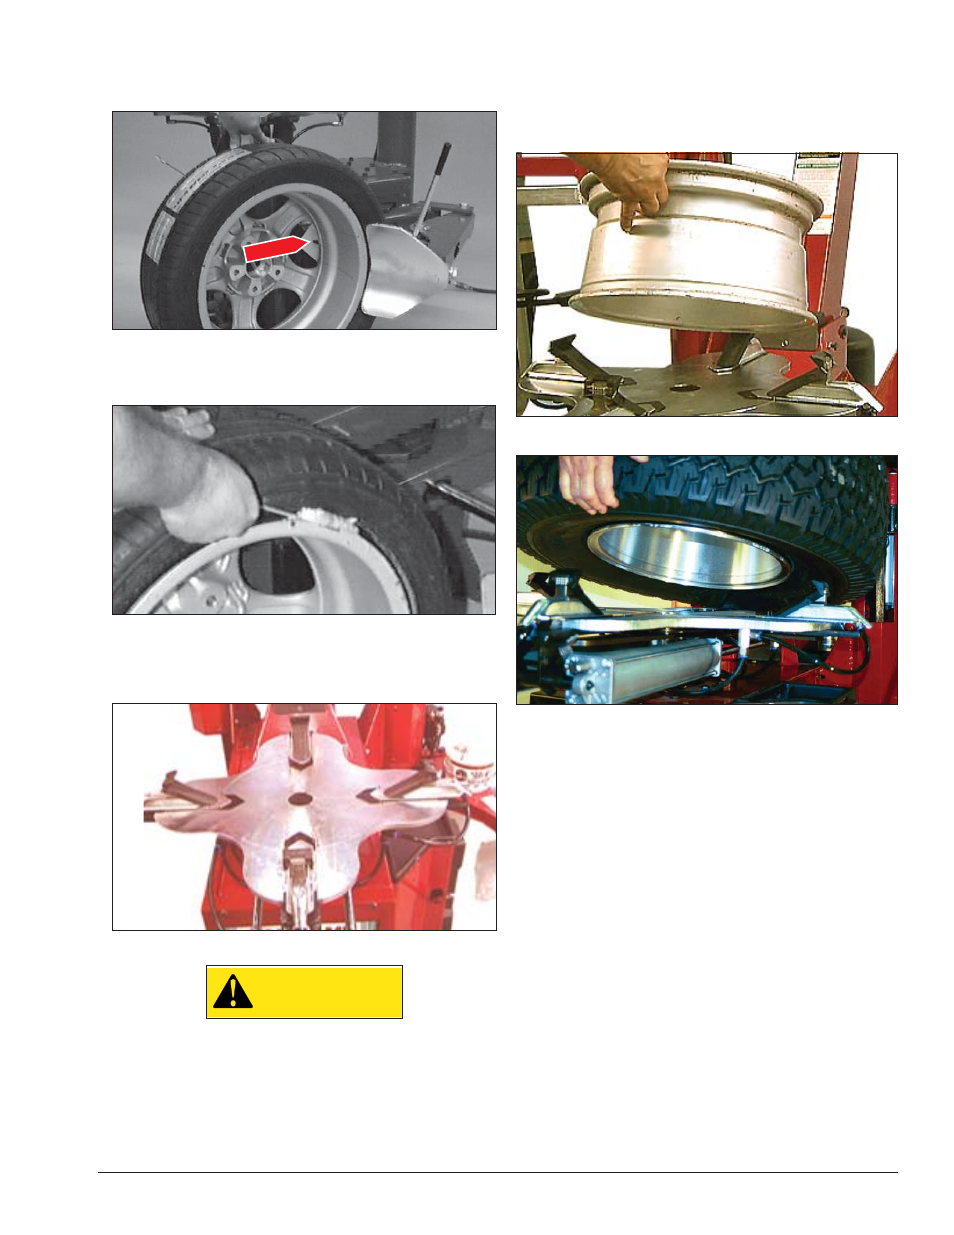
5.
Loosen bottom bead, starting with valve stem posi-
tioned at the 2 o’clock position above the bead loosener
shoe (figure 25).
Figure 25 - Loosen Bottom Bead
6.
Liberally lubricate the bottom bead of the tire
(figure 26).
Figure 26 - Lubricate Bottom Bead
7.
After loosening and lubricating the lower bead,
rotate the tabletop until the clamps are in the 12, 3, 6,
and 9 o’clock positions (Figure 27).
Figure 27 - Rotate Tabletop to 12 O’clock
CAUTION
Avoid back injury, seek assistance when
lifting heavy tire/rim assemblies onto the
tire changer.
8.
Clamp wheel from the outside. Position rim edge
into clamp at 12 o’clock position. Lower the wheel
and depress the clamp control pedal. Slowly move the
clamps inward until they securely contact the outside
edge of the rim (Figure 28).
Figure 28A - Clamp Wheel (Tire Removed for Clarity)
Figure 28B - Outside Clamped with Tire Removed
Tip: This is usually accomplished by crouching down
in front of the tire changer, holding the wheel with the
right hand, and operating the clamp control pedal with
the left hand. This allows the operator to watch the
clamps as they move inward to ensure proper, clamp-
ing.
Valve Stem