Warning, Caution – COATS 5040 A/E Tire Changer User Manual
Page 18
14 •
Important: Always read and follow operating instructions.
Performance, Custom, and
Aluminum Automotive & Light
Truck Wheels
WARNING
To avoid personal injury or finish damage
to components only tire technicians with
experience and training on custom wheels
should attempt to service expensive custom
alloy or aluminum wheels, high-performance
low-profile tires and EMT/run-flat tires.
CAUTION
Many tires/wheels have pressure sensor
devices that are manufactured by different
companies, there are no standards on type
or mounting; therefore, follow the instruc-
tions that apply to the sensor being serviced.
For further information on these devices,
contact the individual sensor manufacturer.
Pre-Operation Notes:
• Ensure all weights have been removed.
• Assistance will be required on wide and large
diameter wheels.
• Clamp wheel from the outside.
• Use ample lubricant for mounting and demounting
• Always review wheel nicks and/or scratches with
the owner before servicing.
Performance Tires & Wheels • Demounting
Follow these instructions for performance type tires
and wheels, including run-flat tires and their associated
wheels, and asymmetrical hump wheels.
1.
Remove the valve core and completely deflate the
tire. On many performance wheels a valve type sensor
may be inside of the rim. These devices are expensive
and should be serviced with care. After deflating the
tire, loosen and remove the retaining nut and then tap
lightly with a hammer to allow the valve sensor to fall
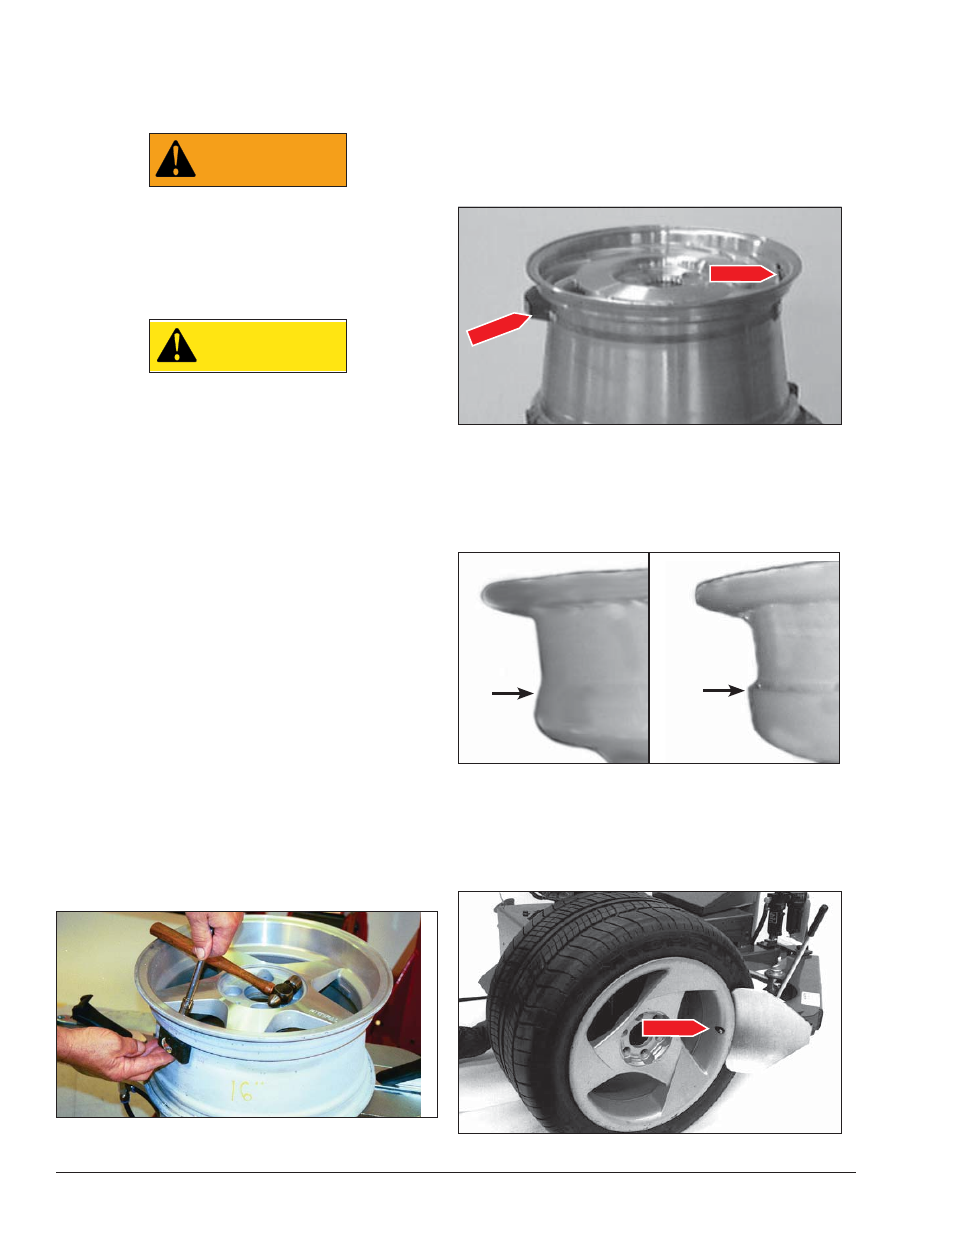
inside the tire before further service work (figure 21).
Figure 21 - Rim with a Valve Type Sensor (Tire Removed for
Clarity)
2.
Some wheels have a low-pressure sensor/trans-
mitter strapped to the wheel. This is especially true on
older run-flat tire/wheel systems. To avoid damaging the
sensor, always loosen the top bead with the valve stem
at the 2 o’clock position first, to determine sensor loca-
tion. Then loosen the bottom bead and the remaining
circumference of the beads as necessary at a location
that will not damage the sensor. (Figure 22).
Figure 22 - Wheel with Strapped on Low Pressure Sensor/
Transmitter
3.
Wheels with an asymmetrical hump have a larger
“ledge” type hump around the wheel except at the
valve hole making them more difficult to mount and
demount and bead loosen (Figure 23).
Figure 23 - Asymmetrical Hump Wheel
4.
Pull the bead loosener shoe away from the machine
and roll the tire in position with the valve stem in the 2
o’clock position (above the bead loosener shoe). Always
loosen the bead on the narrow/mounting side of the
wheel first (figures 4 and 24).
Figure 24 - Position Tire for Bead Loosening
Ledge
Hump Rest
of Wheel
Smooth
Hump At
Valve Stem
Valve Stem
Valve Stem
Sensor