Brother HL-3260N User Manual
Page 141
4-18
☛
☛
☛
☛ 11.
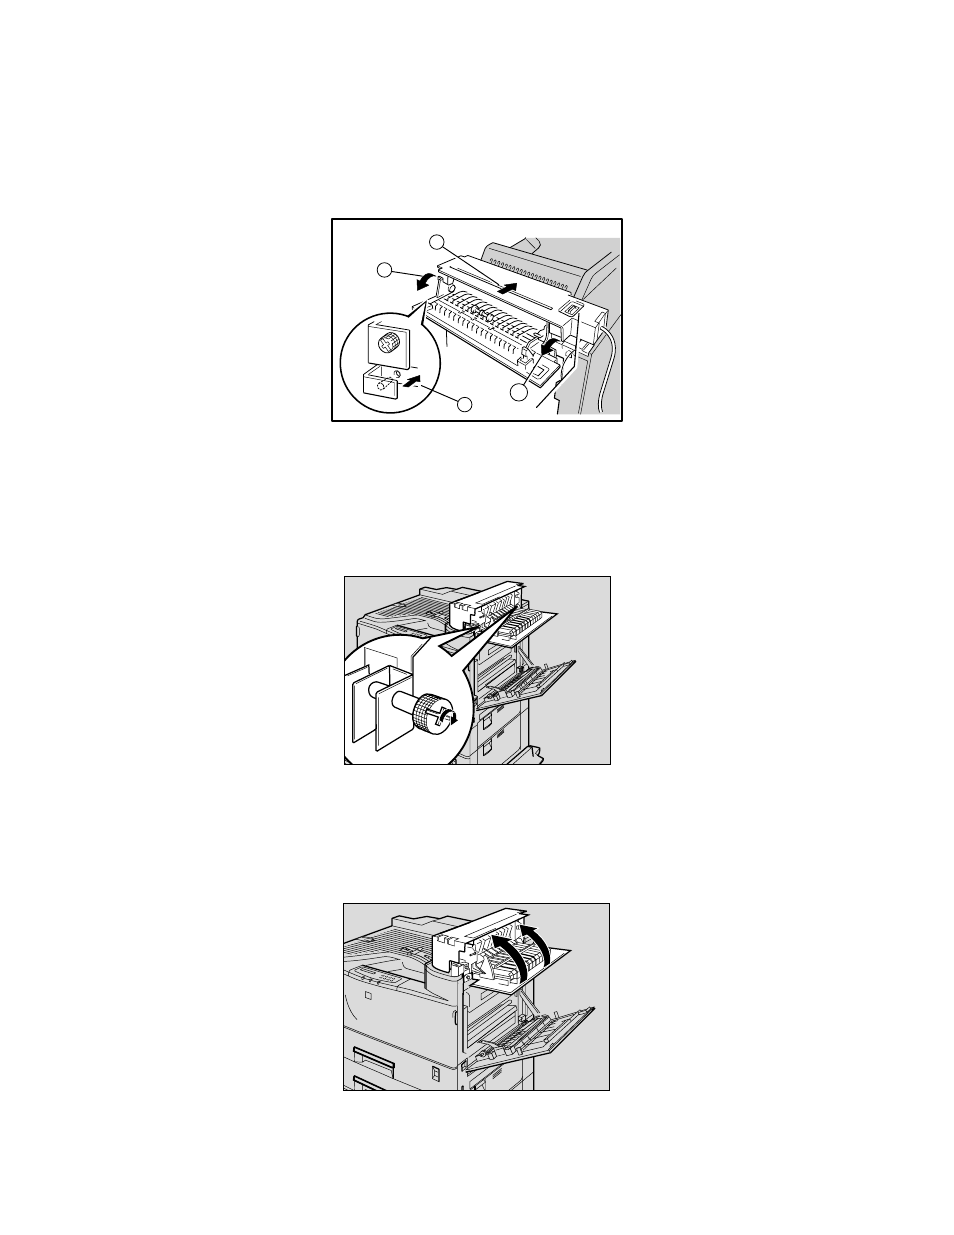
Open the upper right cover (
①) of the Interchange unit and slide the
Interchange unit to the left while keeping the Upper cover right
perpendicular to the printer (
②). Confirm that the projection (③) locates in
the hole as shown in the illustration.
1
3
1
2
Fig. 4-26
☛
☛
☛
☛ 12.
Fasten the two screws finger tight and secure the Interchange unit to the
printer. Use a coin to tighten the screws.
ZAEP161E
Fig. 4-27
☛
☛
☛
☛ 13.
Close the Upper right cover of the Interchange unit.
ZAEP162E
Fig. 4-28
See also other documents in the category Brother Printers:
- HL-2240 (522 pages)
- HL-2240 (21 pages)
- HL-2240 (150 pages)
- HL-2240 (2 pages)
- HL 5370DW (172 pages)
- HL-2170W (138 pages)
- HL 5370DW (203 pages)
- HL 2270DW (47 pages)
- HL 2270DW (35 pages)
- HL 5370DW (55 pages)
- HL-2170W (137 pages)
- HL-2170W (52 pages)
- PT-1290 (1 page)
- DCP-383C (7 pages)
- DCP-385C (122 pages)
- MFC 6890CDW (256 pages)
- DCP-585CW (132 pages)
- DCP-385C (2 pages)
- Pocket Jet6 PJ-622 (48 pages)
- Pocket Jet6 PJ-622 (32 pages)
- Pocket Jet6 PJ-622 (11 pages)
- Pocket Jet6Plus PJ-623 (76 pages)
- PT-2700 (180 pages)
- PT-2100 (58 pages)
- PT-2700 (34 pages)
- PT-2700 (62 pages)
- PT-2700 (90 pages)
- HL 5450DN (168 pages)
- HL 5450DN (2 pages)
- HL 5450DN (2 pages)
- DCP-8110DN (22 pages)
- MFC-J835DW (13 pages)
- DCP-8110DN (36 pages)
- HL 5470DW (177 pages)
- HL 5450DN (120 pages)
- DCP-8110DN (13 pages)
- HL 5470DW (34 pages)
- HL-S7000DN (9 pages)
- HL 5470DW (30 pages)
- HL-6050D (179 pages)
- HL-6050D (37 pages)
- HL-7050N (17 pages)
- HL-6050DN (138 pages)
- PT-1280 (1 page)
- PT-9800PCN (104 pages)