Caution, Leverless bead lifter installation – COATS Kit 85606689 Leverless Bead Lifter User Manual
Page 3
Important: Always read and follow the instructions.
• 3
Leverless Bead Lifter
Installation
CAUTION
Always DISCONNECT THE ELECTRICAL
POWER before servicing equipment. This
prevents electrical shock or accidental
movement of the systems operated by the
electrical power.
CAUTION
Always DISCONNECT AIR SUPPLY before
servicing equipment. This prevents acciden-
tal movement of systems operated by com-
pressed air which may result in personal
injury. BLEED THE AIR SYSTEM by actuating
all the valves.
50/70x Series Installation
1.
Disconnect the electrical power and air supply
from the machine; empty all residual air.
2.
Remove side panel from chassis.
3.
Locate and cut rubber hose that is between the
pedal valve and oil injector.
4.
Route kit hose assembly through 1-inch hole in
rear of chassis. Place hose clamps on cut hoses, then
connect rubber hoses (from step 3) to tee fitting on kit
hose assembly.
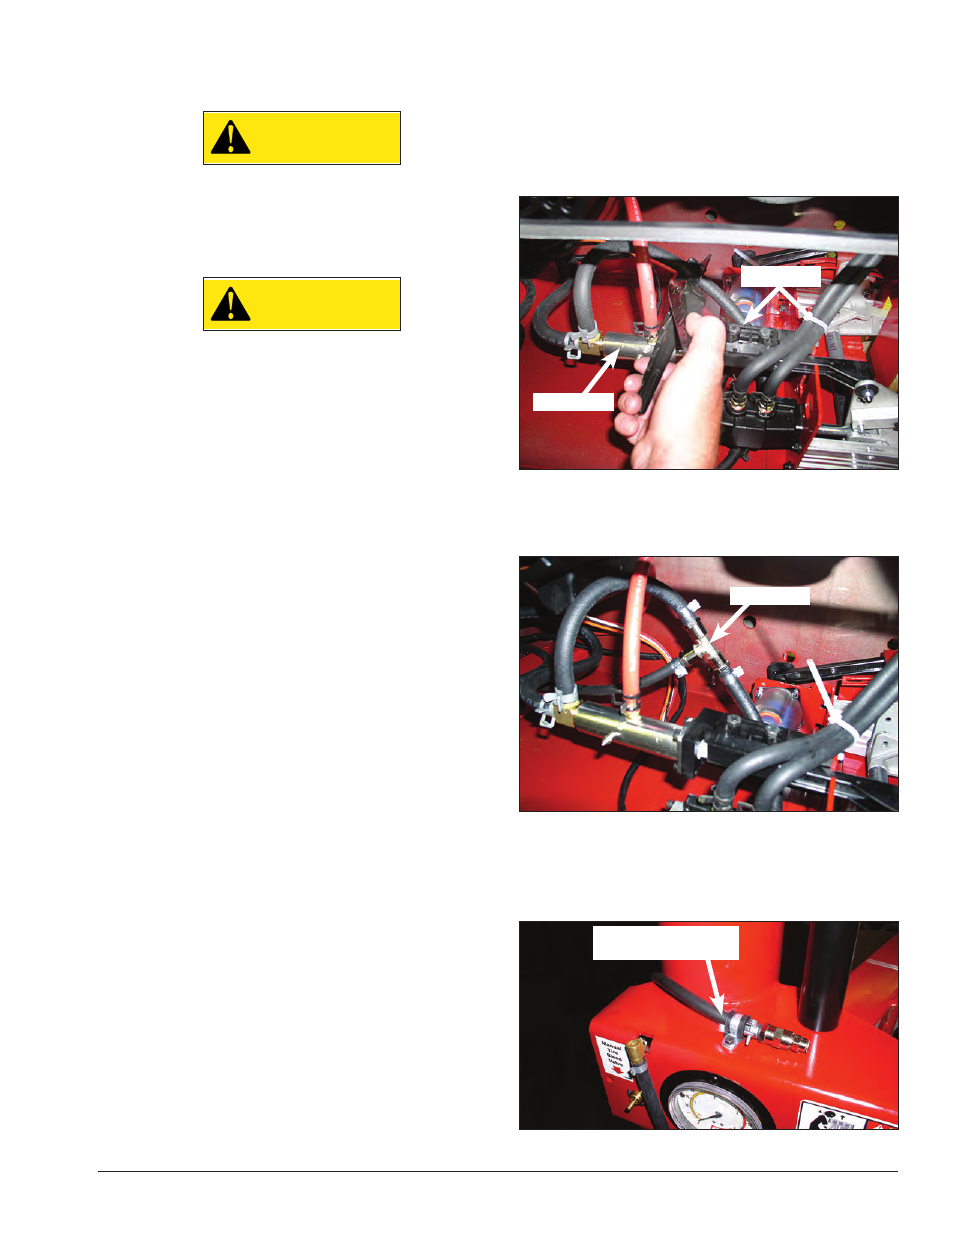
5.
Route kit hose up the back of the tower. Install
cushion hose clamp around air hose near the fitting.
Then, fasten clamp/hose assembly to top of swing arm
using supplied bolt (or use a self-supplied 1/4-inch self-
tapping screw).
Oil Injector
Pedal Valve
Tee Fitting
Fasten Hose To Top
Of Swing Arm