Robo-arm – COATS Kit 8184177 Robo-Arm and Accessory Kits User Manual
Page 6
Robo-Arm™
6 • COATS Robo-Arm™ Assembly
Performance Tires and Wheels - Mounting
1. Lubricate both tire beads liberally. Performance tires will
require more lubrication than standard passenger car tires.
2. Mount the lower bead. In most cases, the lower bead will
mount easily.
AE: Mounting the top bead can be very difficult when mount-
ing new tires on performance and custom wheels. Proceed
slowly and cautiously.
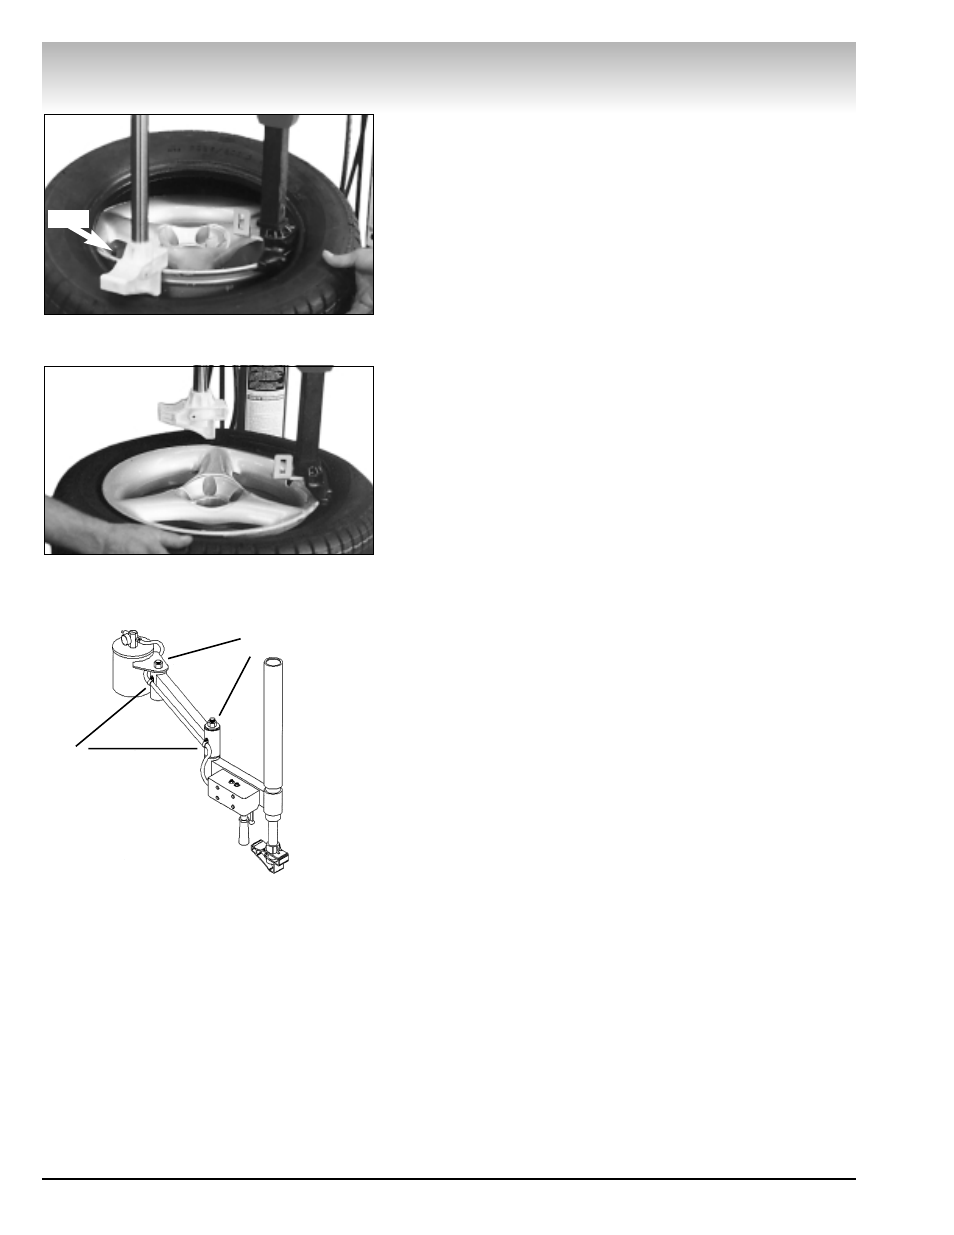
3. Position the valve stem 90 degrees clockwise in front of
the mount/demount tool for top bead mounting. Lift the bead
over the rear of the mounting head. Use the helper tool to hold
the bead in the drop center (Figure 15). Rotate the wheel in
short steps and apply extra lubricant to mount upper bead.
4. On extremely tight tire and wheel combinations, it may be
necessary to use the bottom of the helper foot to flip the tire
bead over the rim flange (Figure 16)
Robo-Arm™ Maintenance
A. Grease the Robo-Arm™ to maintain smooth rotation.
Grease fittings have been provided at the pivot joints.
B. Check bolt torque periodically at pivot joints. Proper Torque
is 240 ft. lbs.
Maintain Bolt Torque
at 240 Ft. lbs.
Grease Fittings
Figure 15 - Mount Upper Bead, Use Helper
Figure 16 - Helper Foot to Flip Bead Over Rim
Flange
Valve